1
Start out by picking your pencils. I used a 3H pencil for light shading, an F pencil for sketching/lines, and a 3B pencil for dark shading.

2
Start out with a basic sketch of the bird. Use the guidelines if you need them.

3
You sketch should end up looking something like this. Erase any guidelines that you don't need.

4
Using an F or HB pencil start further defining the sketch very lightly. Start with the eye and the area around it. pay attention to the direction of the folds under the eyes.

5
Define the beak a bit more.

6
Start lightly sketching in the flow of the feathers.
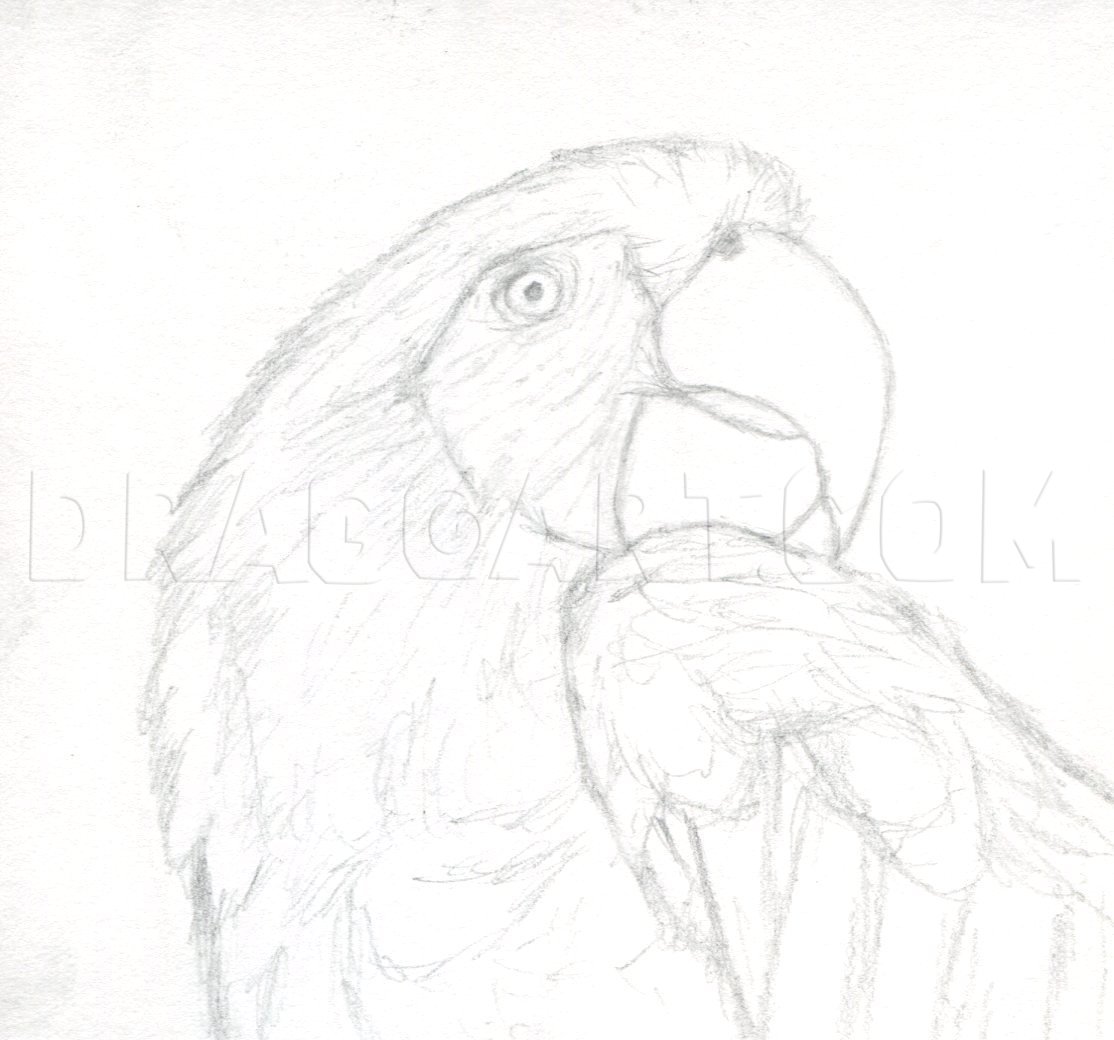
7
Roughly sketch in the flow of the rest of the feathers.

8
Here's a clearer view of my sketch. Make your lines quick and natural. Don't spend too much time on this step.

9
Roughly and lightly shade in the background using a 3B pencil. You could also use an HB pencil for this.

10
Smooth out the background using a cloth or blending stump.

11
Start adding detail to the eye and the area around it. I used an F pencil for the iris and the eye's outline and a 3H pencil for the rest of the drawing.

12
Roughly shade the beak using a 3B pencil.

13
Refine your shading. Use a blending stump to smooth out your shading. Use a 3B pencil for the dark areas and a 3H for the light ones. Erase the highlights.

14
Roughly shade in the head and neck feathers.

15
Now smooth out the feathers and define the outline. Use a combination of 3B and F pencils for the outline and 3H for the feathers.

16
Define the rest of the outline on the left. Use a 3B pencil to shade in the background.

17
Blend over the rough shading of the rest of the neck and chest feathers. Use an eraser to form the highlights.

18
Now define the feathers. Use an F pencil for the dark lines and a 3H for the light ones. Don't be too overwhelmed by the feathers. As long as you follow the basic diagonal flow of the lines they should look realistic enough.

19
Sketch the basic form of the wing feathers.

20
Start making your way down the wing with details. Use F and 3H pencils again to shade.

21
Finish up the drawing by shading in the rest of the feathers. Smooth out your background and go over your shading again. Darken your shadows using a 3B pencil and rework your outlines using an F pencil. That's about it for this tutorial! I hope you f
Comments 0
Details
November 8, 2011
Description: Hey fellow artist, here's another bird tutorial. This time I'll be showing you how to draw a Scarlet Macaw. Let me know if there are any other bird species that you would like to see tutorials of!