1
Start out by picking your pencils. I used an HB pencil for sketching/shading, a 2B for dark shading/lines, and a 2H for light shading/lines.

2
Start of with a basic sketch. Use the guidelines if you need them.

3
Your sketch should look something like this. Keep it light and simple. Erase any unneeded lines.

4
Start defining your drawing at the eyes. Continue using the HB pencil for this.

5
Now define the beak a bit more.

6
Sketch in the flow of the feathers on the top half of the head.

7
Sketch the feathers of the neck.

8
Roughly sketch in the back feathers.

9
Softly shade in the background using an HB pencil and a cloth or blending stump.

10
Start adding details at the eyes. Use a 2B pencil for the dark shading and an Hb for the lighter shading.
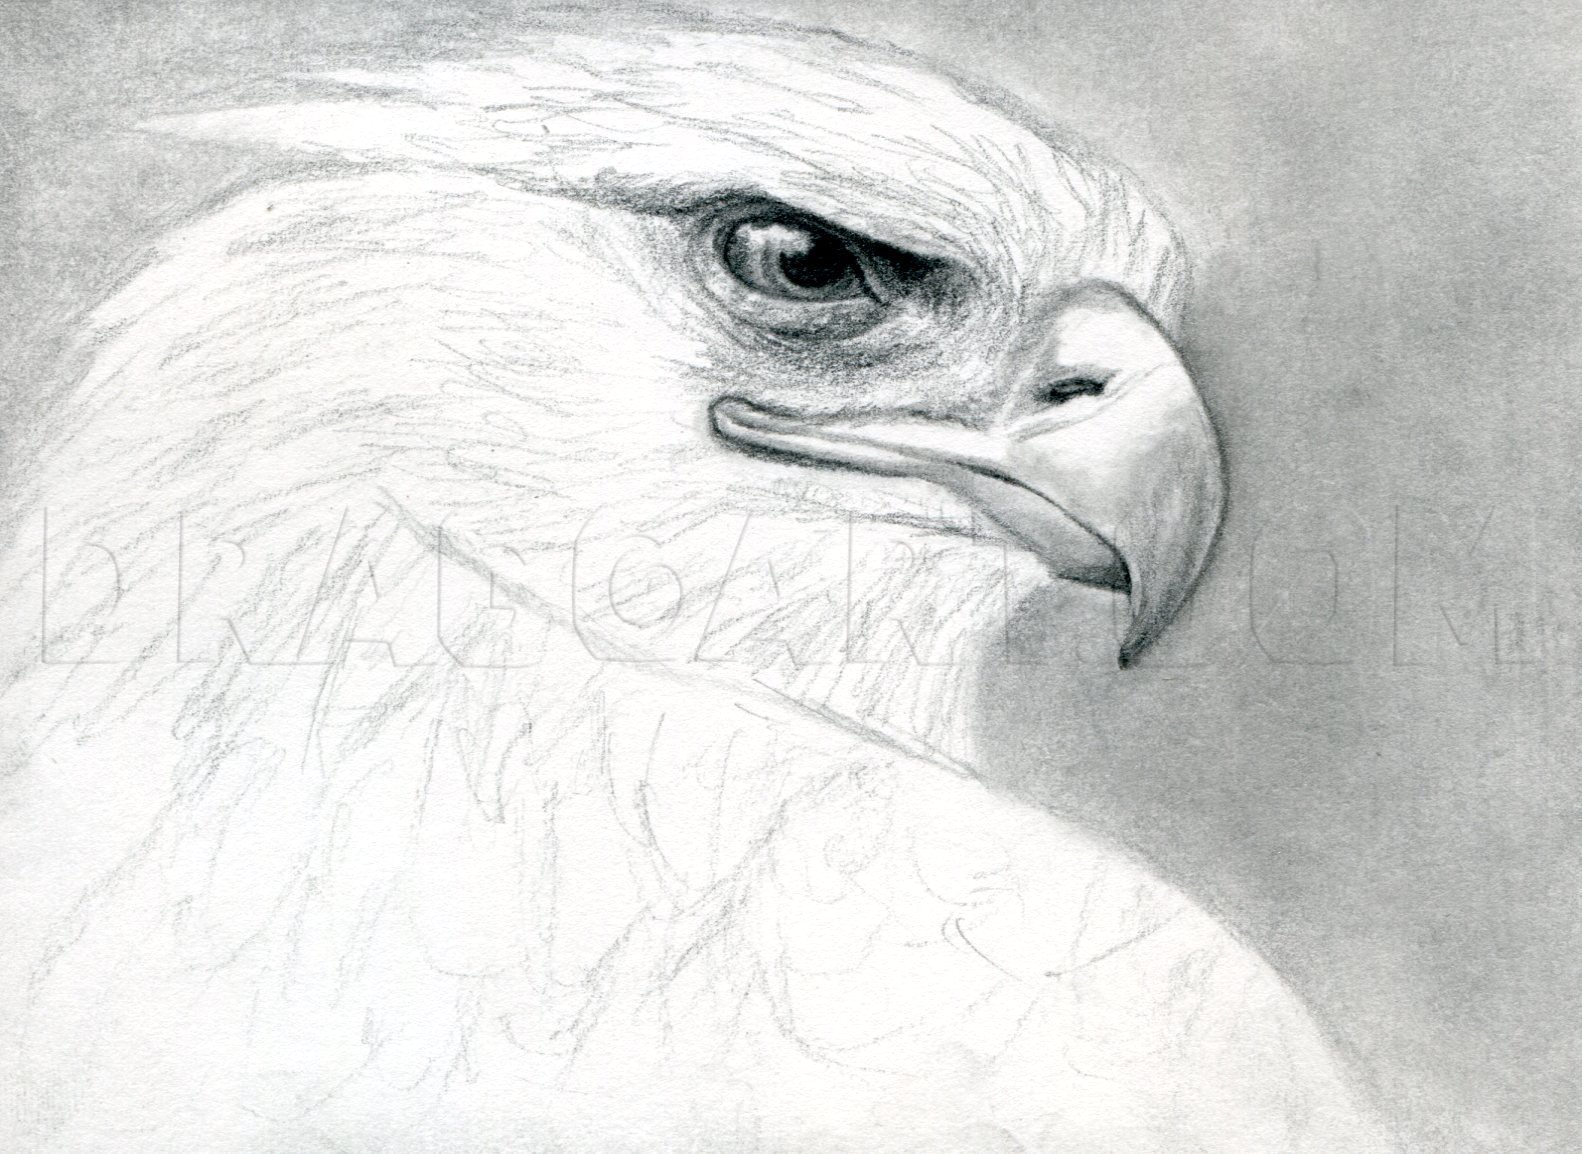
11
Now shade in the beak. Use a 2H pencil for the light shading and an HB for any ares that need to be darkened.

12
Start work on the top half of the head by roughly shading it in using an HB pencil and a blending stump.

13
Define the feathers using an HB pencil. Make sure to define their outline as well. Use the 2B pencil to darken shading and the 2H for extra texture or lighter shading.

14
Now roughly shade over the neck feathers using an HB pencil.

15
Use the 3B pencil to define the birds outline as well as the background. Also roughly shade in the shadows under the birds chin.

16
Define the neck feathers using an HB pencil and smooth out your shading. Use a 3B pencil for the dark areas.

17
Roughly shade in the remaining area using an HB pencil.

18
Shade in the rest of the feathers. Start out by using an HB pencil to smooth out the feathers then use a 2H for light/fine details and a 3B dark for shading. Use a blending stump to smooth out your shading more here and there. Go back and refine your
Comments 0
Details
November 7, 2011
Description: Hey everyone, here's a tutorial on how to draw my favorite type of eagle, the golden eagle. I hope you fellow bird lovers enjoy this one!