

1
This first step is the reference picture I used for sketching. I turned the color picture to black and white so I could see the tones and values and sketch them into the drawing. And once you have your picture on the computer, it's easy to make large

2
MECHANICAL PENCILS - You want to know what pencils I use? Here they are along with how their lead appears in the crosshatch, line, and circular shading. They start from light (H) to dark (B). ------ 9B'S & BLENDERS - Click on the picture with my very

3
Now let's start sketching! First start with these interesting shapes. Start with the 2 oval circular shapes. For bird's head draw the bisecting line. Also draw the legs and slanted decline, which is the tree.

4
Draw in the bird's head and beak.

5
Now lightly draw the dividing point of the beak, draw 2 tight circles for the eye-don't forget the highlights, which are 2 tiny shapes. Now draw in the marking along the length of the bird's head.

6
Your bird is developing beautifully. Lightly draw in the wing & feathers, the bird's torso and tail.

7
Now you can draw in the bird's fluffy parts of the body and don't forget the legs.

8
Lastly, we have the tree and moss. Take your time to add curves and wavering lines, which add character.

9
Working at a university in the audio visual department as an artist taught me lots of professional terms. One is "thumbnail sketch." Sometimes I would receive clients that needed logos, pamphlets, murals, silk-screened t-shirts done and I would draw

10
Overhand is great for writing or fine details. Underhand is like rollerblading through walking traffic--it goes fast! Try tonal shading. It's a great exercise.

11
Here are more exercise in case you want to practice for more realism. Heyyyy, I practice too! *giggle* And don't worry about crocked lines. That's all part of the practice

12
Here is another challenge. Remember the days in school when you had to swim, write, type, learn quicker? Sketching and doodling is that kind of exercise too. Draw three strokes really fast in that second. Follow those arrows on the line strokes. Star

13
Here is how the pencil outline looks without the the guidelines. If you haven't already, erase those guidelines and see if your bird looks a little like this one.

14
Relax and draw lightly nice short lines in the direction of the picture. This is where you need to observe the picture.

15
Darken in the bird's markings and eye. Then work your way to define the feathers and underbelly of the bird. Also do not forget to draw more details on the legs & feet.

16
I am doing these sketches in stages so you can see how I progress and maybe you can mimic that process. Now that I've sketched in the bird, I do a medium shading by stroking with lines. If you want you can shade in the circular method.

17
This next step is to give more texture to the tree trunk. I've used a 180-grit sandpaper. If you don't have any sandpaper, you can use other material with texture or simply dot with your pencil.

18
Blend the bird's underbelly with a tortillon or blending stump. There are too many details to use tissue paper. Now the tree is different. You can use tissue paper on it or a blending stump.

19
I gradually added more graphite, using 9B pencil on the markings, underbelly and tree area. You can add more darkness with your regular No.2 pencil.

20
Three things I did here. Added darker tone, darkened the background to make the bird pop out. Also I added whiter areas with White Titanium Acrylic paint on the moss, legs of bird, different feather & fluffy areas, also around the edge of the bird's

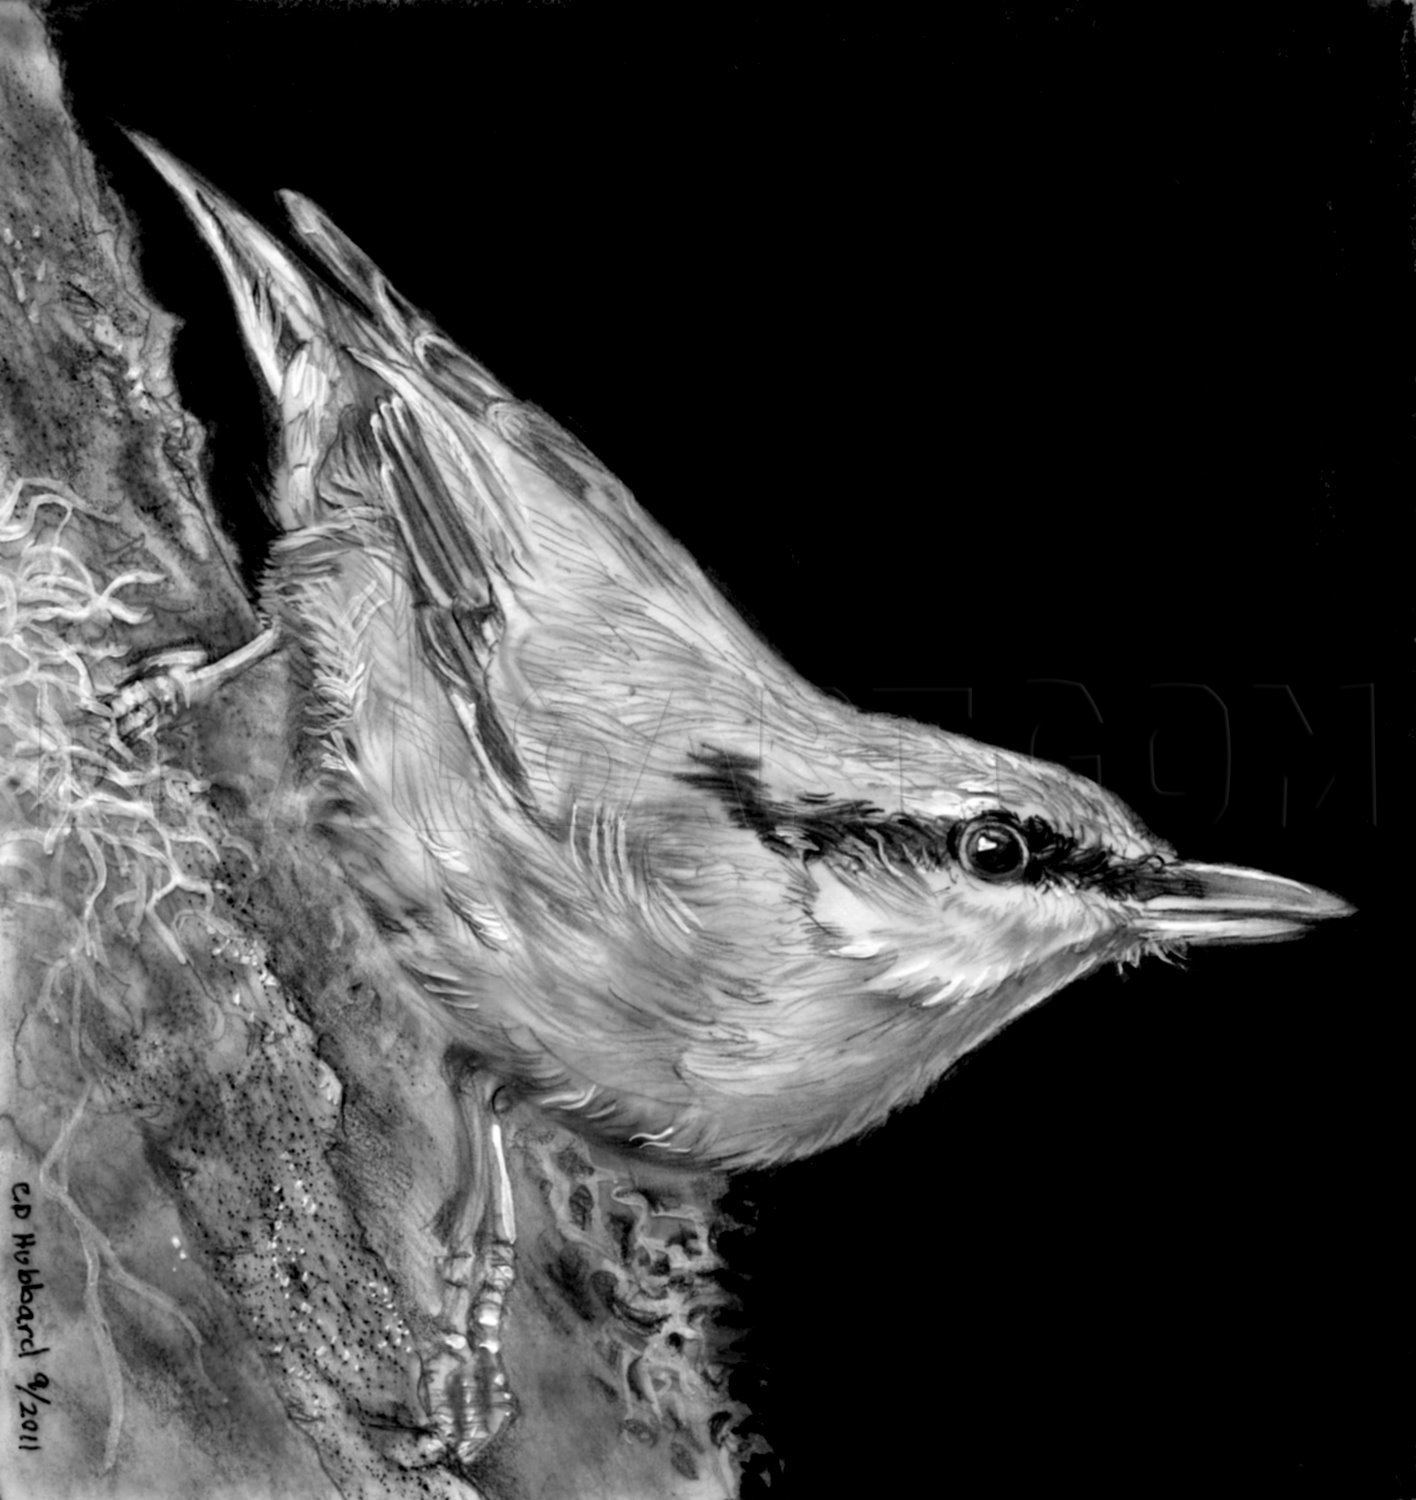
21
This is the result. I used a 9B graphite crayon for that deep black. The next couple of steps will give you tips on tone, shading, highlights, etc.

22
Here is how tone, shading, texture and reflective light affected this picture of our bird.

23
And, last but not least, are HIGHLIGHTS. Click on this picture to see where it applies! In closing this tutorial of "How to Sketch a Bird," I must say it has been my pleasure to teach this. Also I'd like to hear if the extra tips made a difference fo
Comments 0
Details
September 22, 2011
Description: This is a first! I'm drawing a Bird! This time. This picture reference is given from a DevientArt member's photographer friend--"Tony Fagan Photography." He gave me permission. In this tutorial we are going to learn "How to Sketch a Bird." If you just want to do the line drawing, that would be great. But those of you who like doing pencil shadings and detail, I have that for you too. I hope you will enjoy it. This is both for Novice, Intermediate, and Advanced. So I chose the middle point of difficulty.