


1
Begin by drawing the head and torso guides for your flying eagle. When that is done draw in the wing guidelines as well as the beak guideline.

2
Here we will work on the beak. As you can see it's open and cawing. Draw in the pointed tongue and proceed to step three.

3
We will now draw in the head of the eagle like so along with the eye and back part of the neck.

4
A simple line will create the chest and some of the back part of the body.

5
Up next, we will tackle the task of drawing the thighs, legs and claws. Add those nails on the talons or toes too.

6
Create the tail by drawing the fanned out feathers. These feathers should also be layered.
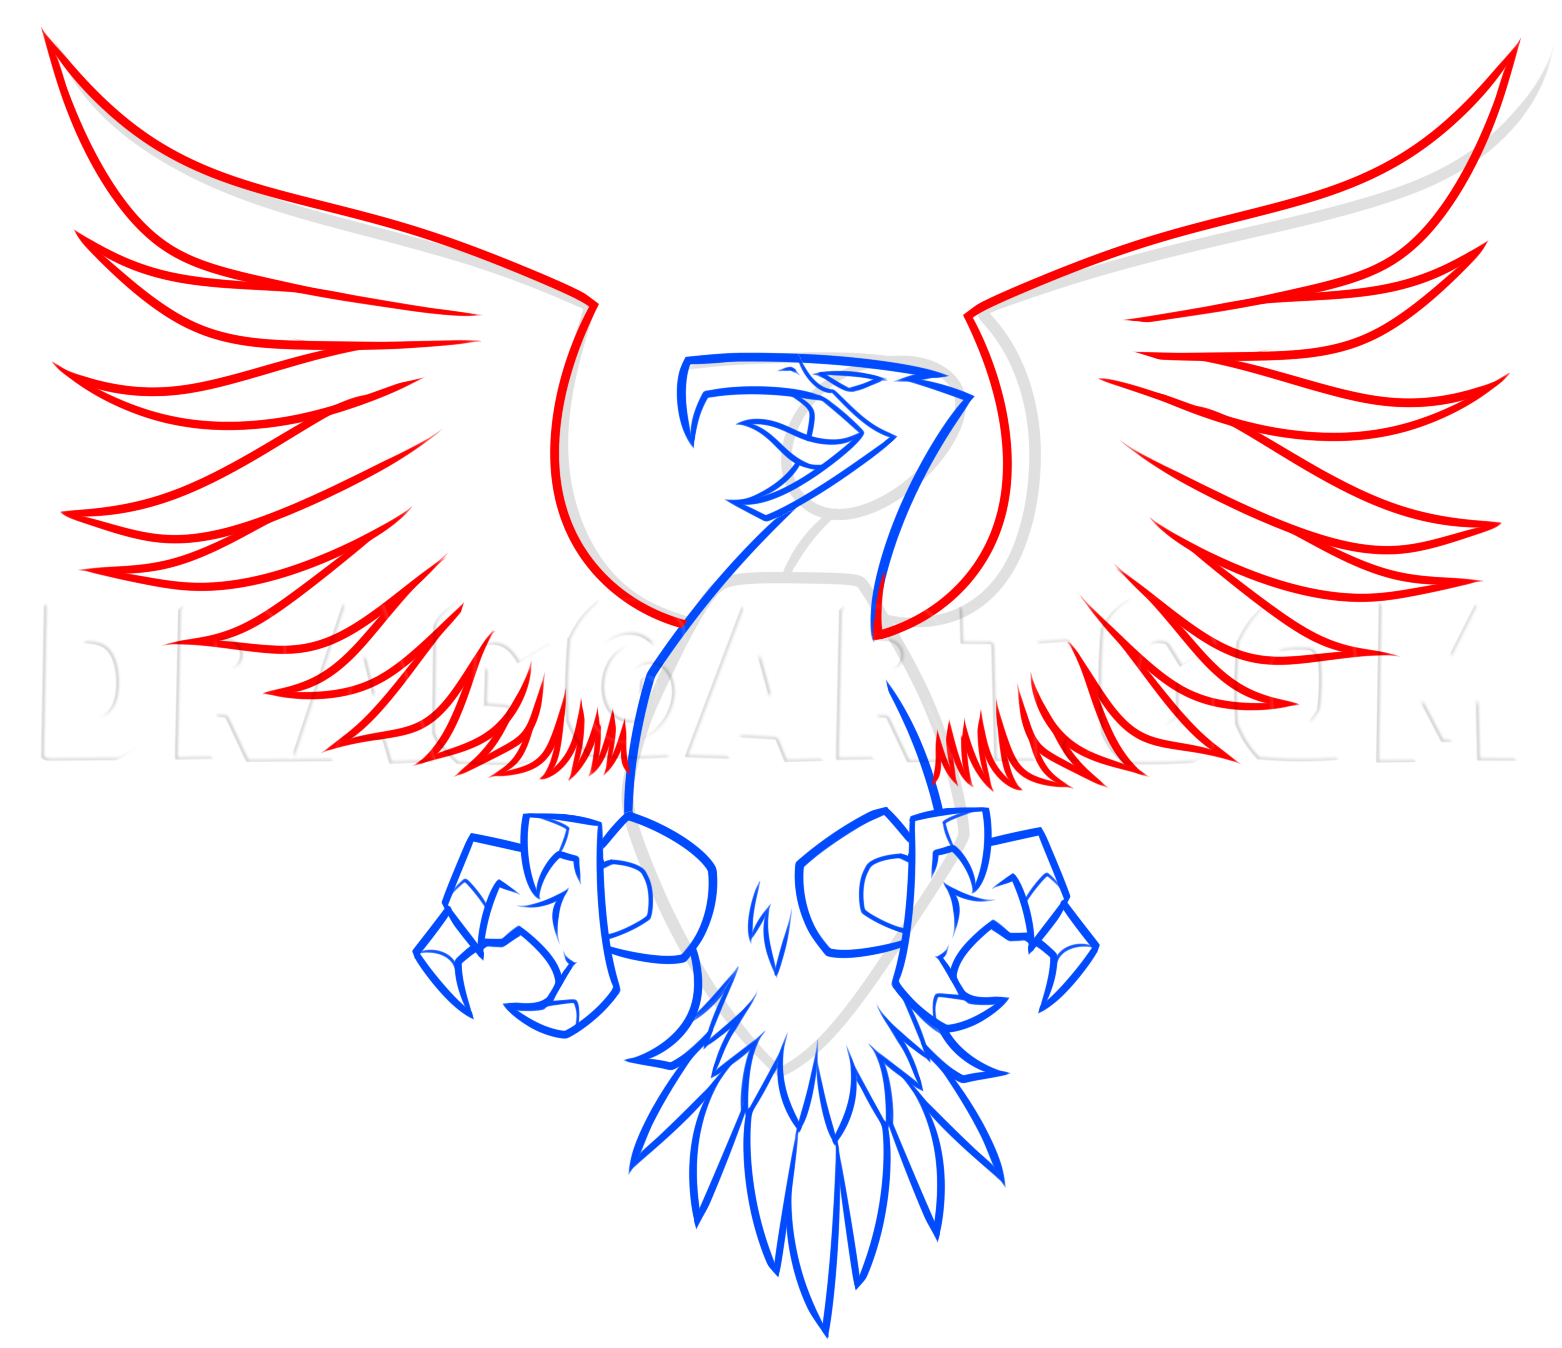
7
It's now time to draw the expanded wings. These wings are open, upright and fanned out as well. As you know this eagle is in flight.
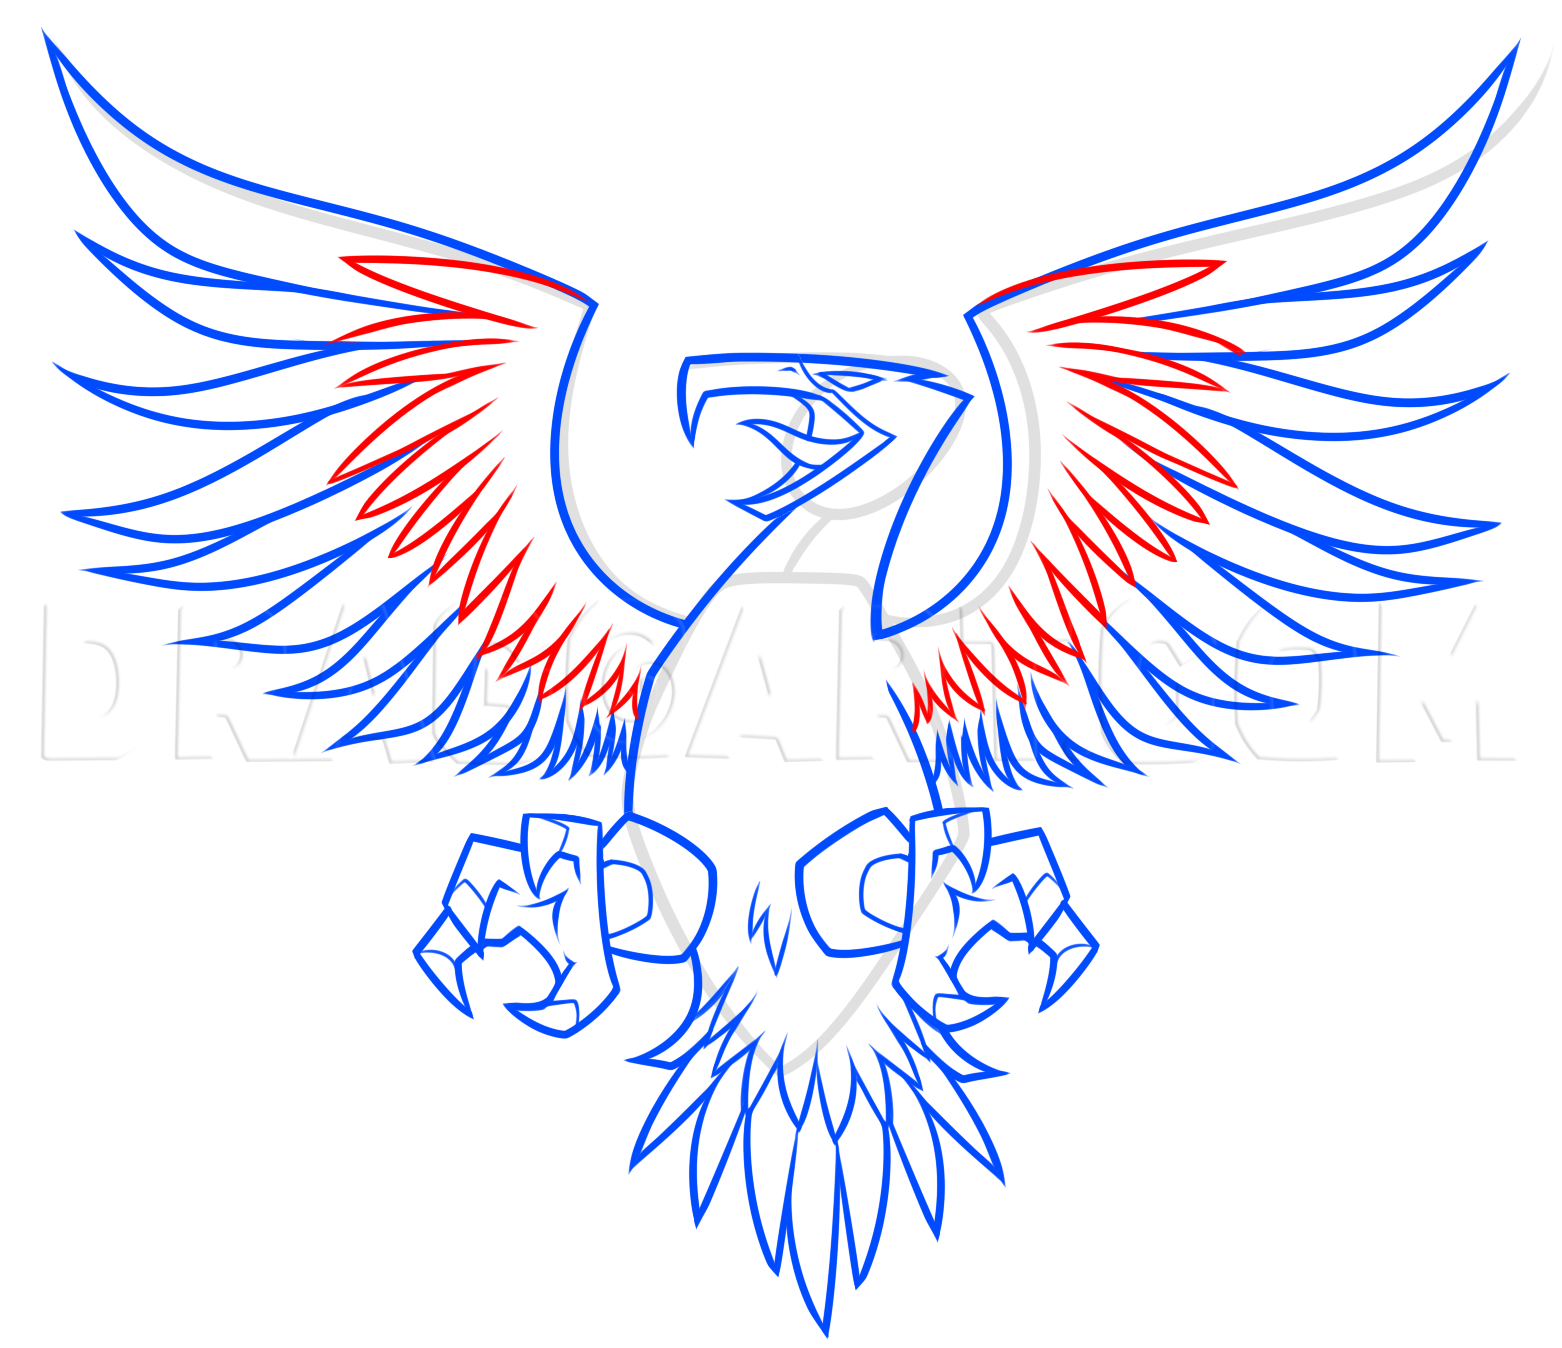
8
Lastly, fill in the bone area with more feathers. But these feathers will be a lot smaller. Erase your mistakes and guides as well.

9
That's it. Here is your line art. Now you can color in your flying eagle.
Comments 0
Details
April 4, 2017
Description: How about a really cool tut on how to draw a flying eagle in the form of a tattoo concept. Instead of making a drawing on a realistic looking eagle in flight, I wanted to make a concept that could be used for a tattoo if one chose to do so. This tutorial is both attractive, easy to replciate and fun to create. I really enjoyed drawing this flying eagle because of the angled look of the bird. It sort of reminds me of a military style eagle, but without the serious style. My favorite part to this drawing are the eagles legs and claws or talons. I think they came out super. Anyways, drawing eagles is always fun, but when you draw a flying eagle the excitement is that much better.


