Art
Battles
Live
News
Contest
Contact Us
Join
Login
Battles
Tutorials
Art
News
Live
Contest
Contact Us
Privacy Policy
Login
Join
Welcome to DragoArt 💖🔑
Login
or
Join
How to Draw Realistic Flowers
Artist:
finalprodigy
/ December 23, 2011
Step 1.
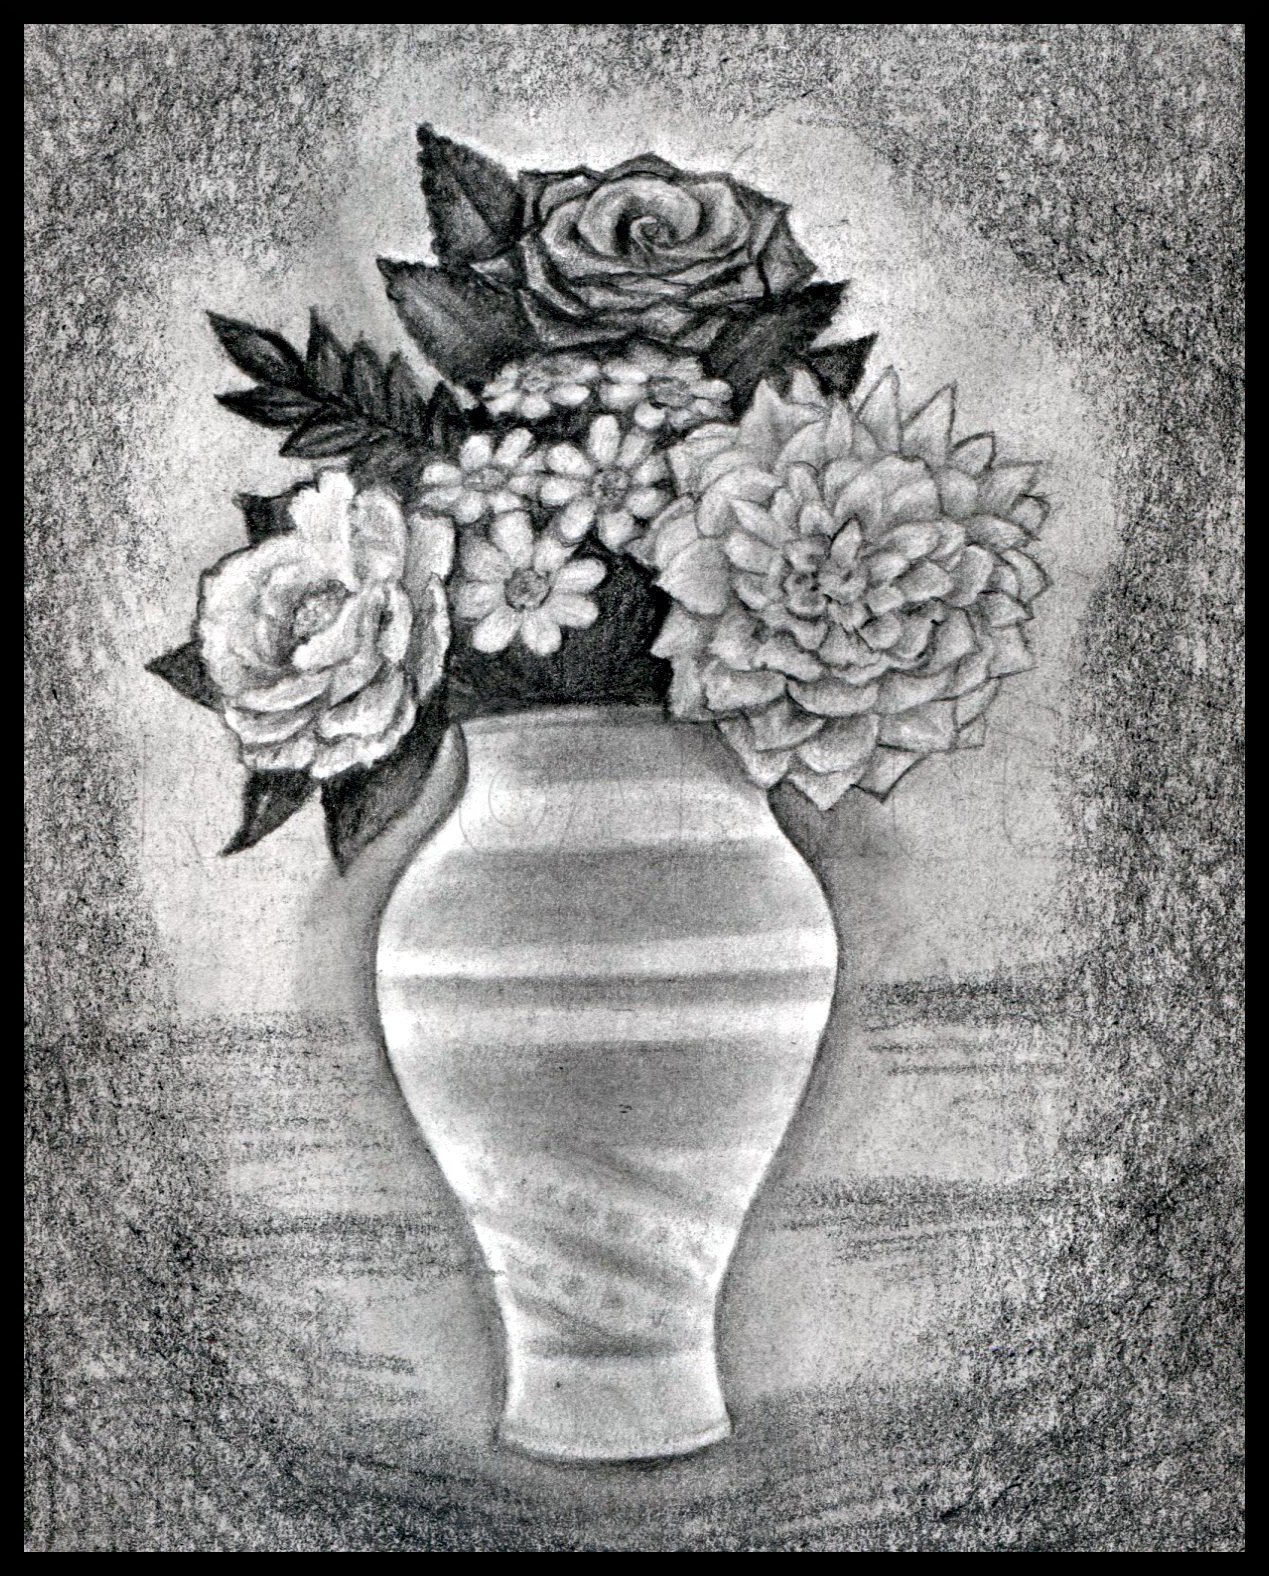
Start out by picking your pencils. For this drawing I used an HB pencil for sketching and shading and a 6B pencil for dark shading. A 6B graphite stick can also come in handy when shading large areas.
Step 2.
Start out by sketching a basic vase using an HB pencil. After that sketch in some circles to get an idea of where your flower will be.
Step 3.
Roughly shade over the paper with a 6B pencil then blend in your shading with a blending stump.
Step 4.
Start shading in your flowers one at a time. Start by erasing out the basic form of the flower. After that, use an HB pencil to start defining the flower from the center outwards.
Step 5.
Keep shading the flower until you have all of the pedals shaded. After that you can smooth out the shading using a blending stump and a kneadable eraser.
Step 6.
Move on to the next group of flowers. Erase their basic forms and then outline them with an HB pencil.
Step 7.
Roughly add the dark shading around the flowers a using a 6B pencil. After that start shading and defining the flowers using an HB pencil.
Step 8.
Finish shading the smaller flowers. After that erase the basic shape of the next flower on the left.
Step 9.
Start defining the flower using an HB pencil. Try to work from the center outwards. Outline the petals before shading them in.
Step 10.
Finish up shading the flower the erase the basic shape of the top flower and leaves.
Step 11.
Sketch the basic forms of the rose and leaves using an HB pencil. Then start defining their shading from left to right.
Step 12.
After you have finished shading the rose sketch in some more leaves around the flowers to fill in the blank areas.
Step 13.
After you've shaded in your leaves sketch some basic designs onto you vase.
Step 14.
Blend in your designs with a blending stump and use a kneadable eraser to add highlights. After that define the outline of the vase.
Step 15.
Next up shade in the background using a 6B pencil.
Step 16.
Finish up the drawing by blending in your background with a blending stump and cleaning up your details. Hope you found this helpful!
Comments (0)
More From
finalprodigy
Mature Content
Mature Content
Mature Content
Mature Content
Mature Content
Mature Content
Mature Content
Mature Content
Mature Content
Mature Content
Mature Content
Mature Content
Related
Mature Content
Mature Content
Mature Content
Mature Content
Mature Content
Mature Content
Mature Content
Mature Content
Mature Content
Mature Content
Mature Content
Mature Content
Details
Artist:
finalprodigy
Date Added:
December 23, 2011
Steps:
16
Favorited:
12
(view)
Views:
0 in last hour, 17 in last day, 79 in last week, 83923 total
Comments:
0
Tags:
draw realistic animals
,
how to draw realistic
,
draw realistic
,
how to draw flowers
Description:
Hey everyone, here's so far my only still life tutorial. I'll be showing you how to draw a vase of flowers. You should learns a few helpful techniques for your next still life drawings. So get your supplies ready for this one!
X
Login
Username
Password
Remember Me
I forgot my password
X
Leaving Dragoart for External Site
We temporarily stopped you from leaving Dragoart so you could confirm
The site above is not affiliated with Dragoart in any way. Please continue at your own risk. Don't enter any passwords or personal information from a site claiming to be Dragoart or its affiliates.
X
Flag Content
Report
sexual
violence
copyright
spam
Details (Optional)
X
Flagged Content
Loading...
X
Members that favorited
Loading...
X
Contest Submission Form
Loading...
X
Battle Challenge
Loading...
X
Battle Challenge Details
Loading...