


1
Start out by picking your pencils. I mainly used an HB pencil for the clouds. I also used a 6B for dark and preliminary shading on the two main images. Any B pencil should work though.

2
Start out by drawing a simple cloud using an HB pencil. Shade over the paper then use a blending stump to smooth out your shading.

3
Next up sketch a basic cloud shape. Make sure it is darker than the background. Blend it in using a blending stump.

4
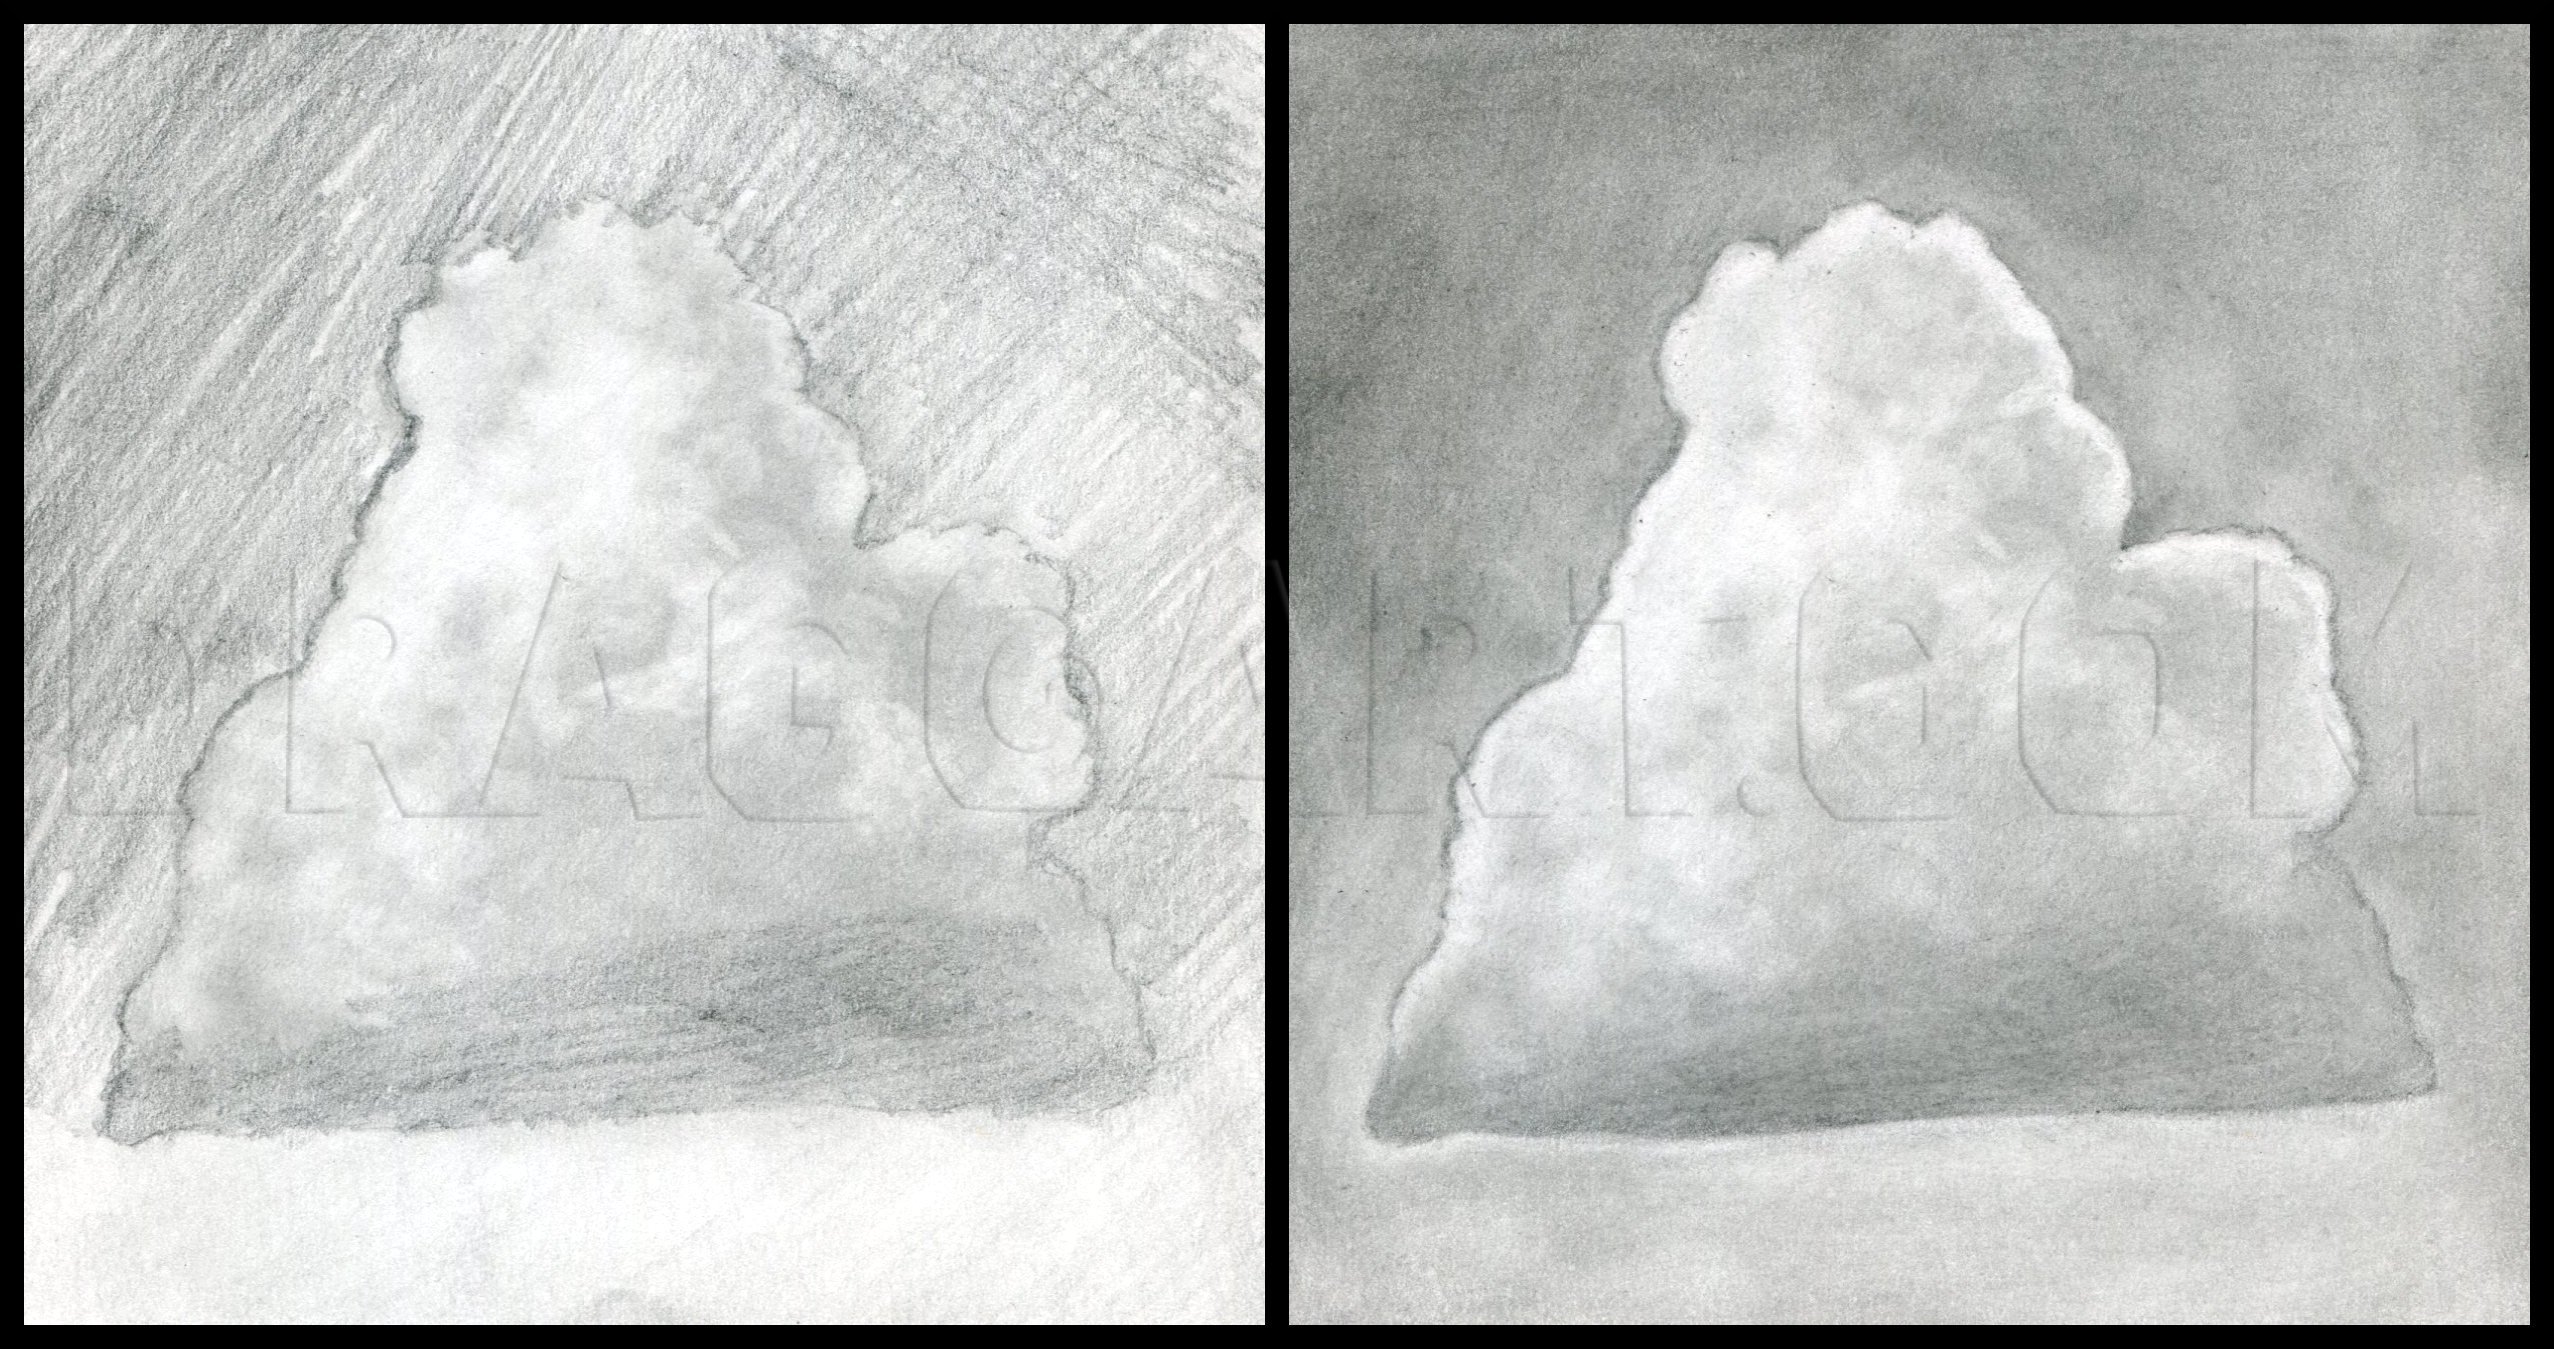
Erase the highlights from the cloud. Decide where the light is coming from and erase accordingly. Kneadable eraser work best for this. After that. Outline the cloud shape.
5
Add another layer of shading to the background. Blend your background into the outline of the cloud. You can also darken the base of the cloud to make it pop out more. This is a pretty quick and efficient way to render a single cloud. Now let's move

6
Now, lets draw a bunch of clouds from an "airplane" view. Use a 6B pencil to shade in your background then blend your shading in with a blending stump.

7
Start erasing out the basic cloud shapes. Try to work from back to front. Worry more about the outlines of the clouds than the actual forms.

8
After you have erased the clouds in use a 6B pencil and blending stump to smooth out your background by darkening it. You can also darken the bottom corners.

9
Start forming your clouds by working from back to front. Use an HB pencil to work on the outlines and shading. Blend in your shading/outlines using a blending stump. Use a kneadable eraser to add highlights to the clouds.
10
Finish up by shading and blending the foremost clouds. You can make all of your clouds look fluffier by lightly blending over all of them with a blending stump and then softly erasing the highlights again using a kneadable eraser. Now, let's move on

11
Start off by shading with a 6B pencil and then blending again. If you have a 6B graphite stick, use it. It'll speed this process up.

12
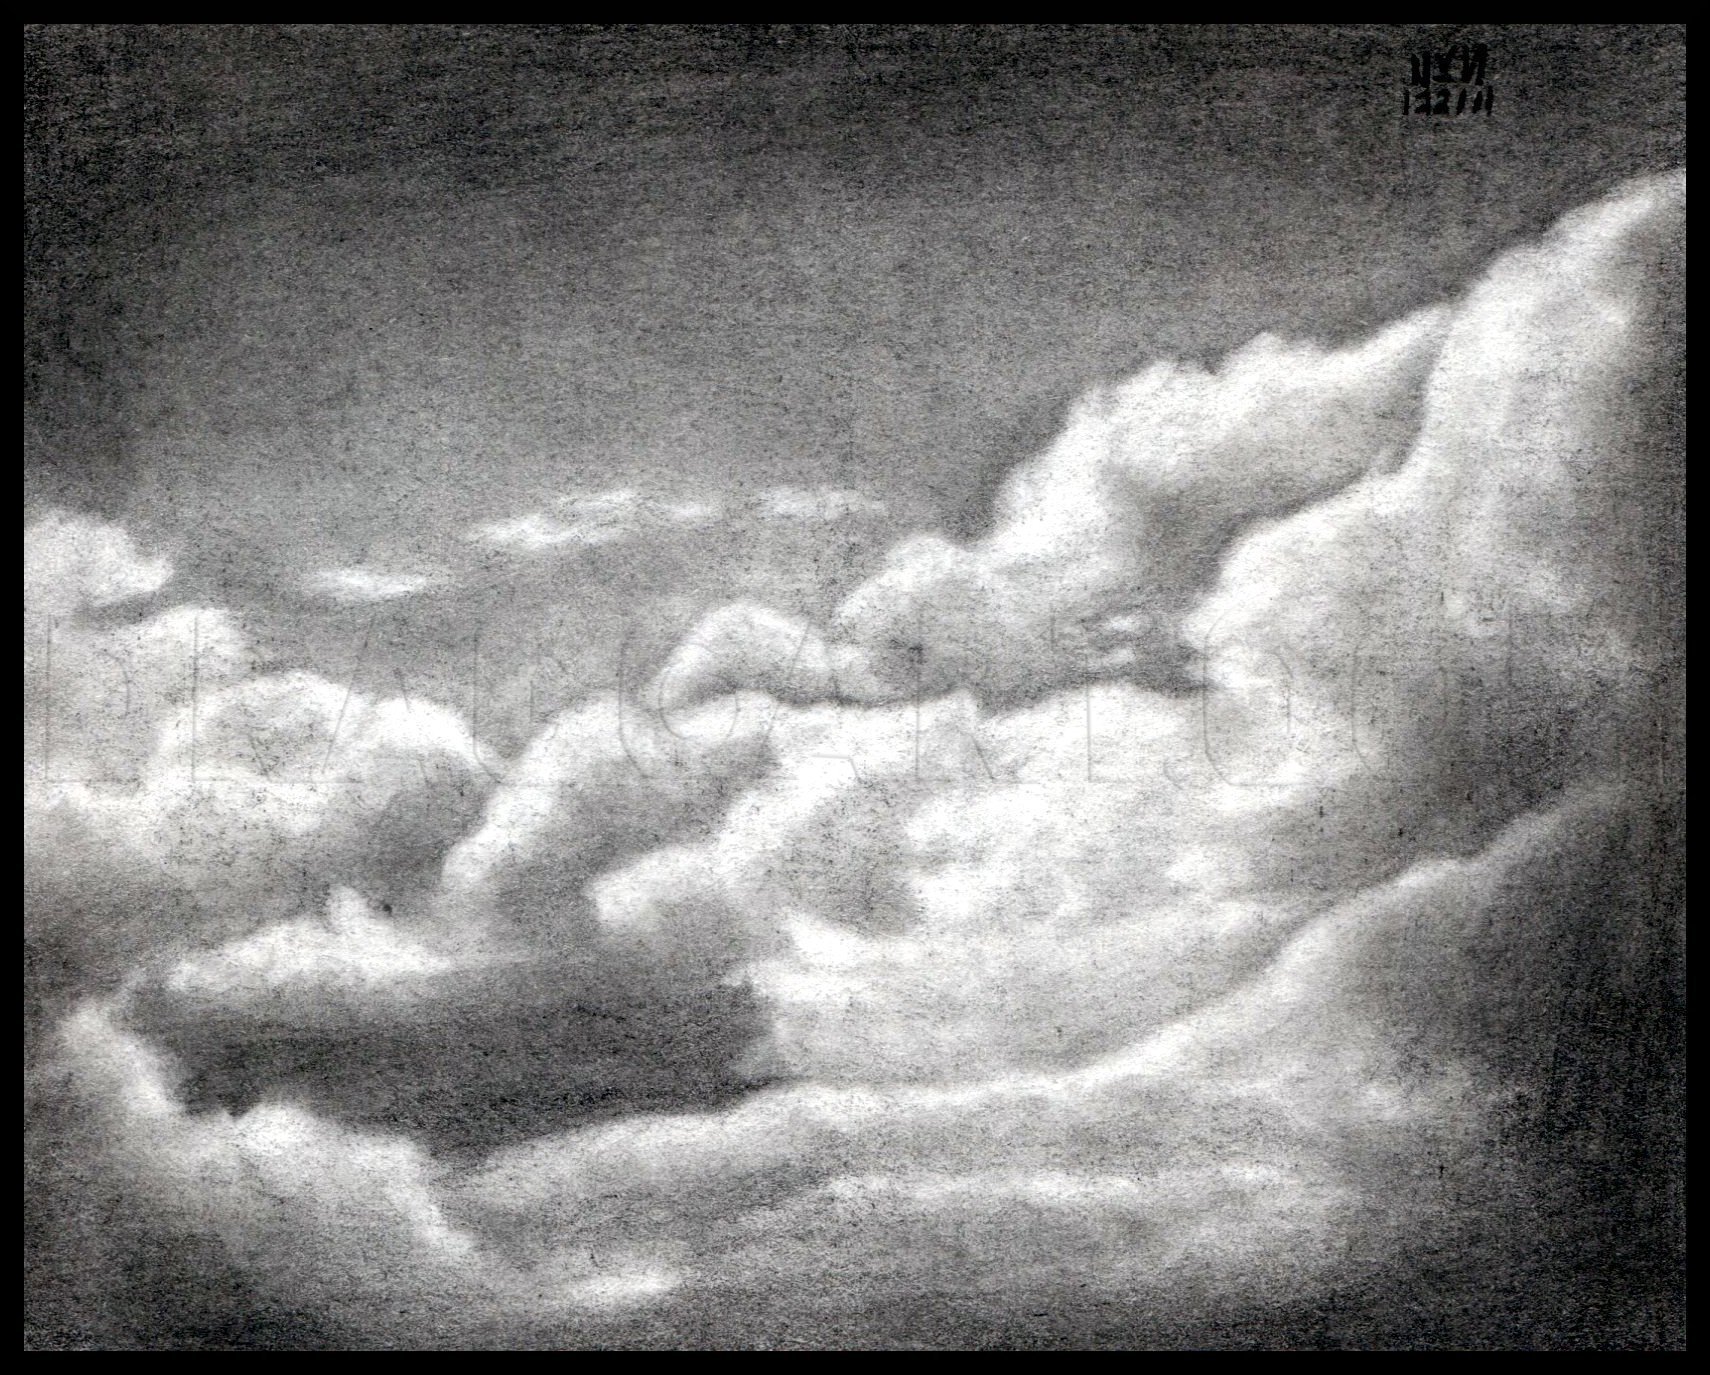
Erase the cloud shapes into the sky. Keep in mind where the horizon is. The closer the clouds are to the horizon, the farther away they are. Basically keep the smaller clouds close to the horizon and the larger clouds higher up. After that use a 6B p

13
Now start working on the clouds and sky. Use an HB pencil to outline your clouds and shade them in. Then blend in you shading using a blending stump and use a kneadable eraser to work on the highlights. Keep in mind that the sun is somewhere in the u

14
Move down and shade in the next group of clouds. Blend them in using a blending stump again.

15
Now shade and blend in the rest of the clouds. Make these ones less detailed since they are farther away.

16
Finish up the drawing by blending in and defining the landscape using a 6B pencil and blending stump. Try to go back over your sky with a blending stump to smooth it out. And that's it for this tutorial! I hope you all enjoyed it. Comments and questi
Comments 0
Details
December 22, 2011
Description: Here's another nature tutorial for you all. This time I'll be showing you how to draw clouds. As with my other tutorials, the techniques used in this tutorial more or less mirror painting techniques. If you've ever followed along with Bob Ross, you'll follow along just fine with this tutorial!


