


1
Alright, lets start off with a quick look at a wolf's skeleton. Now, you don't have to draw this or know all of the parts, just keep it in mind when drawing. The hardest part for me when drawing 4-legged animals was figuring out where all of the join

2
In addition to learning a bit of anatomy it helps to sketch out your subject, This are pen sketches that I made fairly quickly to sort of get me into the "wolf drawing mood." You can learn a lot of important things by sketching before drawing. For in

3
This was my final sketch before starting the drawing. If you need a reference when drawing the wolf's fur I suggest using this sketch because the fur direction is easier to see.

4
Here is a look at the pencils that I used for this tutorial. The are Derwent Graphic (graphite) pencils, They have always been my pencils of choice but here are many other good graphite pencil brands. For this tutorial I used a 4H pencil (for light d

5
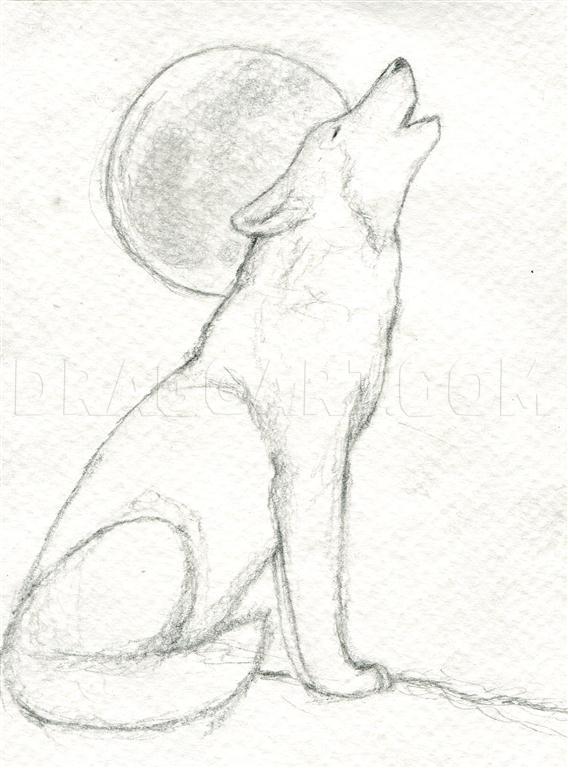
So here is the preliminary sketch. Since this is an advanced tutorial you should be able to reach this step without too much help but i'll use the next two steps to help you out a bit.

6
If you can't "eye" the sketch use the grid method. All you have to do is make a grid on your paper corresponding with the drawing then copy it box for box. This should be much easier than having to copy the whole drawing at once.

7
If you prefer the guideline method use this step as your starting point. Start by sketching the shapes highlighted in orange then sketch in the blue around it.
8
Once you have the wolf sketched in define the outlines. So far I've only had to use an HB pencil.

9
Now shade over your background with an HB pencil and then blend it with tissue or cloth.

10
Now do the same for the wolf's body by shading in the darker spots of fur. Don't worry to much about losing your previous lines.

11
Start adding details from the head down. Use an F pencil (or just darker lines with an HB)to outline. Use the HB again to darken the area surrounding your outline. The 4H pencil works well when drawing in the lighter patches of fur. The F pencil work

12
Move on down the neck towards the feet. If you are having trouble with the direction of your pencil strokes refer to the final pen sketch that I did. Just remember that the fur flows away from the head, towards the tail.

13
Add detail to the front legs and finish off the body. Don't forget to define the body and shade around the outline.

14
Now finish up the fur on the hind leg and tail. Once you are satisfied with the wolf finish up your background.

15
Here is the finished drawing. You can add as much detail as you want to your backgrounds just remember that too much detail will draw attention away from your foreground (the wolf). I hope everyone has fun trying out this tutorial!
Comments 0
Details
June 19, 2011
Description: Hey guys, here's an advanced tutorial for drawing a howling wolf!


