


1
Before we start I'll show you which tools I'm going to use in this tutorial. - Pencils of various hardness: HB, 2B, 4B and 8B. - Mechanical pencil with 0.5mm HB or 2B lead. - Paper stump (great for blending). - Eraser and, if you have it, also a eras

2
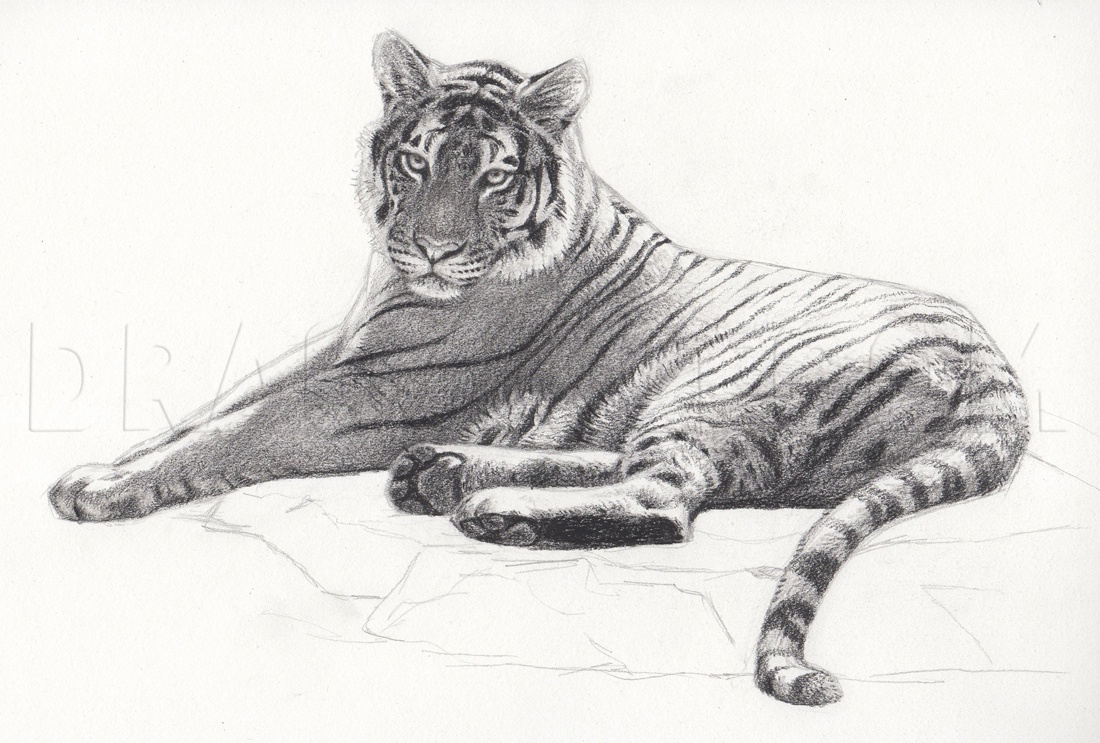
If you need it, draw the guide lines like you see in the image. Try to keep the right proportions of the different parts of the Tiger. The tiger we're drawing is laying on the rocks and is seen from the back, so the main parts (shoulders, body/belly

3
Now some suggestions and tricks to help you in case you have problems drawing the tiger. -When you draw the face (but this can be applied also to other parts) look at the reference and simplify what you see in a series of basic forms easy to reprodu

4
Start working on the drawing from the darkest parts using the 8B pencil. Don't draw a black lineart (it wouldn't be very realistic), just look at the reference and locate the parts where there is black (or the darkest color in the figure) and reprodu

5
When the darkest parts has been fixed, create a layer of base "color" in the parts not touched by the light (the light source is behind the tiger). Add more layers to create darker shadows. I'm still using the 8B pencil.

6
Do the same thing on the head. Keep the paper clear where there are highlights and white fur.

7
Use the paper stump to blend the graphite.

8
Now the shadows should look darker and more uniform. Do not touch the ligther parts, thay have to remain clear.
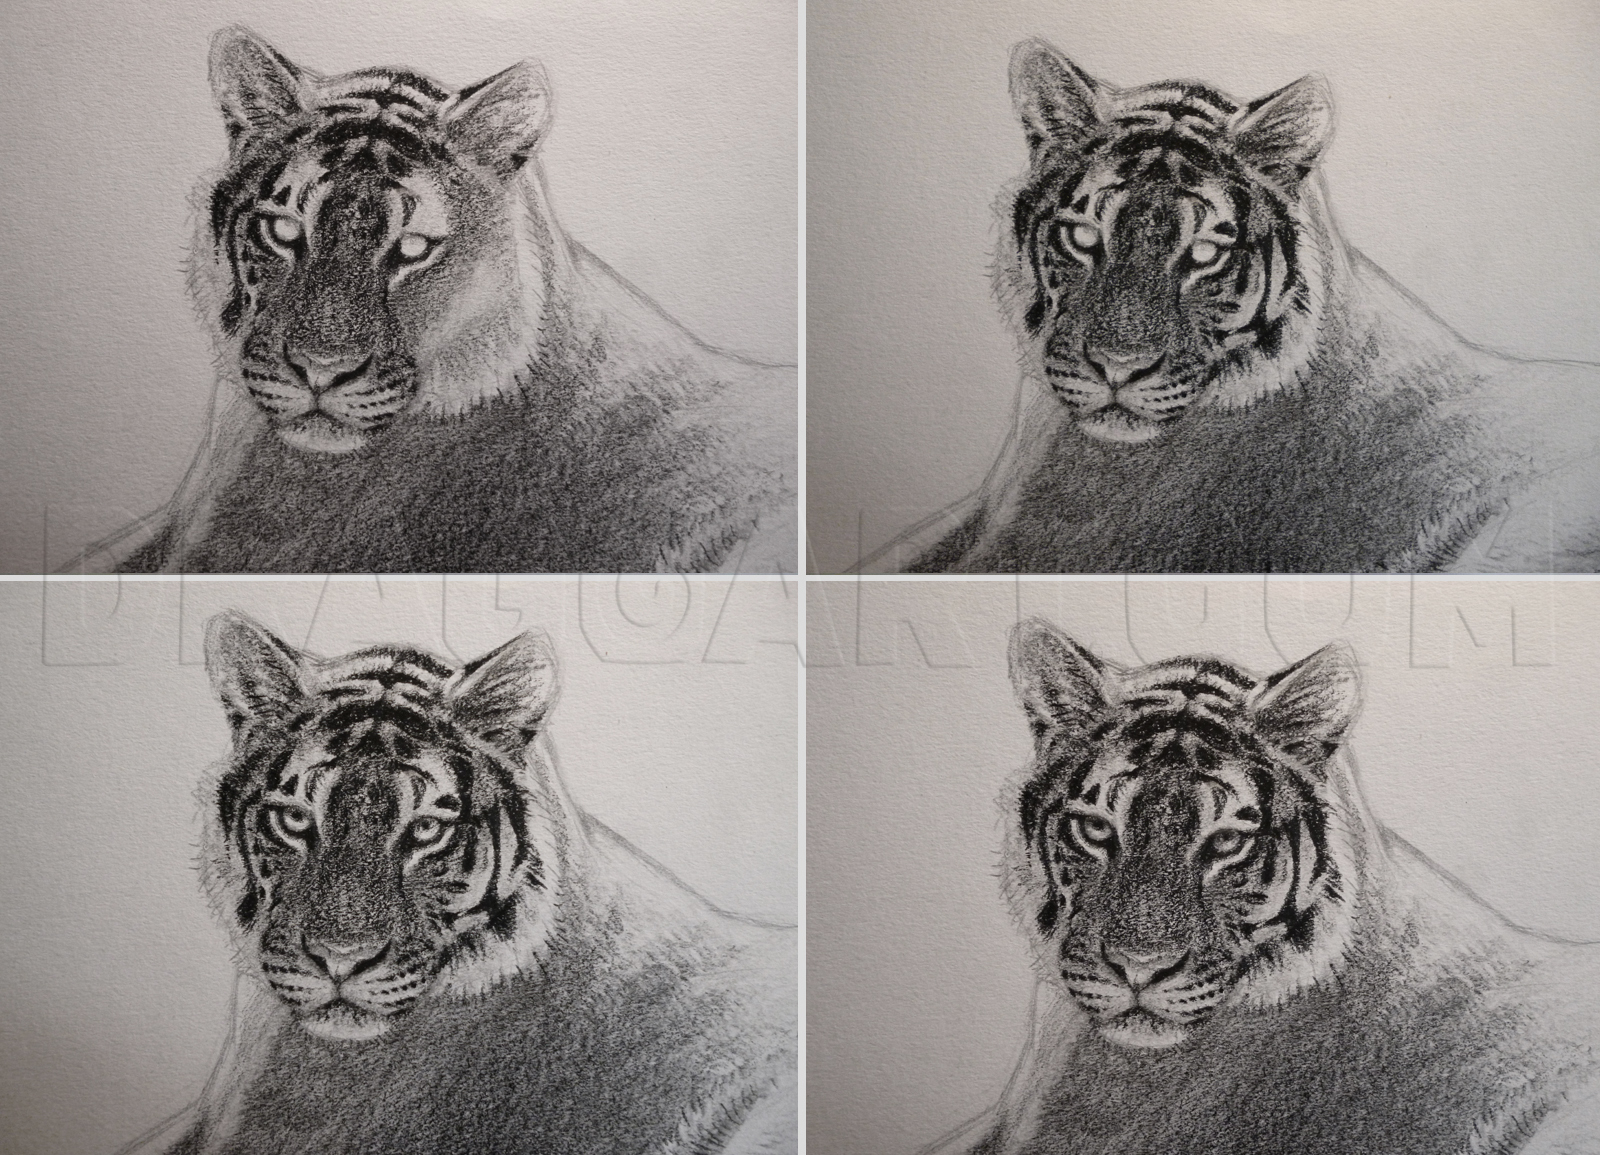
9
The base of the drawing is done so we can add the stripes to the tiger. For this step use the 8B pencil well sharpened. The stripes are symmetric and different for each individual. Draw the round pupils and a little bit of shadow inside the eyes, t

10
Add two points of light inside the eyes with the eraser pencil or with a little piece of putty rubber. Continue drawing the stripes on the body of the tiger. Follow the forms and the masses. Where there is highlight, draw the stripes gray (by pressi
11
When you're done with the stripes this is how your tiger should look.

12
Stripes are probably the most evident feature of the tiger. As I wrote before, each tiger has its own pattern, but the way the stripes are spread on the body and their form is similiar in all the tigers. The pattern is quite symmetric (not perfectly)

13
Darken a little some parts where the fur is less illuminated and orange (there should be pure white light mostly where the fur is white and illuminated). To do this use the 4B pencil. Add also some little details with 4B and 2B pencils.

14
Fix the enlightened areas with the eraser pencil or with a piece of putty rubber. Then add the long and thick whiskers.

15
The Bengal Tiger is finished! Just add some shadows on the rocks and you're done.

16
Let's finish with a "summary" of the main diffent parts, from black to white. The black arrows indicate the black parts, the darker ones (not all of them, just some samples). The blue arrows indicate the darker parts of the shadows, where they are
Comments 0
Details
May 23, 2014
Description: Tutorial about how to draw a realistic Bengal Tiger with pencil.


