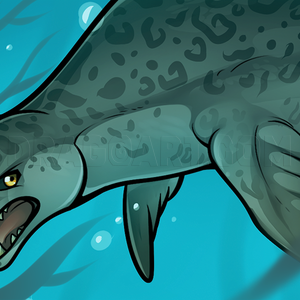
1
Sketch the circle and oval like shape lines for the seal's body mass. Lightly draw this with a No.2 or HB pencil. Make sure you draw it as seen in the picture.

2
Sketch lightly the two oblong red lines as shown in picture.

3
Go ahead and draw in those curved lines that represent the seal's flippers. They're not perfectly matching so watch closely where they go.

4
Now draw in the seal's eye and snout, called proboscis.

5
Now draw in the left side of the seal. Watch how the lines relate to the guidelines and don't forget the beach, his flippers, and part of the sand pile in front.

6
This time, draw in the right side of the seal, including his flipper with tiny cute toes *wink*. Don't forget the other side of the beach.

7
I made this line drawing especially for the novice so you won't have to second guess. If you don't want to do the pencil shading and blending part, you can finish here. Otherwise, let us continue to the next step.

8
This has a few more details. Draw in the lines that are his wrinkles and mottled area. Look at the direction of these lines to help with shading.

9
Here is the final line drawing made especially for you. If you don't want to do the pencil shading and blending part, you can stop here. Otherwise, let us continue to the pencil drawing part.

10
Here is the outline done with a 0.7mm mechanical pencil. Look closely and see if your lines look something like this. You can erase if certain areas like the eyes or nose don't line up. Take you kneaded eraser and dab off the shadow outlines or dark

11
This time Acrylics and dotting with my 9B pencil has won! Sandpaper, the new kid on the block has to take a back seat to my wonderful Titanium White or Opaque White Watercolors for HIGHLIGHTS! Yaaaa! Try it, you'll like it!

12
The picture that goes with this step shows two different ways to hold your pencil to acquire certain effects. OVERHAND: Holding a sharpened pencil in normal writing form with fingers in the middle or near the lead gives you great control and thin/det

13
Special Effects! How in the world do you create those scales and gills on the mushrooms? The secret is in how you hold the pencil and the type of pencil's edge, which is explained in the following step. Look at the different effects in this step. Pra

14
CUBE, BALL, CONE, & CYLINDER -- These are shapes everywhere in nature. It helps to know how to shade, add texture, etc. Recognizing these shapes, simplifies the landscape or subject you're looking at. TONE, SHADING, SHADOW, & TEXTURE -- Tone is the a

15
You can use your rubber kneaded eraser for reflective lights on the sides of the mushroom caps and stems, within the scale areas of the first mushroom, within the gills of the second mushroom and on the stems. Remember that the reflective light area

16
The picture here is a great exercise for value shading. I've got a little secret tip for you to make things easier. You can download this to your desktop. First click on the picture to have access to full size. By right clicking on your mouse, you ca

17
After printing out a number of the above template, practice shading in the values like this picture. You become familiar with this shading technique that gives you more control and confidence.

18
This is the first start with the pastel application. If you do the whole picture in a pencil sketch, this is where you would sketch in small circles or lines to shade the areas. It would take hours upon hours to cover all that area with a pencil. I c

19
Here I used my blending stump to "draw" in more of the folded areas. I also added more shading to the seal's body. I blended softly with a tissue to add more smoothness on the seal and beach. I followed the lined highlighted areas with my kneaded er

20
I first sketched in more shading on the body to allow the wrinkles and highlights stand out. After the pencil blending with my stump, you can see the smoother difference after the application. I took my kneaded eraser and decreased the outline shadi

21
I shaded the background with light to dark gray pastels. I smoothed the background with a tissue and my blending stump. Then I added dots and shadings to the sand with my 9B Graphite pencil looking closely at the reference. I also added more details

22
Whoa! I covered the edges of my background with my 9B Graphite Crayon, which is so smooth. Then I purposely added reflective lights on the seal's flippers, snout, and back to make him pop! I also added dark outlines to the seal's shadowed area in ord

23
Without highlights, your picture would have a flat appearance. Click on this picture to learn how to make your own picture POP out!

24
Click on this picture to see how Tone, Shading, Texture, and Reflective Light affect the Elephant Seal. Check out Wikipedia for neat info on these ocean-going seals. I am closing out now. But you all have been wonderful and it has been a great pleasu
Comments 0
Details
August 2, 2012
Description: Elephant seals take their name from the large proboscis of the adult male (bull) which resembles an elephant's trunk. The bull's proboscis is used in producing extraordinarily loud roaring noises, especially during the mating season. More importantly, the nose acts as a sort of rebreather, filled with cavities designed to reabsorb moisture from the animals' exhalations. This is important during the mating season when the seals do not leave the beach to feed, so must conserve body moisture as they have no incoming source of water. The two species, the northern elephant seal and the southern elephant seal, both were hunted to the brink of extinction by the end of the 19th century, but numbers have since recovered. (Wikipedia Notes) I hope you learn something from this tut and please enjoy! A fav, love it or comment would be fantastic! Luv n hugs to you all and thank you!!!