1
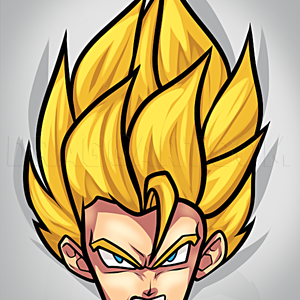
The first step is make sure you have line art of your drawing. Clean and neat line art is essential to having a nice drawing. If you're not sure how to outline digitally I have a tutorial (it's for microsoft paint only though) on it; outlining in Sai
2
I accidentally already start coloring but here's how to do it. Make a new layer and name it (you'll have a lot of layers so naming them helps to keep it organized). Go to your line art layer (it's the one I have highlighted) and take the magic wa
3
While the area you want colored is still highlighted, switch to the layer you'll be coloring with. For me this layer's name is "clothes". Take the bucket tool and fill in the entire area. If you did it right then only the selected area will be filled
5
It's time to color in white areas if you have any, if you don't then you can skip this step. Coloring white on white is tough so I make things easier by making a new layer and setting it below ALL my base color layers and fill the entire canvas with
6
All white areas have been colored in now. You'll want your white areas to have their own layer (instead of not coloring in white at all) so that you can shade in those areas later.
7
Time to clean up. Even though you've used the selection tool and bucket to fill in areas, there's going to be some tiny spots that haven't been filled in with color. It's important that you manually color in these areas, preferably with the pen to
9
Time to start shading. I recommend choosing a different color like I did (I chose salmon even though the base color is a yellow-orange color) or slightly darker shade. You can start with any layer you want but I'm starting with the hair. There's p
10
Make a new layer and put it above the base color layer (hair) and below the layer made in the previous step. Make sure you clip this layer too. Select the layer from step 9 and on your keyboard hit the keys "ctrl" and "E". This will merge the layer o
11
Once you're done filling in all the areas you want shaded it's time to do a touch up. Remember how I told you when shading to choose a different color or slightly darker color? Here's why. Right now your layer setting is on "normal" but we're goin
12
Continue doing steps 9-11 with each base layer color. I moved on to the skin layer and started shading in. If you're on the skin layer like I am and want to add some blush to your character's face make a new layer, set to "multiply", and clip it (
13
I figured I'd add in a step for how to do eyes. Make a new layer over your eye base layer and clip it, name it "highlight". Pick a lighter color than your eye's base color and fill in a small section like I did. There's also another way to do this bu
14
See the highlight in her hair that's sweeping across? Anytime you want to add highlights to your drawing, you're going to make another layer for that, make sure to clip it like always. Set the layer mode to "screen" and pick white or a light color. C
Comments 0
Details
January 25, 2013
Description: Just a tutorial on how I color and shade. It's been a long time since I've uploaded a tutorial.


