


1
Make the guide for Woody's face and then sketch in the guidelines for the features.

2
Using the guide you just made, define the shape of Woody's face which is sort of long. Add the ear and hair line.

3
Cover the top of the head with the hole of the cowboy hat that Woody almost always wears. When that is done draw more of a hairline and then detail inside the ear.

4
You will finish drawing Woody's hat like so, then add the stitch or laces along the lid of the cowboy hat.

5
Use the facial guidelines to draw in the round eyes, then draw the nose and expressive eyebrows.

6
Color in the pupils and draw the iris'

7
We will now draw in Woody's famous smile and add those frown lines to form the cheeks.
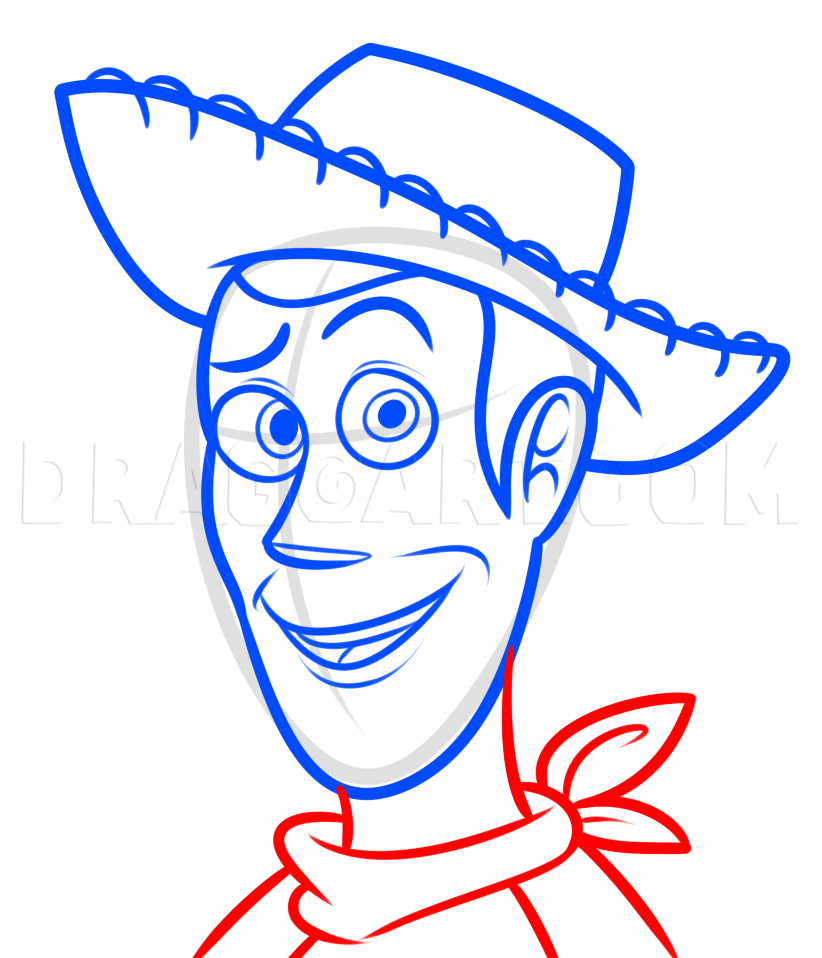
8
Lastly, draw Woody's neck, then draw in the scarf, arms and torso. Erase the mistakes and you're done.

9
Here is the line art, now color in Woody to bring him to life.
Comments 0
Details
December 22, 2015
Description: After looking through the Disney section of Dragoart, I noticed that I didn't have any lessons On Woody from Toy Story except for one. The reason why I chose to make this lesson on Woody, is because Toy Story is still a very popular film that is watched by millions of people especially during the Christmas season. So here it is, how to draw Woody easy, step by step. I hope you guys have fun with this tut, I know many will.


