


1
For this tutorial I used white charcoal for highlights, HB charcoal for sketching and general shading, and 4B charcoal for dark shading. It helps if you have charcoal sticks as well as pencils. I also used paper towel and a blending stump for blendi

2
These first sketches are fairly basic. I started off by sketching basic shapes using an HB charcoal pencil. I then started lightly adding features to the shapes.

3
I used the same HB pencil on these steps to add bolder, thicker lines to my lions. Making the outlines thick will make the sketches stand out a bit more.

4
Next I lightly rubbed a bit of soft willow charcoal onto the drawing then blended it in using some paper towel. If you don't have willow charcoal then get a paper towel and load some 4B or HB charcoal onto it then lightly rub it over your drawing. I

5
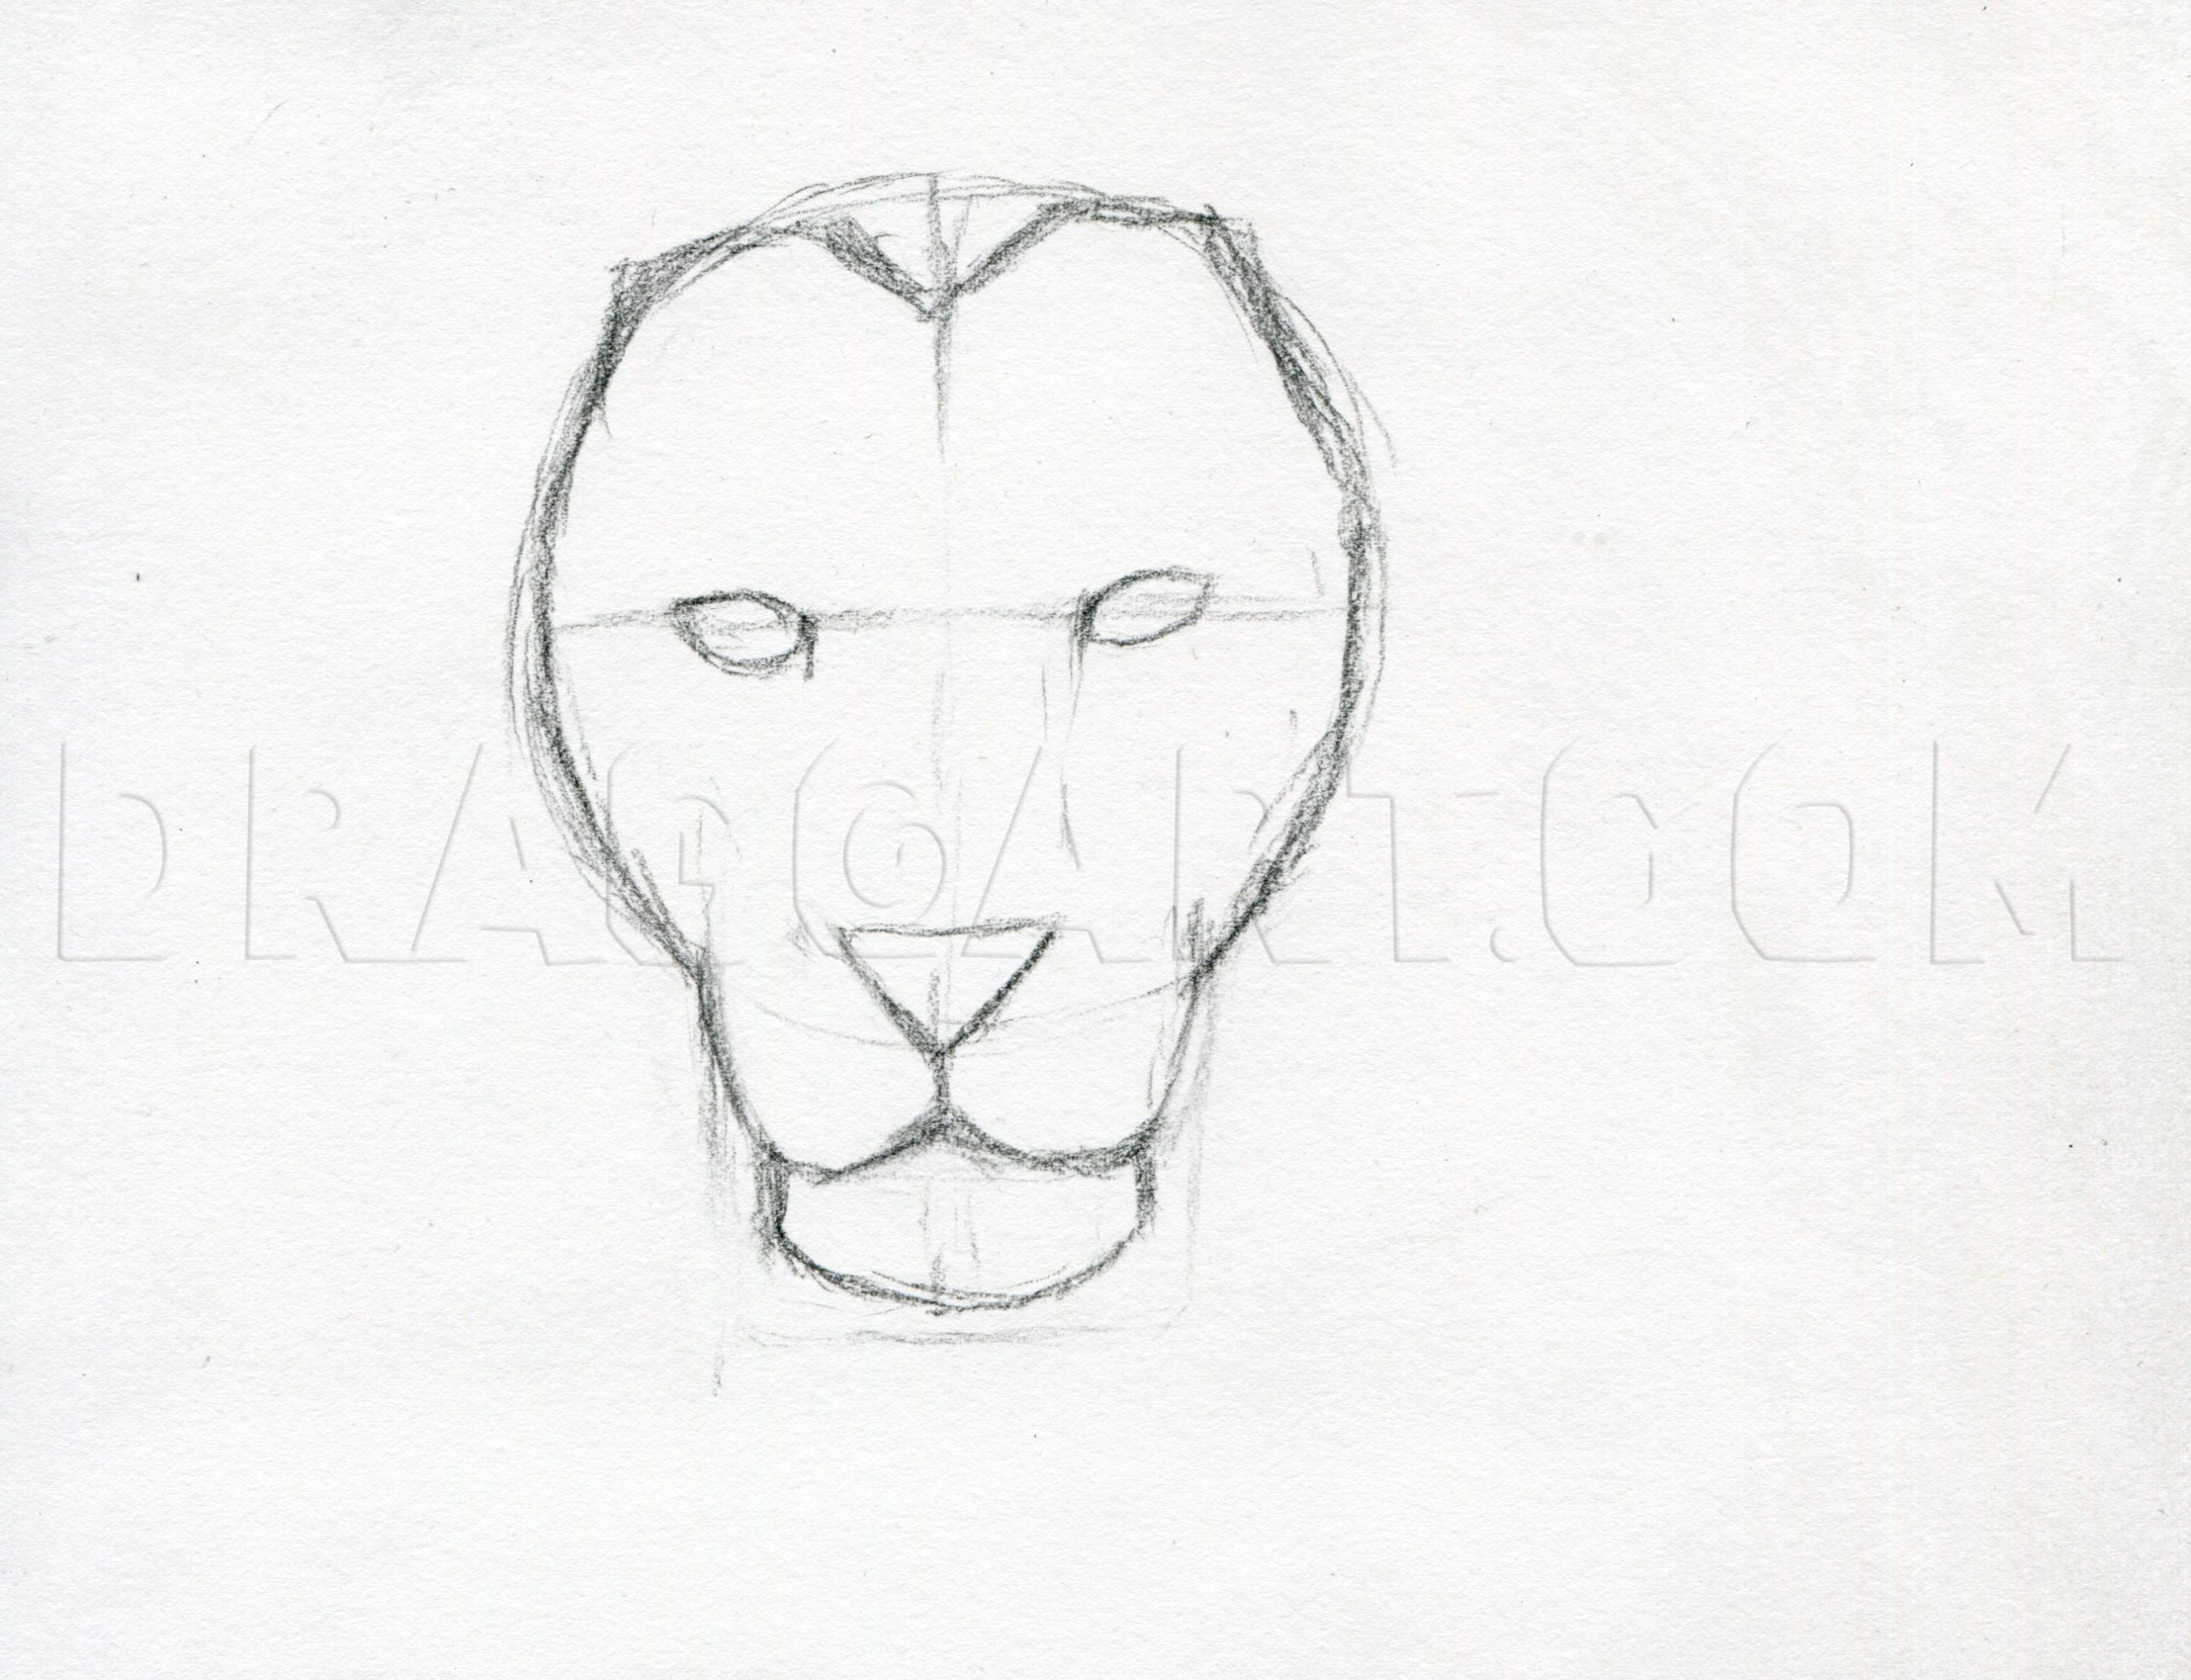
Time for the big sketch! I started off with an HB charcoal pencil again and lightly sketched in some shapes. Remember that these guidelines aren't set in stone, they are just here to help you get started. Modify your sketch as you go along if anythin
6
Next, sketch in the basic features. Go ahead and develop the hairline and face outline as well.

7
Develop the facial features a bit more with darker lines. Sketch in the basic shapes for the mane and body.

8
Roughly sketch in the mane and body. add some lines to indicate the flow of the fur as well.

9
For this step I roughly shaded in the drawing using soft willow charcoal. Again, if you don't have soft charcoal you can use 4B or 6B charcoal just shade very lightly.
10
Smooth out your shading using a cloth or some paper towel. You shouldn't have to worry too much about losing your outlines here.

11
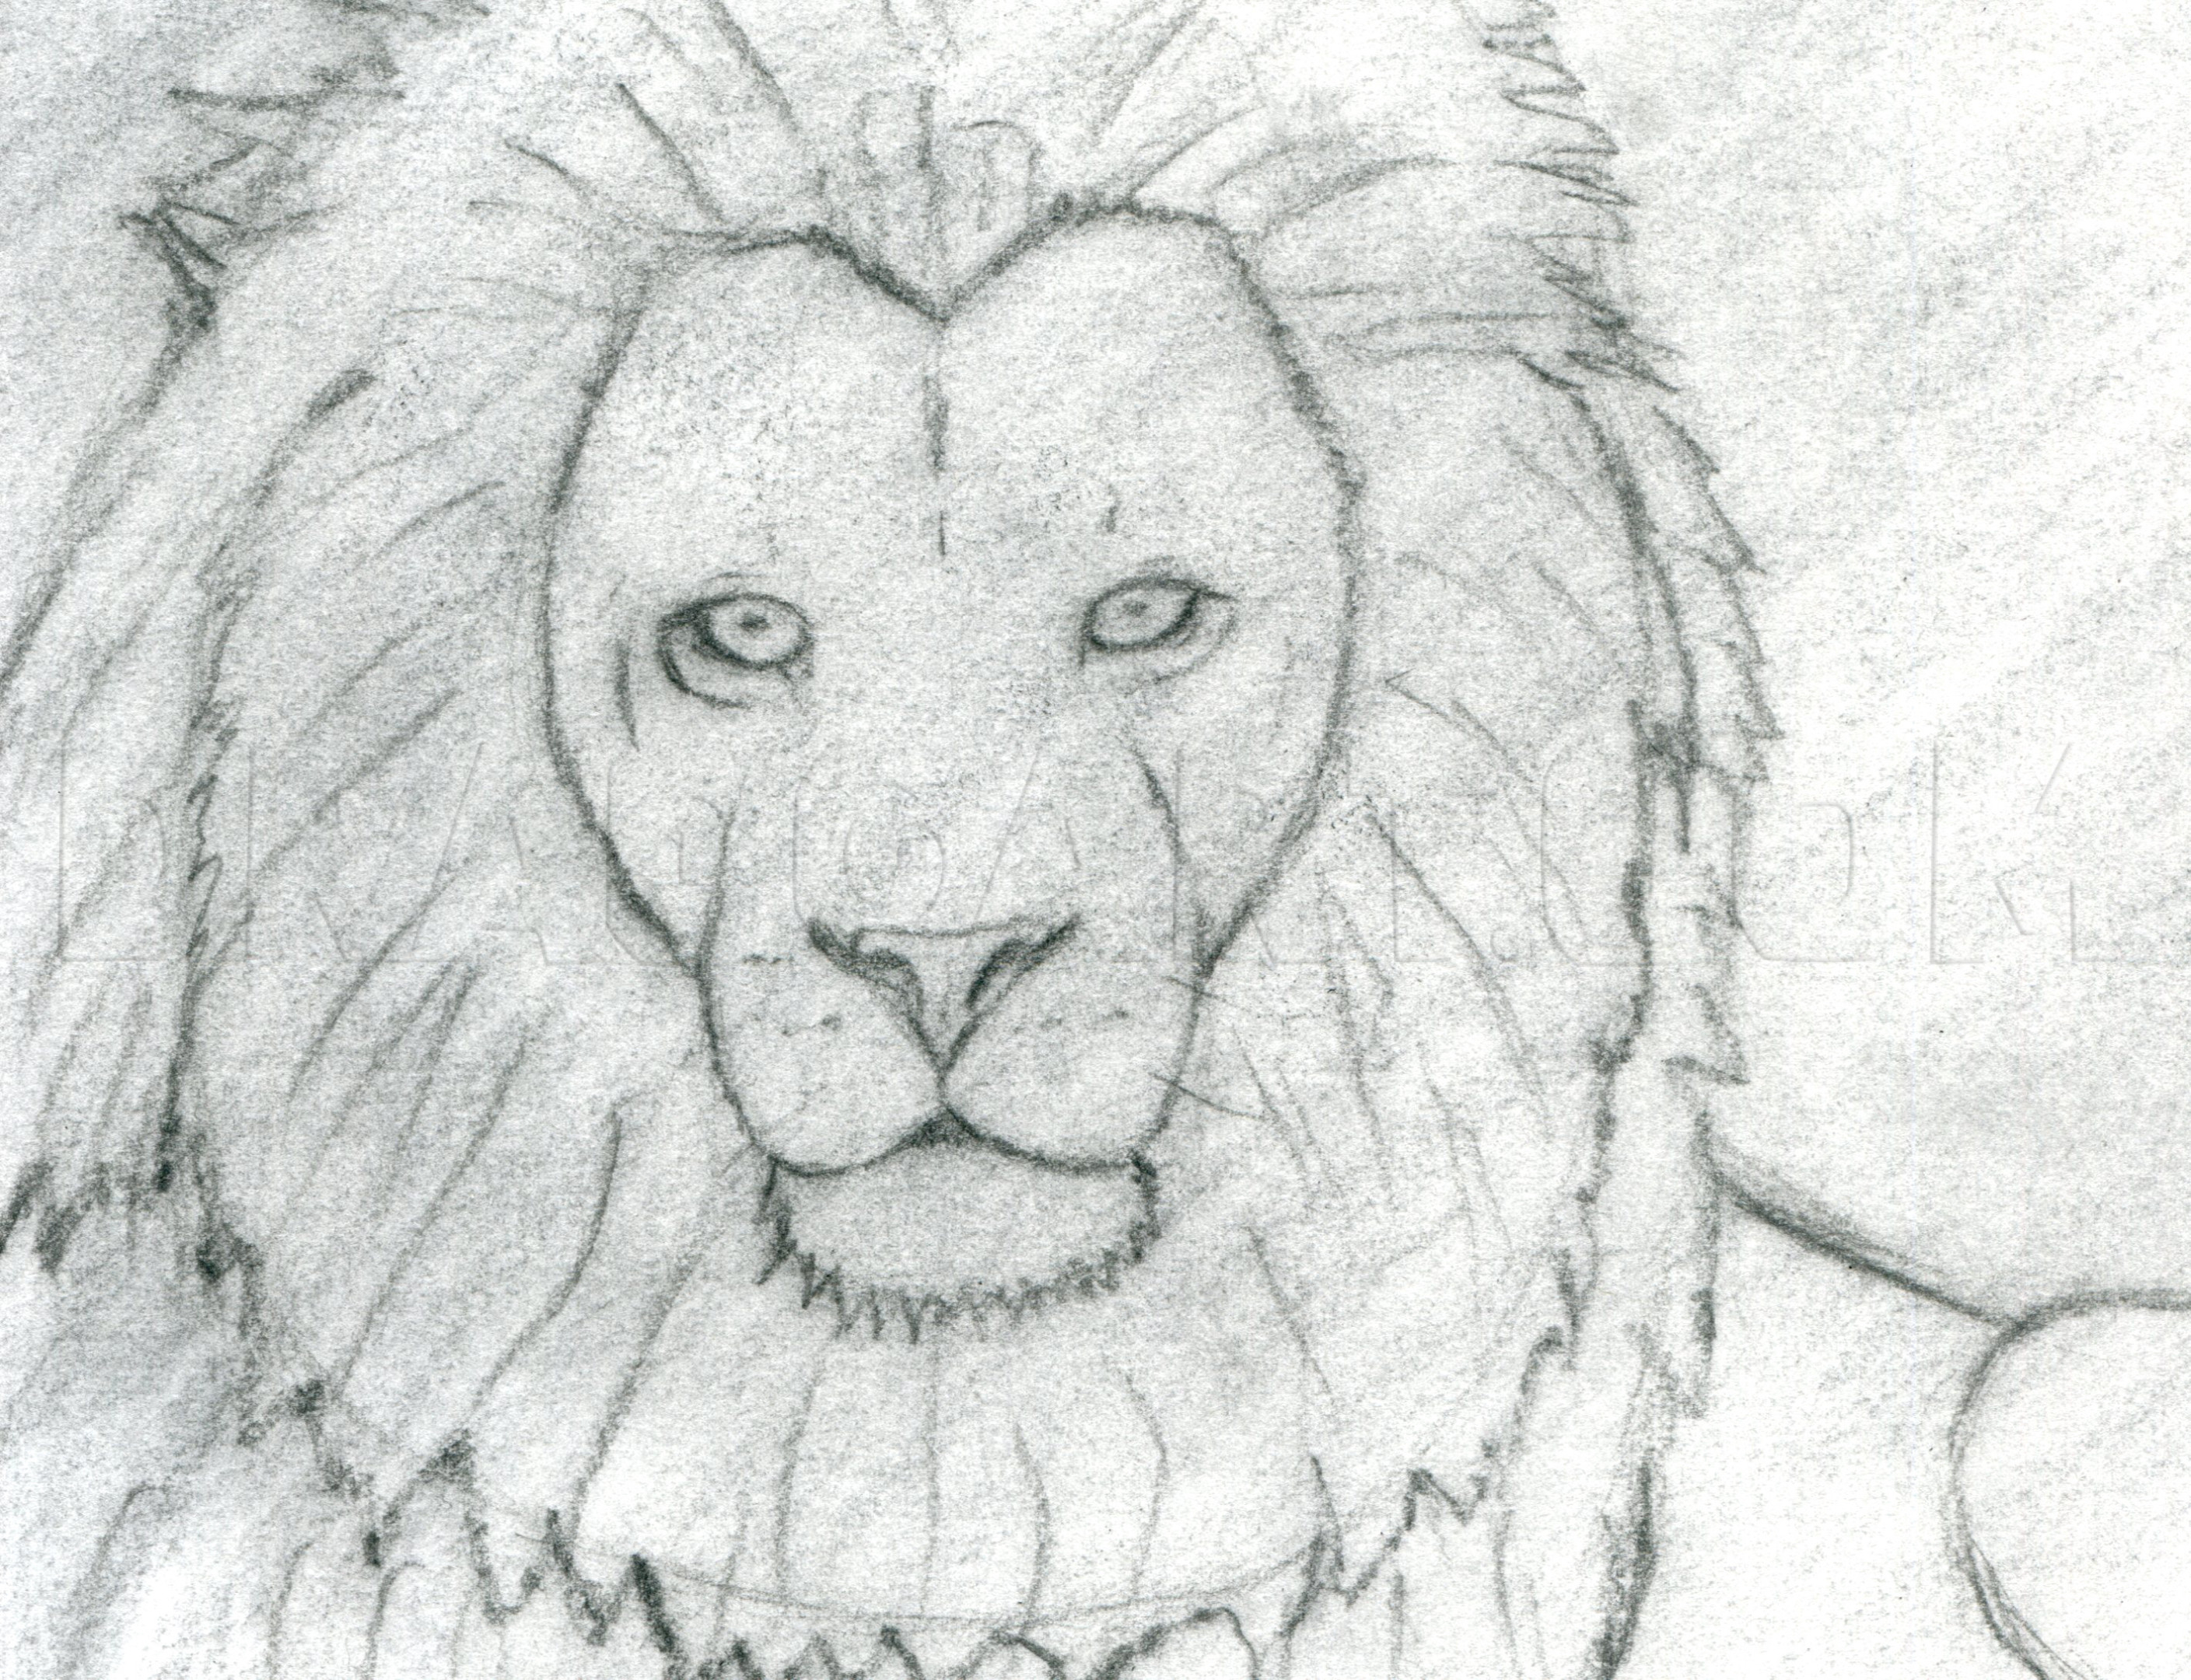
Start adding rough shading using 4B charcoal. I decided to go from top to bottom, concentrating first on the lion's face.
12
Finish adding rough shading to the rest of the face. There's no point in getting too detailed yet, just concentrate on developing some shading.

13
Here I used my white charcoal to add some highlights as well as blend in my shading a bit. Work from top to bottom again.

14
Finish up adding highlights to the rest of the face. I held back on adding whiskers for now. It's much better if you add whiskers after you've shaded in the mane.

15
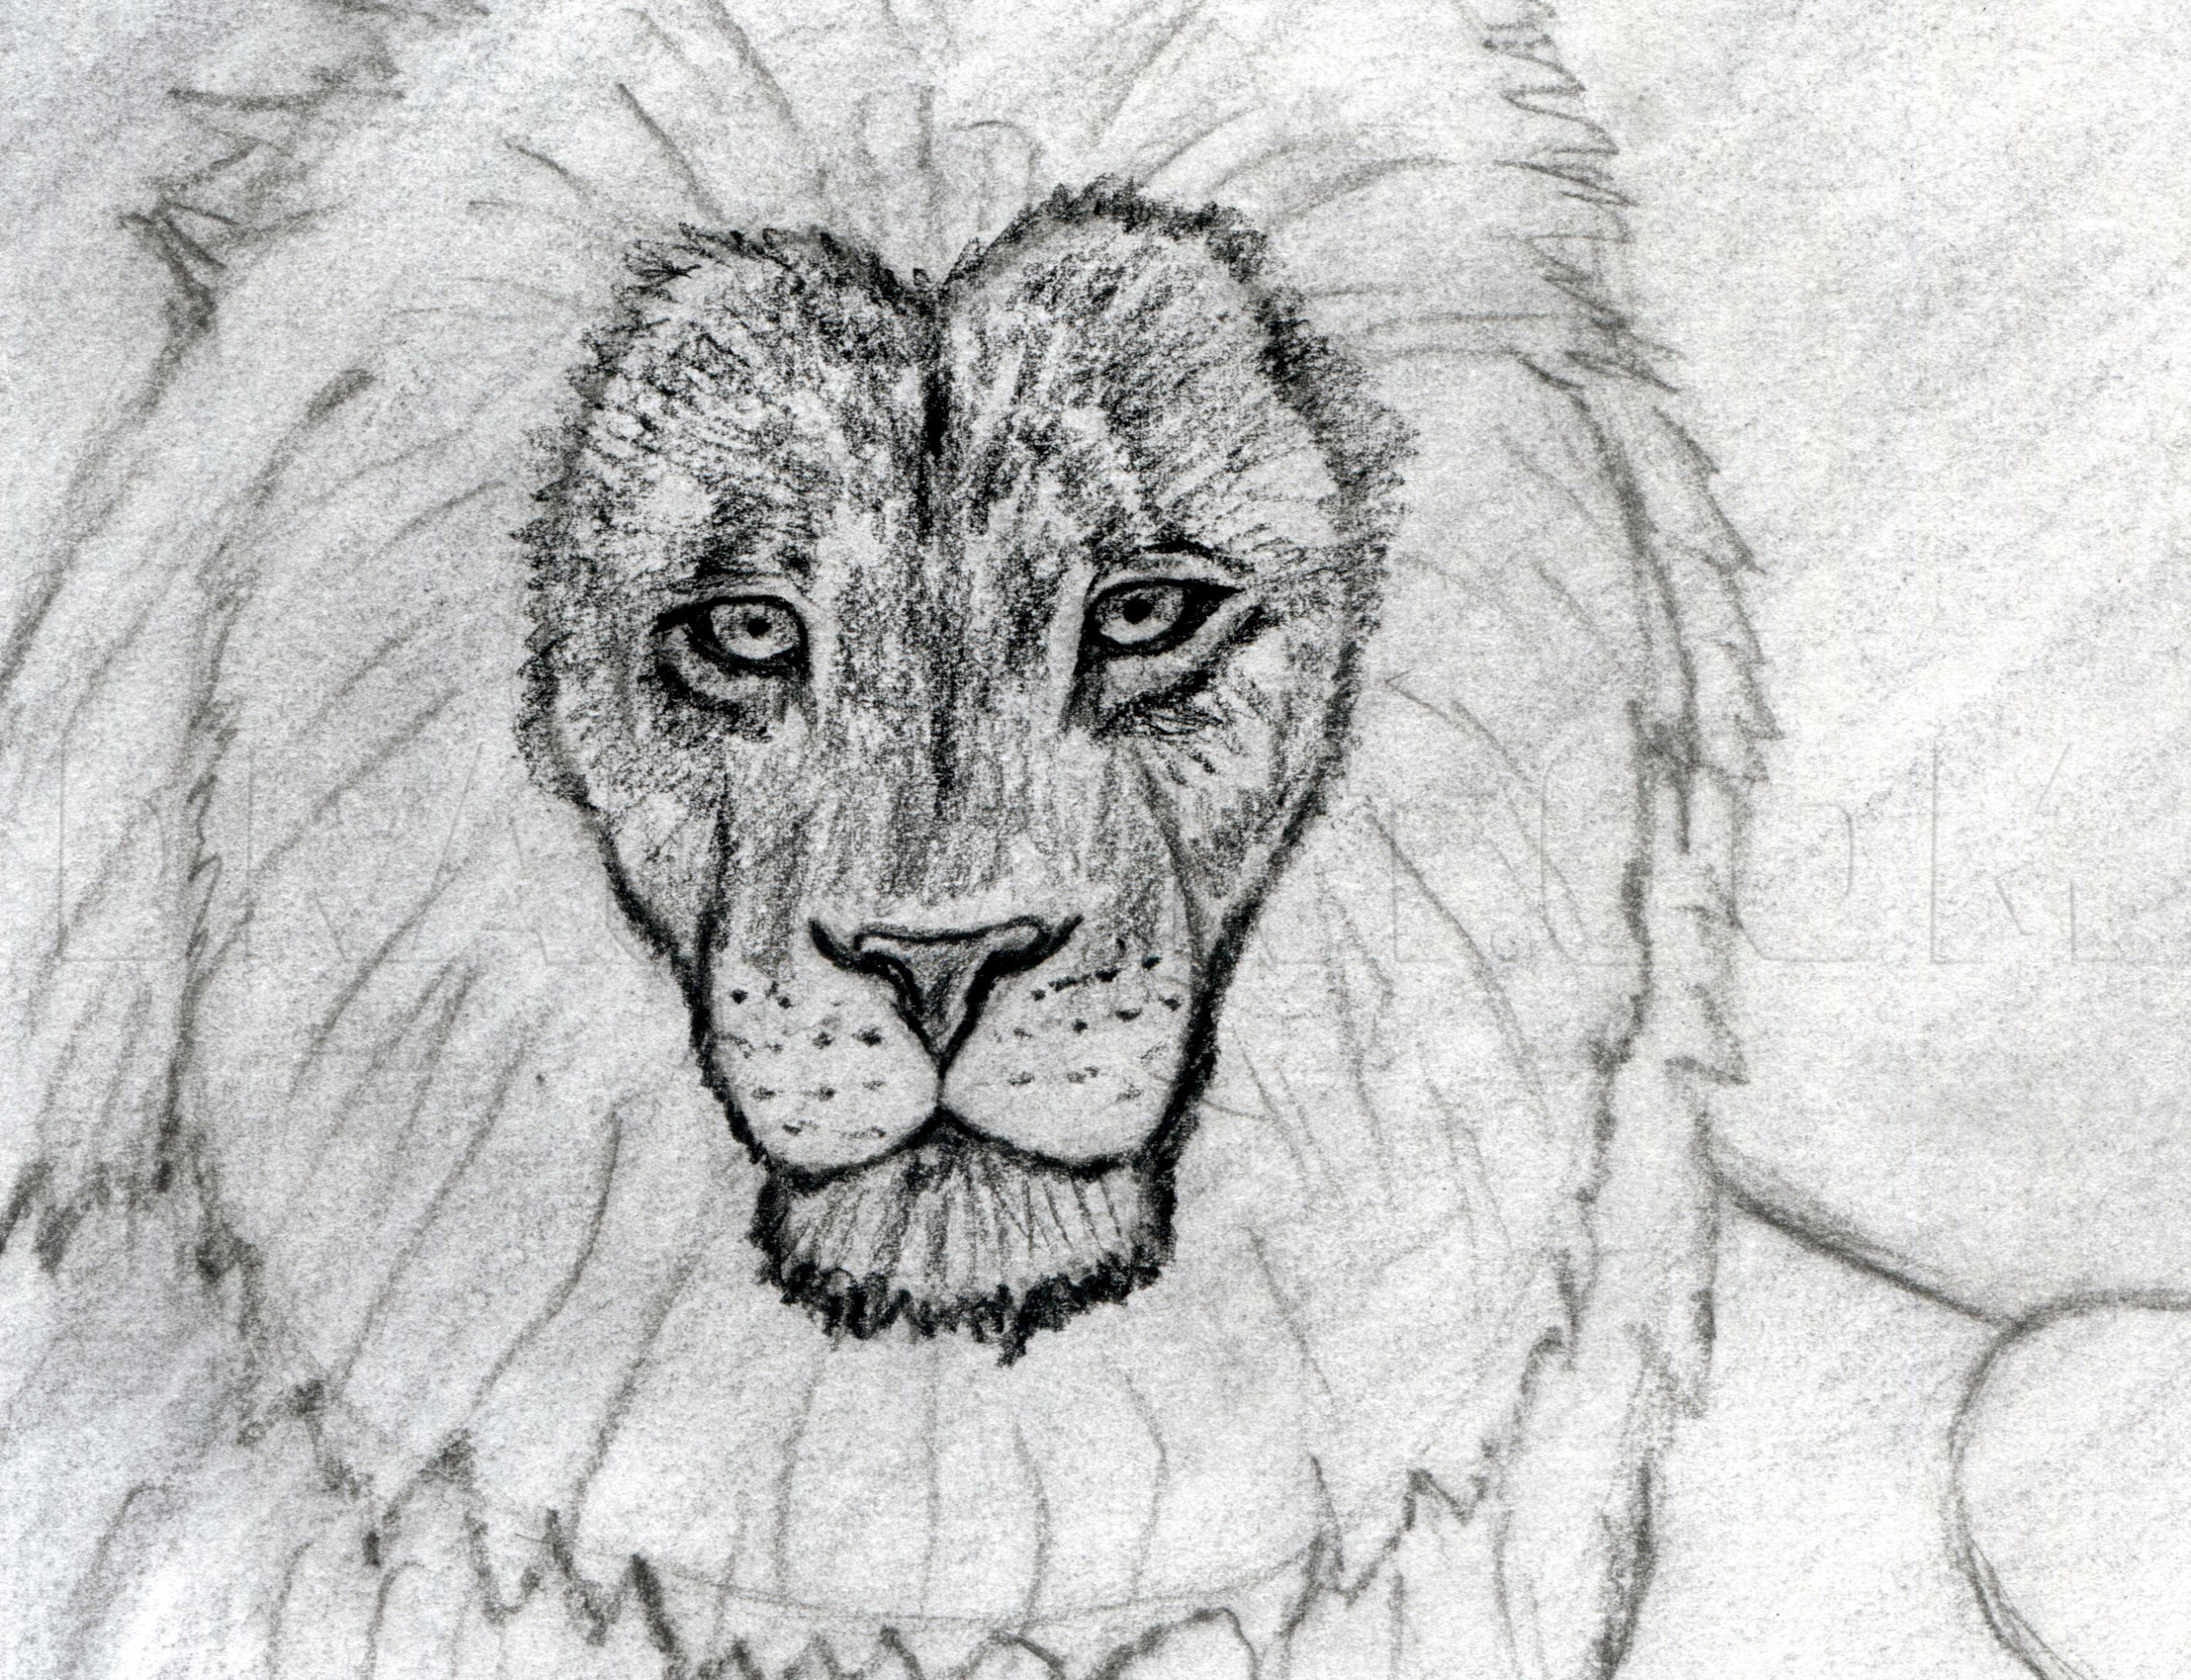
Using a 4B stick of charcoal I lightly and roughly shaded in the first layer of mane hair. Try not to make your shading too dark.

16
I blended in the mane here with a blending stump. If you don't have a blending stump the next best thing to use would be your index finger. Just make sure that your fingers are dry when using them for shading.

17
Working from top to bottom again start adding highlights to the mane. You should only need white charcoal for the mane since the previous dark shading provides the darker values of the mane.

18
Finish sketching in you mane. Add in the whiskers and some stray hairs as well.

19
Using a stick of 4B charcoal I went ahead and roughly shaded in the rest of the drawing. add darker values to add contrast to the drawing.

20
Blend in your shading using a blending stump/a finger.

21
I finished up the sketch my adding some highlights with white charcoal and smoothing my shading a bit with a blending stump. I also used an HB charcoal pencil to balance out the shading on the lion's face a bit. You can get as detailed as you want to
Comments 0
Details
February 21, 2013
Description: Here's a tutorial on how to sketch a lion using charcoal. If you've never used charcoal before then I hope this tutorial shows you some of the medium's possibilities and gets you to at least give it a shot!


