2
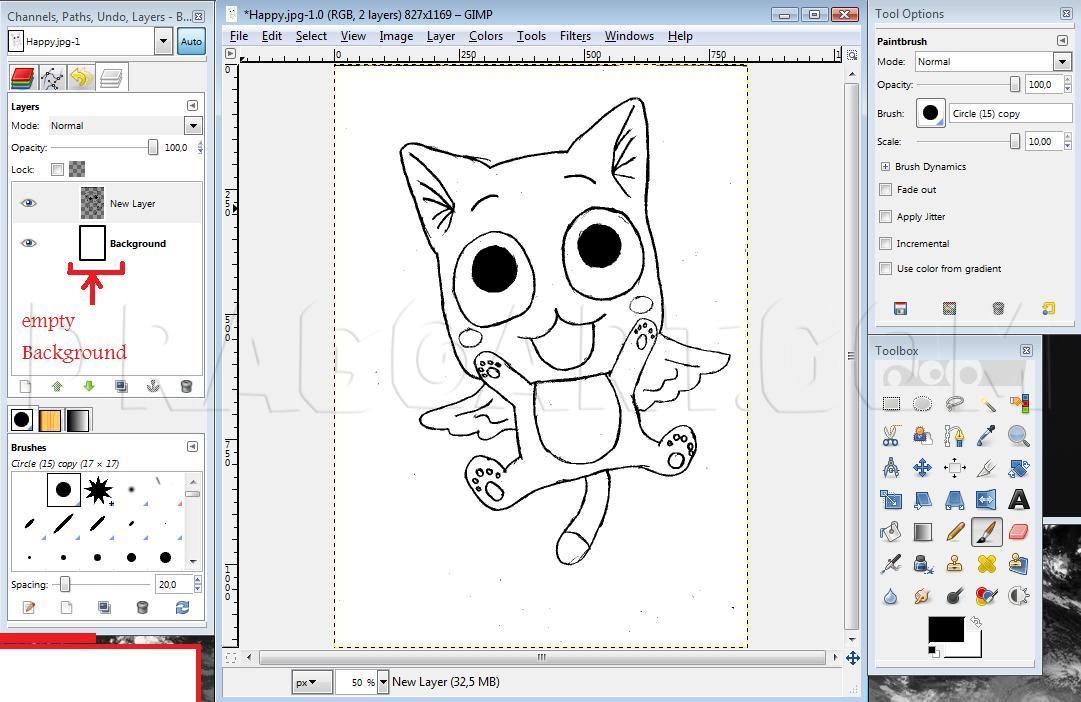
Now go to Colors- Adjust Brightness and Contrast and change the bars to the same position as mine. Now you should have your drawing in black. After that make a new Layer, transparent.
3
Now go to the background-layer and delete all unimportant lines. Then go to Select- Bya color. Then click on a black point in your drawing, now your drawing should be selected.
6
Disable the selection. If you now making the background inactivate, you should see your drawing on a transparent background.
7
If you activate the background, you can delete the lines on it. But JUST on the background. The drawing lines in the new layer should rest there!
8
Now work on the new layer. Color your drawing with the pen, the brush and the bucket fill tool. Take your time and do it right. Use the colors you want, you also have to add any shading-parts.
9
Now use the blur. Switch the rate to 100% and blur all the point where two colors or more are mixed. For example the shadow-parts. Don't blur the black lines!
10
Now duplicate the layer (Layer- duplicate Layer) and work on the new layer ( the one above). Now choose Filters, Blur- Gaussian Blur. Put the data to 4px and push ok.
11
Go to the unblured layer and choose Select- by color and click on a black part again. Now the black outlines should be selected again.
12
Change to the first layer (the duplicated layer)and go to Edit- Fill with FG Color. Black has to be the FG-color again.
13
Now you can disable the selection and the outlines should be re-tightened. Now make a right-click on the first layer (the duplicated layer) and select 'merge down'. Now your layer are combined.


