1
Ok, this is a pretty labor-intensive tutorial, but I've tried to break it down into easy-to-follow steps for everyone to follow along. To begin, we'll draw a simple guide drawing that will serve as the base for the detailed line art. The main shape i
2
Let's zoom in and focus on the head for a bit. We'll continue to block in major shapes before getting to the final line art. First outline the shapes of the nose, eyebrows and the sides of the face. Then detail those shapes with the eyes and nostrils
3
Draw the tongue. Then fill in the opposite side of the mouth and teeth. Next we'll focus on the curves of the neck. Each section has a different texture or scale pattern, so we'll separate them now.
4
Lighten your guide drawing and we'll begin the final line art for the head. I like to begin with the eyebrows because they let us give the character some emotion right off the bat. The lines we're using are much thinner now, but we want to keep the o
5
Moving on to the lower jaw, try to focus on keeping that square shape to the front of the snout and mouth. That's one feature that distinguishes this version of Godzilla from most of the others. Little spikes sticking out from the jawbone are a fun d
6
To begin the neck, focus on just one small part of the scales. Then we'll move on to the next segment, which reaches down a bit more. The third segment reaches even further down, and shows us a different texture pattern on the bottom. We'll use these
7
Continue the spikey shapes on the top of the head and neck. Then we'll start adding some fine wrinkles beneath the jaw. From there, we add a column of large scales going down toward the base of the neck. Fill in the softer center area of the neck. Th
8
Now we'll start to repeat the texture patterns down the length of the neck. Near the bottom, things start to wrinkle as the neck meets the body. With that, the head is complete.
9
Let's now jump to the arm. We want to break down the big shapes of the first guide drawing into smaller shapes. This is another set of guide lines, so keep your lines light if you're drawing with paper and pencil. Start with the main shapes of the fo
10
Lighten those secondary guide lines, and we'll move on to the final line art for the arm. I chose to begin with the claw and then start laying in the ribbed scales of the back of the finger. On the two other fingers, I started with the round knuckle
11
From this angle, we can build the outline of the forearm using overlapping curves. Keep these fluid and very wrinkled. Use different lengths to make it look natural and organic. We're going to outline the rectangular armor plates of the forearm using
12
Use the same basic techniques to outline the upper arm and start to fill in the shapes. Add lots of wrinkles in the armpit area that spread out across the side of the body. On the shoulder, we want to draw a bunch of tiny spikes, kind of like rock sa
13
For these steps, I've drawn a more detailed guide drawing for each section of the leg. The knee and lower leg are basically cylinders with a ribbed pattern. I don't want that pattern to be too obvious, so the open wrinkle lines return to build up the
14
I had trouble getting good reference for the chest and belly of this new Godzilla design, so I've opted for this V-curve pattern. For the final line art, I've used both thick and thin overlapping curves. The thick parts of the lines give us a crease
15
Moving on to the second leg, we want to use the same steps as in Step 13. The main differences from this viewing angle are the heel of the foot being visible, and the fatty portion of the underside of the leg. That fatty section has a simpler cross p
16
Take care in drawing the guide for the second hand. Use your own hand for reference if you have trouble. As before, we want to block in the basic muscle shapes. From there, I've added the ribbed pattern we'll use to place the scales. Following the sa
17
Between the legs, we see the belly transition into the tail as it curves back and around to the side. Draw the center line of the body as our main curve. The tail can be drawn very fleshy on the underside. Notice the deeper wrinkles as the tail bends
18
Our original guide drawing will work for the tail. Let's just add some rows of spikes growing smaller toward the tip of the tail. In the final line art, we can an angrier shape to the segments of the tail. The spikes and scales almost appear as secti
20
Godzilla has multiple rows of large spikes running down his back and tail. They're almost like the armor plates on a Stegosaurus, but much more spiky and aggressive-looking. Over the year, the spike pattern has changed. What I've drawn is sort of a m
21
Next we'll outline the main row of large spikes that runs down the center of the back. There's usually one very large spike, and the others grow smaller toward the neck and tail. I've used lots of bold curves and sharp points to build these spike pla
22
Now we can add some detailing to the sides of the spikes. I wanted these to have a wild feel, almost like fire.
23
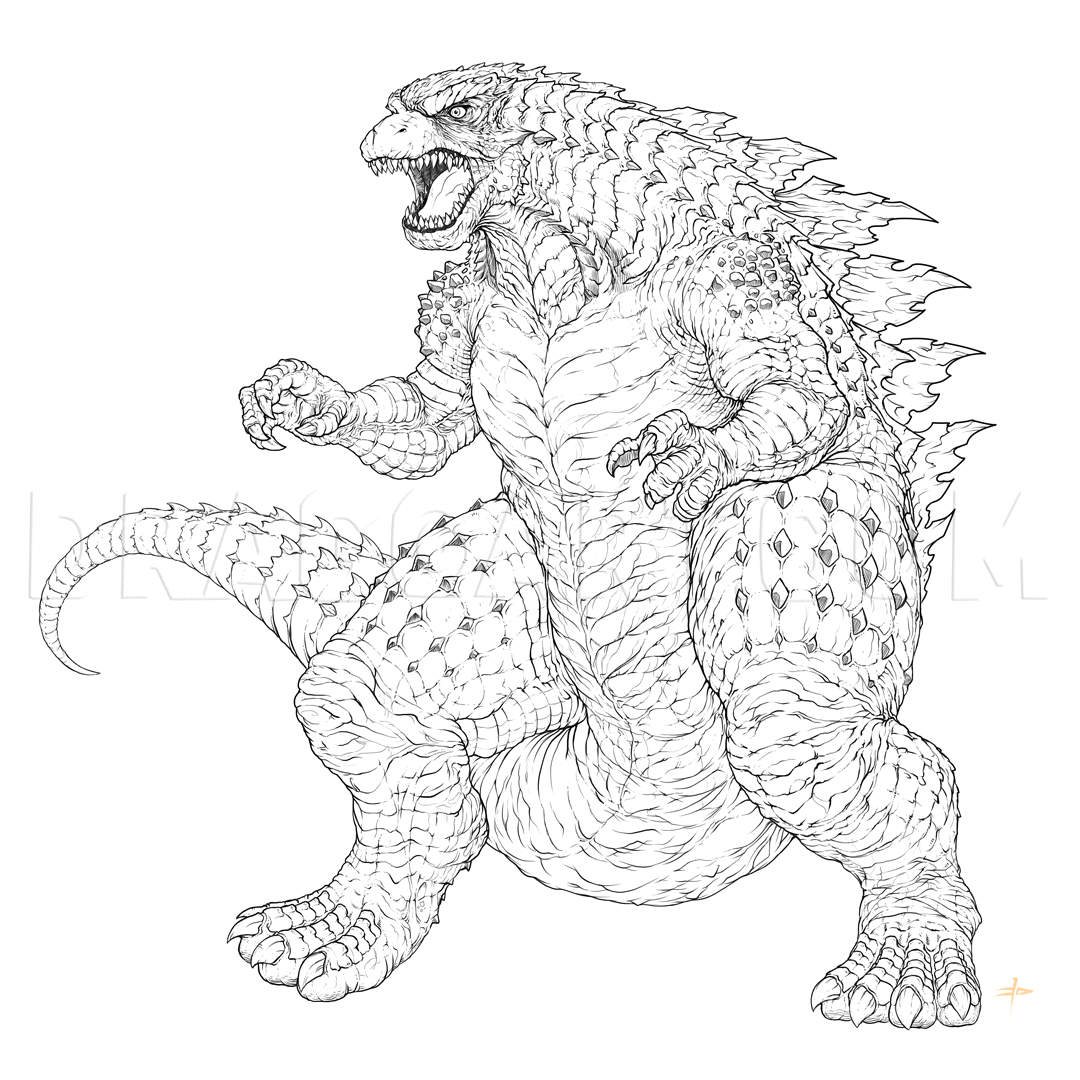
Now let's zoom out and take a look at the entire picture. Man, that's a lot of detail! The bold outline here gives us a nice cartoony look -- especially on the head. If I were to draw this again, I would try to keep the line weight more even around t
24
Here's a more refined take on the line art. Finer lines and detail throughout. Lots of detail on the face and around the eye. Perhaps a little too much. With a drawing this detailed, it's important to make sure the overall shape reads from far away,
Comments 0
Details
May 19, 2014
Description: Godzilla is tearing it up at the box office! Ew, did I just say that? Anyway, I've just completed this Ultra Deluxe tutorial on how to draw the Big G himself.


