2
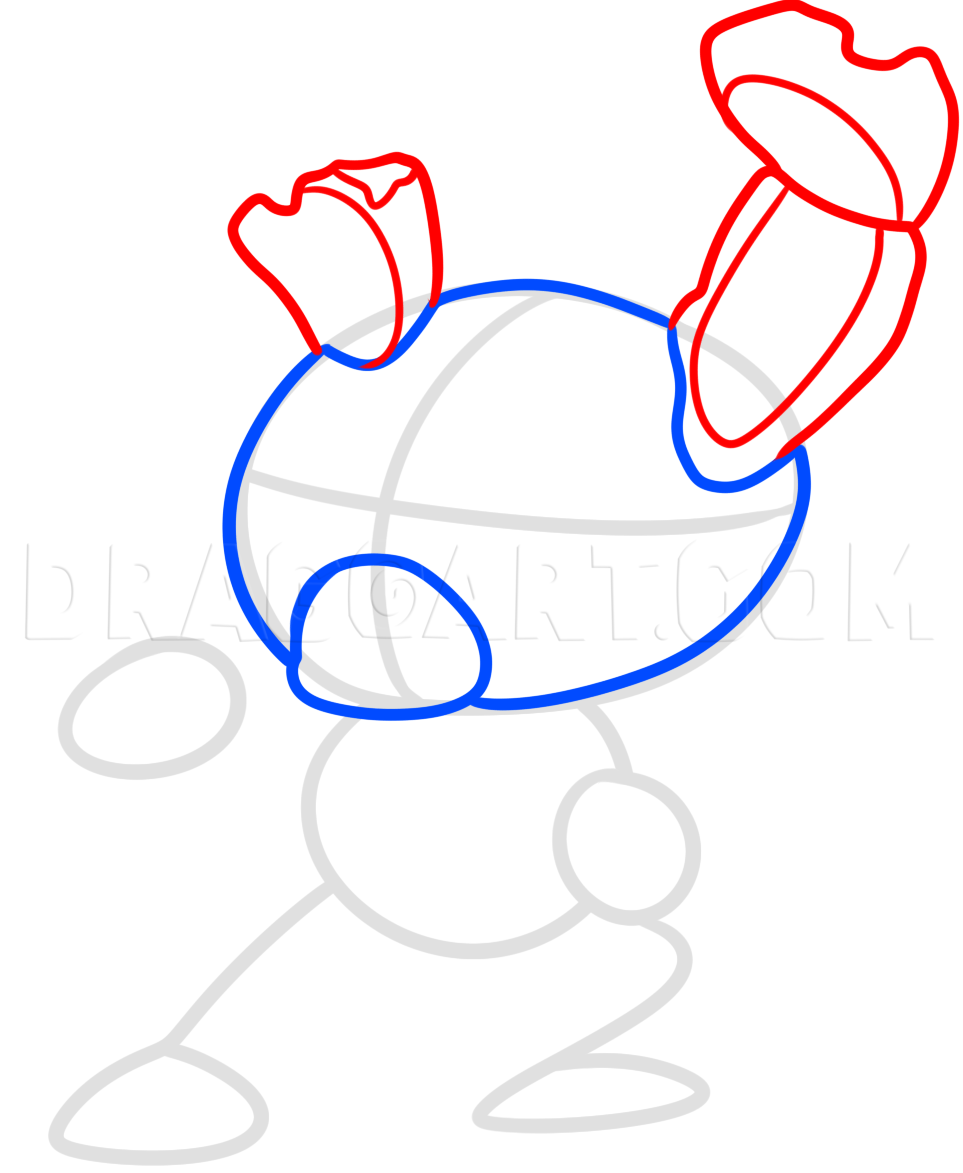
Define the shape of chibi Springtrap's face like so, then draw the shape of the muzzle. Leave gaps on the corners of the head for the base of the ears.
3
Fill those gaps with Springtrap's ears and notice how the left ear is broken and the right ear is full length but chipped at the tip. Add detailing inside the ears, then proceed to step four.
4
Here we will use the facial guidelines to draw the eye shapes, then draw the lining for the ripped lips/mouth opening.
5
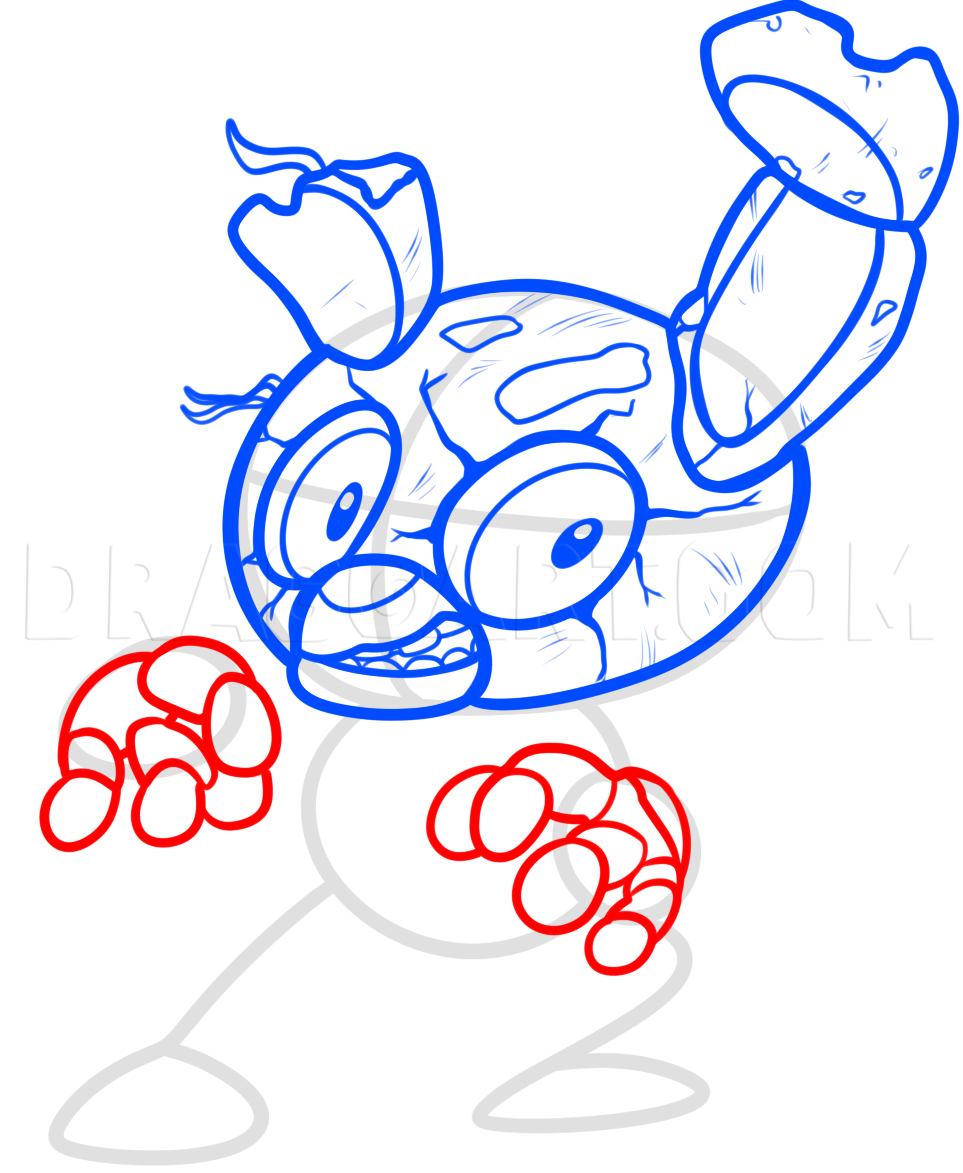
Add depth to the insides of the eyes to make them sunken in. Then draw and color in the pupils. Once that is done you can sketch in all of the texture flaws on the face and head. This should include scratches, tears, rips, holes and even some wires s
6
Let us proceed to drawing the body starting with the clutching hands and fingers. Notice that the fingers are made in layers.
7
Use the body guide to define the shape of the body. You will then draw the arms and then add some small pieces of wire coming from the creases of the joints. Add some detailing to the chest as well.
9
Lastly, finish the legs by drawing the angles and feet. Add detailing to showcase a damaged body with exposed parts. Erase your mistakes and that's it.
Comments 0
Details
March 6, 2015
Description: It looks as though the lesson on Springtrap was a big hit and because of this I went ahead and made another tutorial based on this figure from Five Nights at Freddy's 3. Here is how to draw chibi Springtrap, step by step. I really like the way this drawing came out because it showcases exactly what a villain from the game series looks like. It's not certain yet what Springtrap would like (from what I hear), so it's probably a good idea to expect something different looking in the actual released game. Anyways, enough with the hogwash and time for the lesson. Enjoy yourselves as you tackle this tut on drawing chibi Springtrap.


