

1
First, you may need to practice some anime eyes before you begin. This is how I draw my anime eyes. I start with the outer shape of the eye, thin and plain and only one line.

2
Next I thicken up my lines by adding more lines to the already created shape. Thicken up the upper part and the side, but leave the bottom pretty untouched.

3
From here, we can go a number of different directions. here are some examples of what you can do with your eye shape. Depending on how you wish to express your character, will depend on what goes in the eye shape. Eye shape 1 and 2 and 4 are fairl

4
Once you've chosen what kind of eye you want to work with, you can decide if you need to determine if your head will be turned or head on. To do a turned eye (top) Do a similar, but not exact eye shape that is thinner than the already drawn out eye.

5
As you can see in the first four, eyes can be made expressive by what the rest of the face is doing. I have used the same eyes for these four but the faces look different because of the mouths I gave them. In the last two, you can see that using di
6
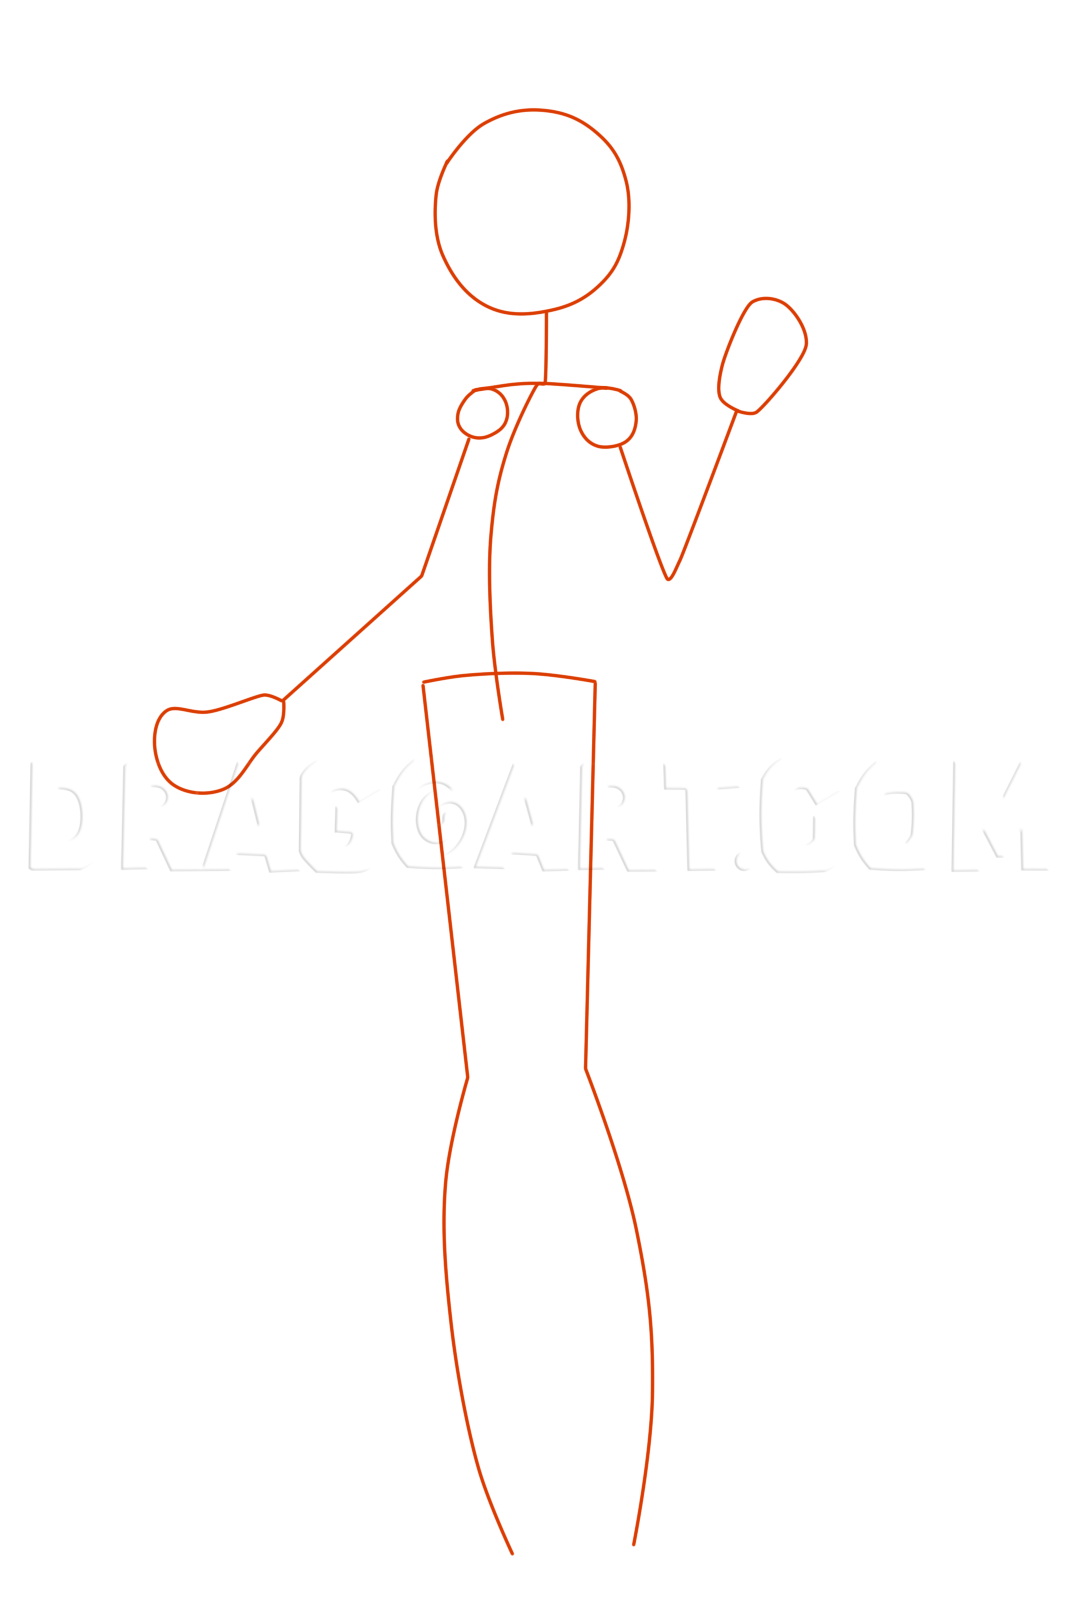
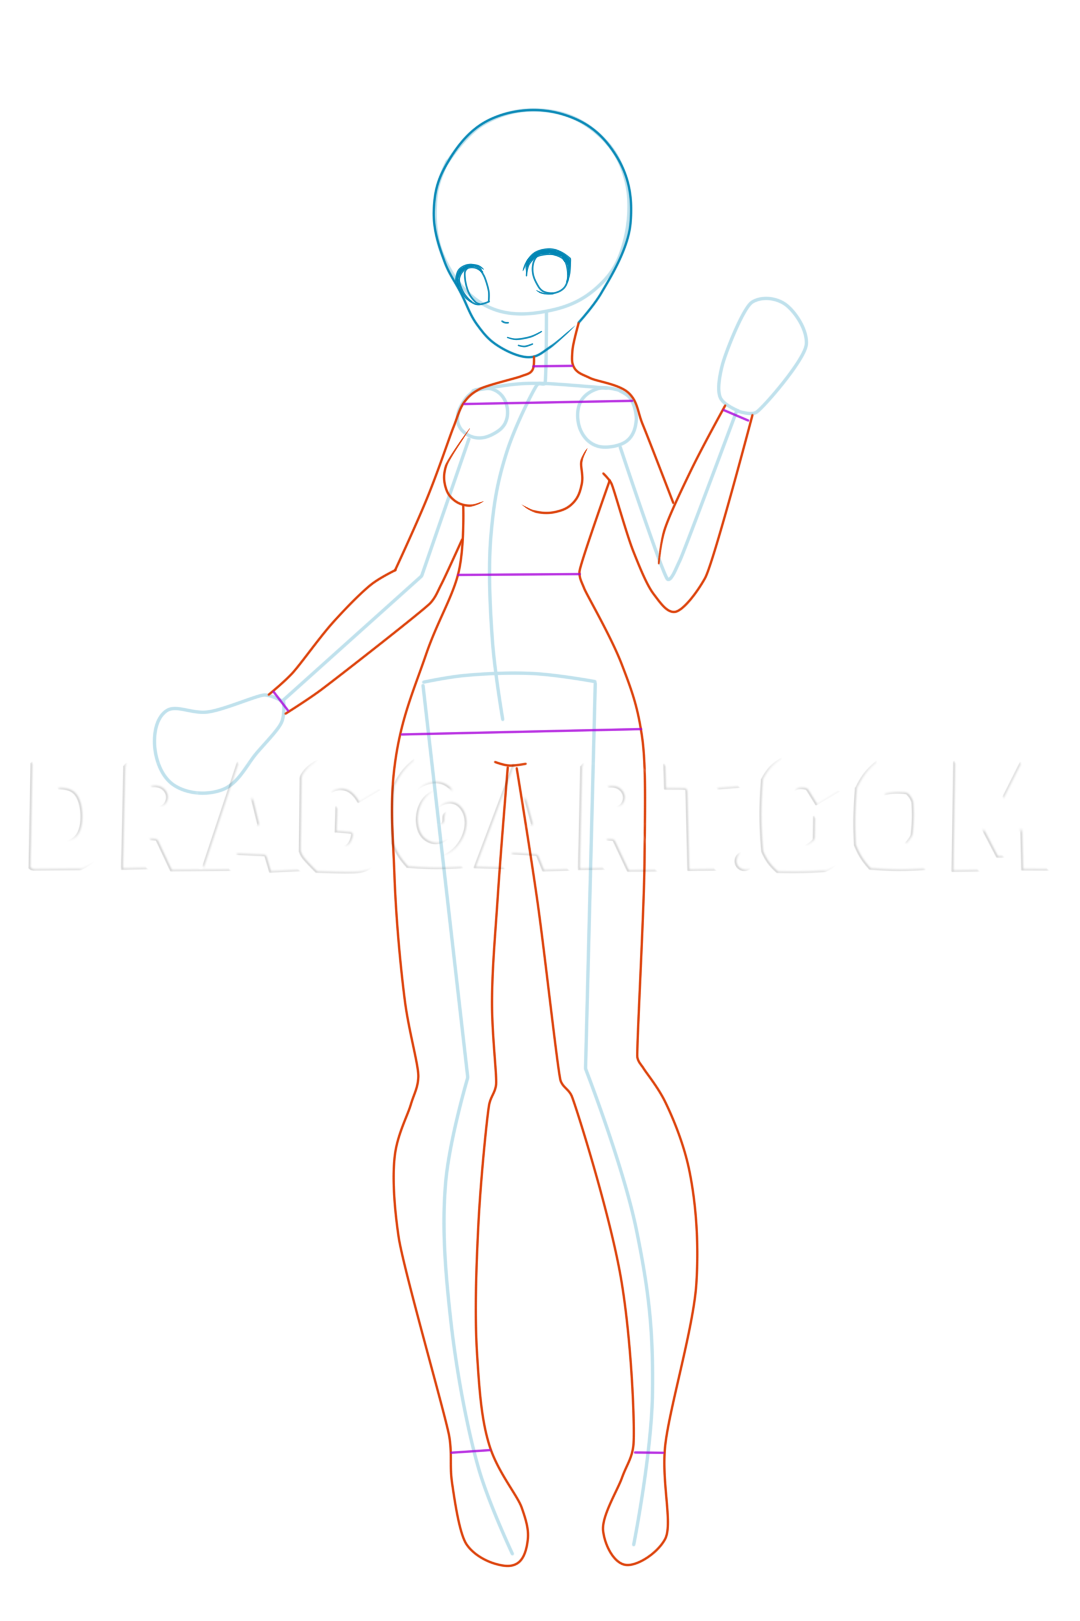
Now that we've done some anime face practicing, lets look at the anime body of the female first. Anime people tend to have really long legs compared to regular people, so when you are drawing your stick figure guide line, make sure your legs are lon
7
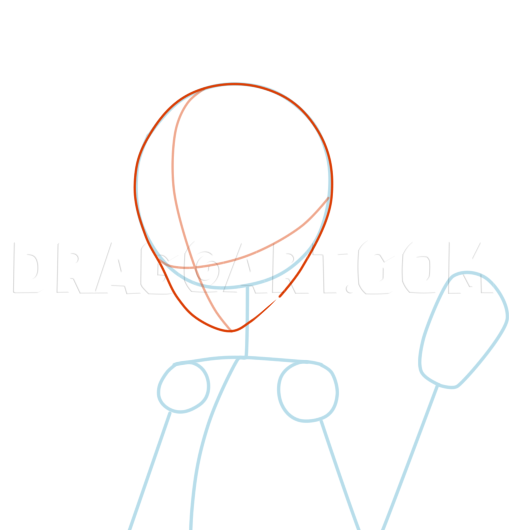
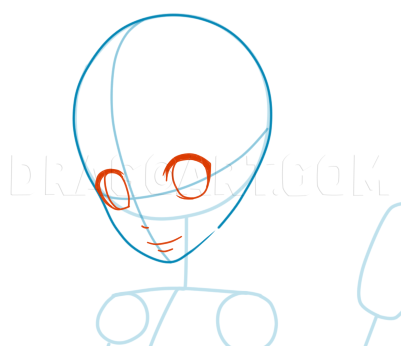
Now, from here we can begin to build our face. This is how you build an anime face the proper way. The guide line circle is the bulk of the head, and then you're going to curve the line out and create your chin. The head should always be able to c

8
Now, remember what you learned with anime eyes! Build the eye shape you want by drawing thin plain lines. Remember to keep the eye that will be furthest away from you thinner than the other to create the turned head effect!
9
Now thicken up the top and side of the eye, leaving the bottom alone and pick what kind of iris you want your anime girl to have. I chose the basic side look with a smile. Draw in a little dash nose and a smile with a smaller smile underneath to sh
10
Now we can start to build the rest of the body. Using your stick figure guide lines, start drawing out the rest of the figure paying specific attention to the purple lined areas. These areas ensure your anime person will look like a female. The wr
11
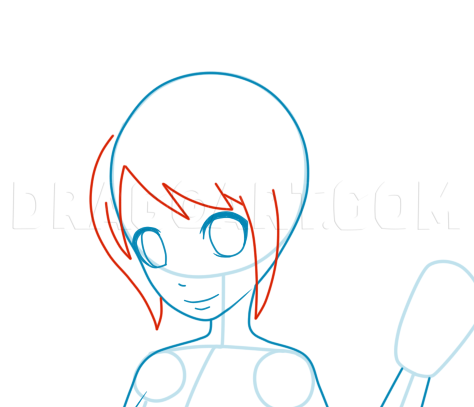
Now that you've built your frame, we can work on the hair! The most common hair styles we see in anime have what is called "ear tails." These are pieces of hair that fall in front of the ear beside the chin to break up and frame the face. Add in s

12
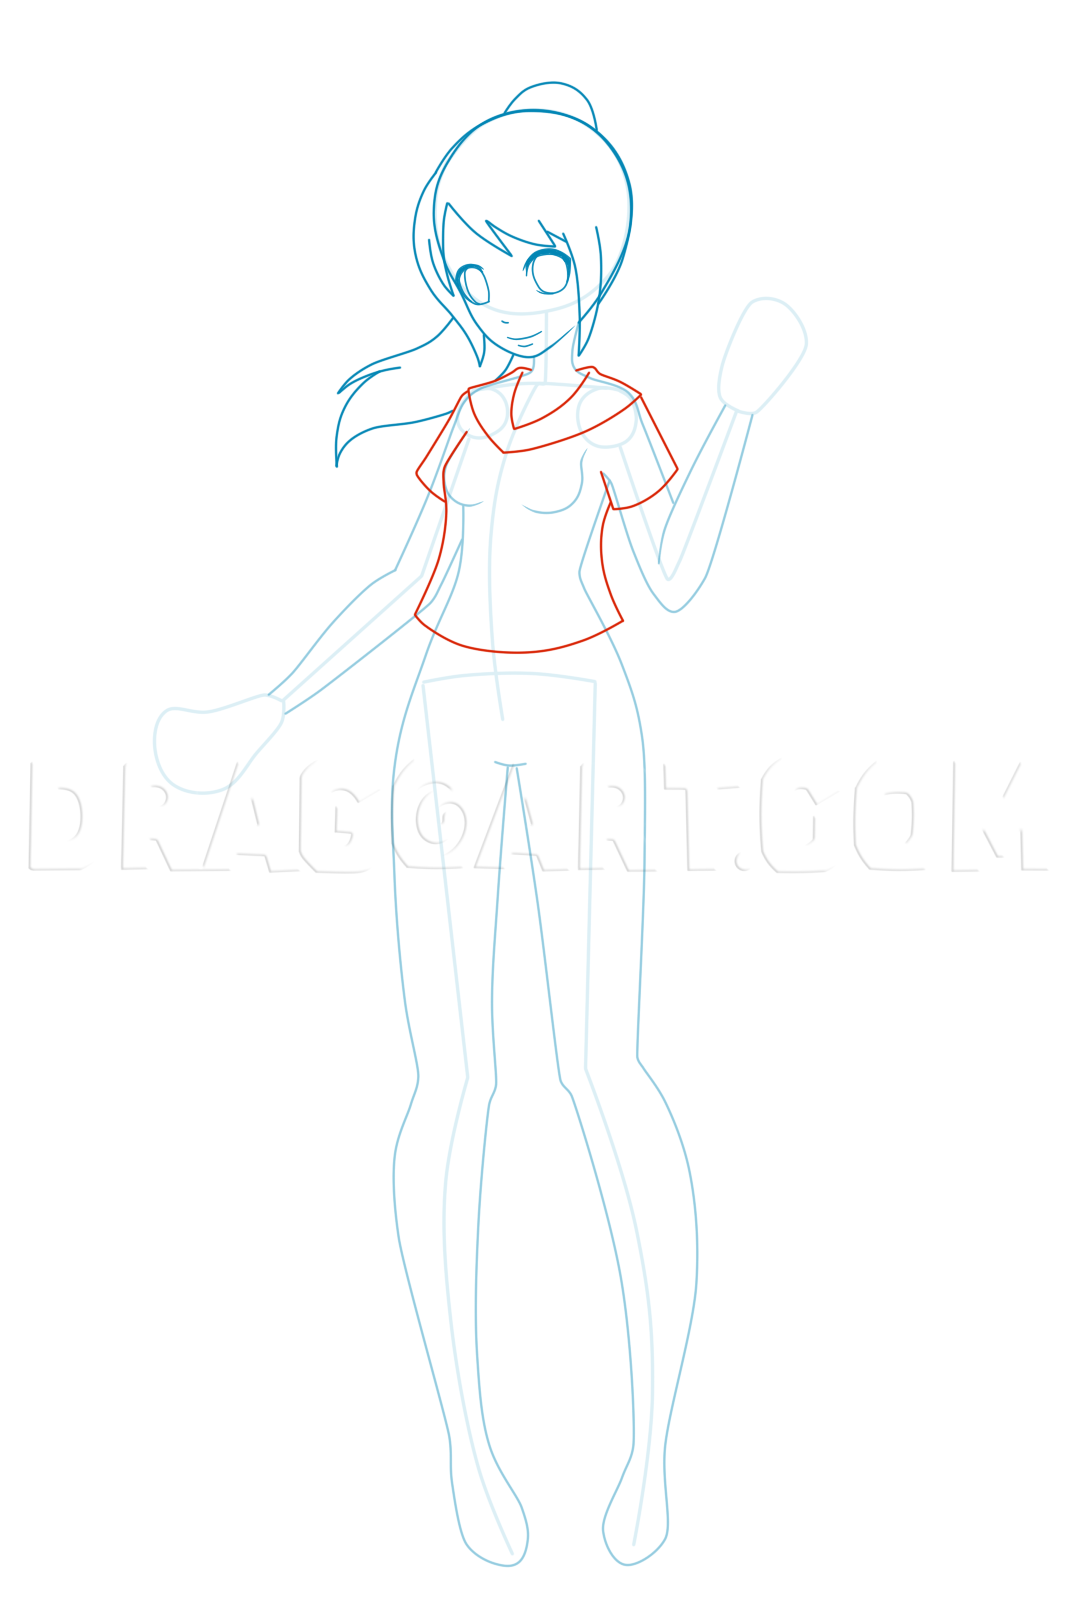
Now connect your bangs to the rest of your head! After that, you can start to draw in her pony tail. Draw a big bump on the back of her head, this will show the bunched upper part of the pony tail. Then draw the rest of the pony tail coming out fo
13
Now to start building her school uniform. Draw in a loose fit shirt that will extend off of her body a whole lot, notice the sleeves and chest part of the shirt aren't touching the body at all. Then draw a V shaped collar. Again, try to draw this

14
Now between the lower point and the upper point of the collar, draw in a rounded rectangle. This serves as the base for her bow. From the rectangle, draw out some upside down bunny ears with a single line through each of them. Now you can draw a l
15
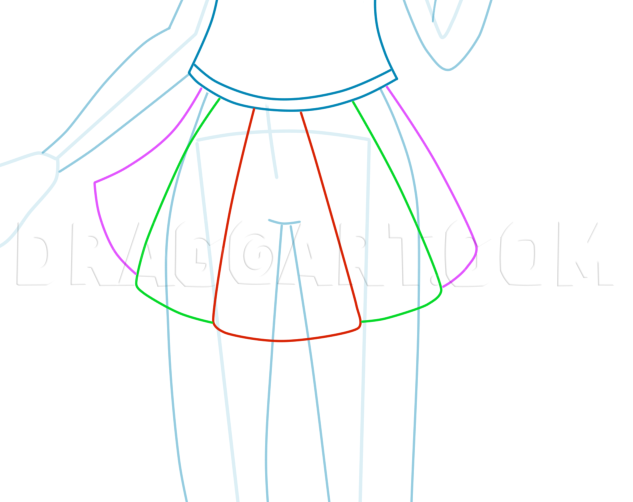
Now for the skirt! I've color coded it to show the order of which to draw the pleats instead of drawing them all at once. Draw the middle one that is colored red first. This will establish how long your skirt will be. Then draw in the two green p

16
Now we need to finish her up by adding in some hands, remember to keep the wrists and hands not too large. Draw in an ear behind the ear tail that is closest too you, draw in some eyebrows and eyelid lines to give her a bit of life. Draw in some kn

17
Now, for boys, they have broader shoulders than females, so make them visibly larger than the head circle when drawing out your stick skeleton. Also, the hand will be a lot bigger than the females, so you can express that now too. The legs are long

18
The male is going to be more head on than the female, so after you draw in your chin, make sure your eyes are close to identical, just flip flopped.

19
Now add detail to your eyes, keeping them a bit thinner than the female eyes and add in your iris for each eye. Add in another dash nose, and another smile and lower lip.

20
Guys tend to be a lot more blocky than females, but there are some key things to keep in mind when drawing the figure. The waist will not dip in like the females and the chest is flat and blocky. The shoulders need to be visibly wider than the head

21
Draw in some spikey bangs (in blue) making sure to not cover up the eyes. Now when drawing the rest of the spikey hair, be sure to not lay it flat against the head or it won't look spikey and fluffy anymore. Pick a focus point and from there, draw o

22
Now for some clothes! His shirt is going to be a lot tighter than the girls shirt, so you can draw the chest part of the shirt closer to his body, but make sure it comes off the body at least a little bit to show that he's IN the shirt instead of par

23
For the first step of the pants, draw out the basic outline. Make sure the pants hang off of his body a lot underneath and just slightly on top. Don't forget his waist band! Next, draw in the details of his pants. Pockets, coin pocket, zipper fla

24
Now you can finish him up by adding in a large hand, a collar to his shirt, an ear, thick eyebrows and eyelines, the spikey edge to the underneath of his bangs and even a little cow lick to the top of his head!
25
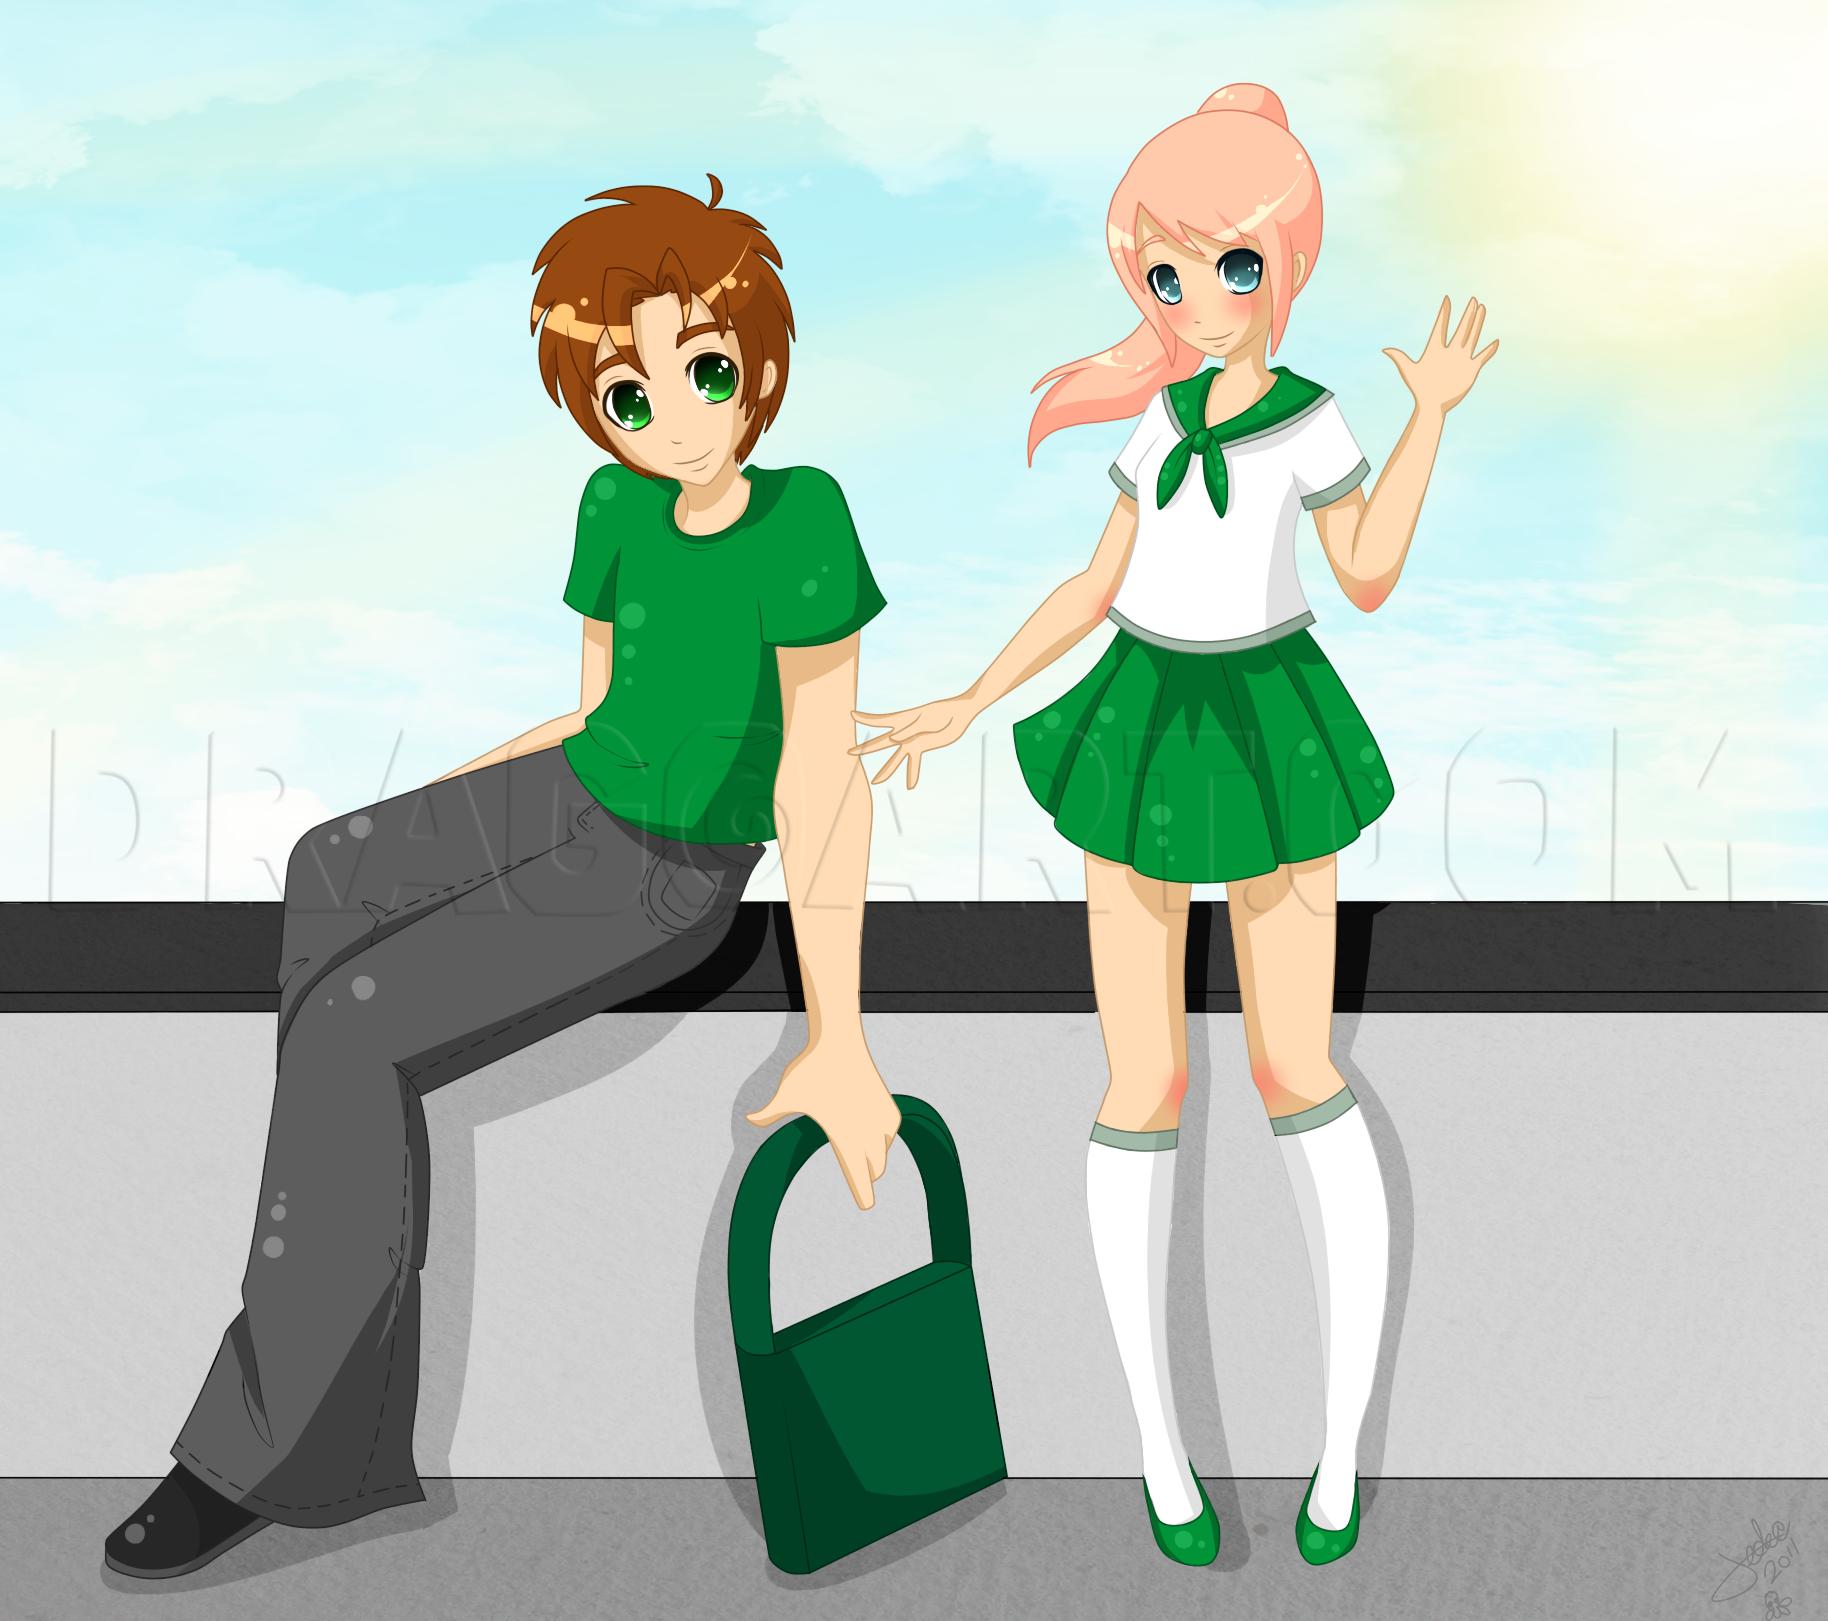
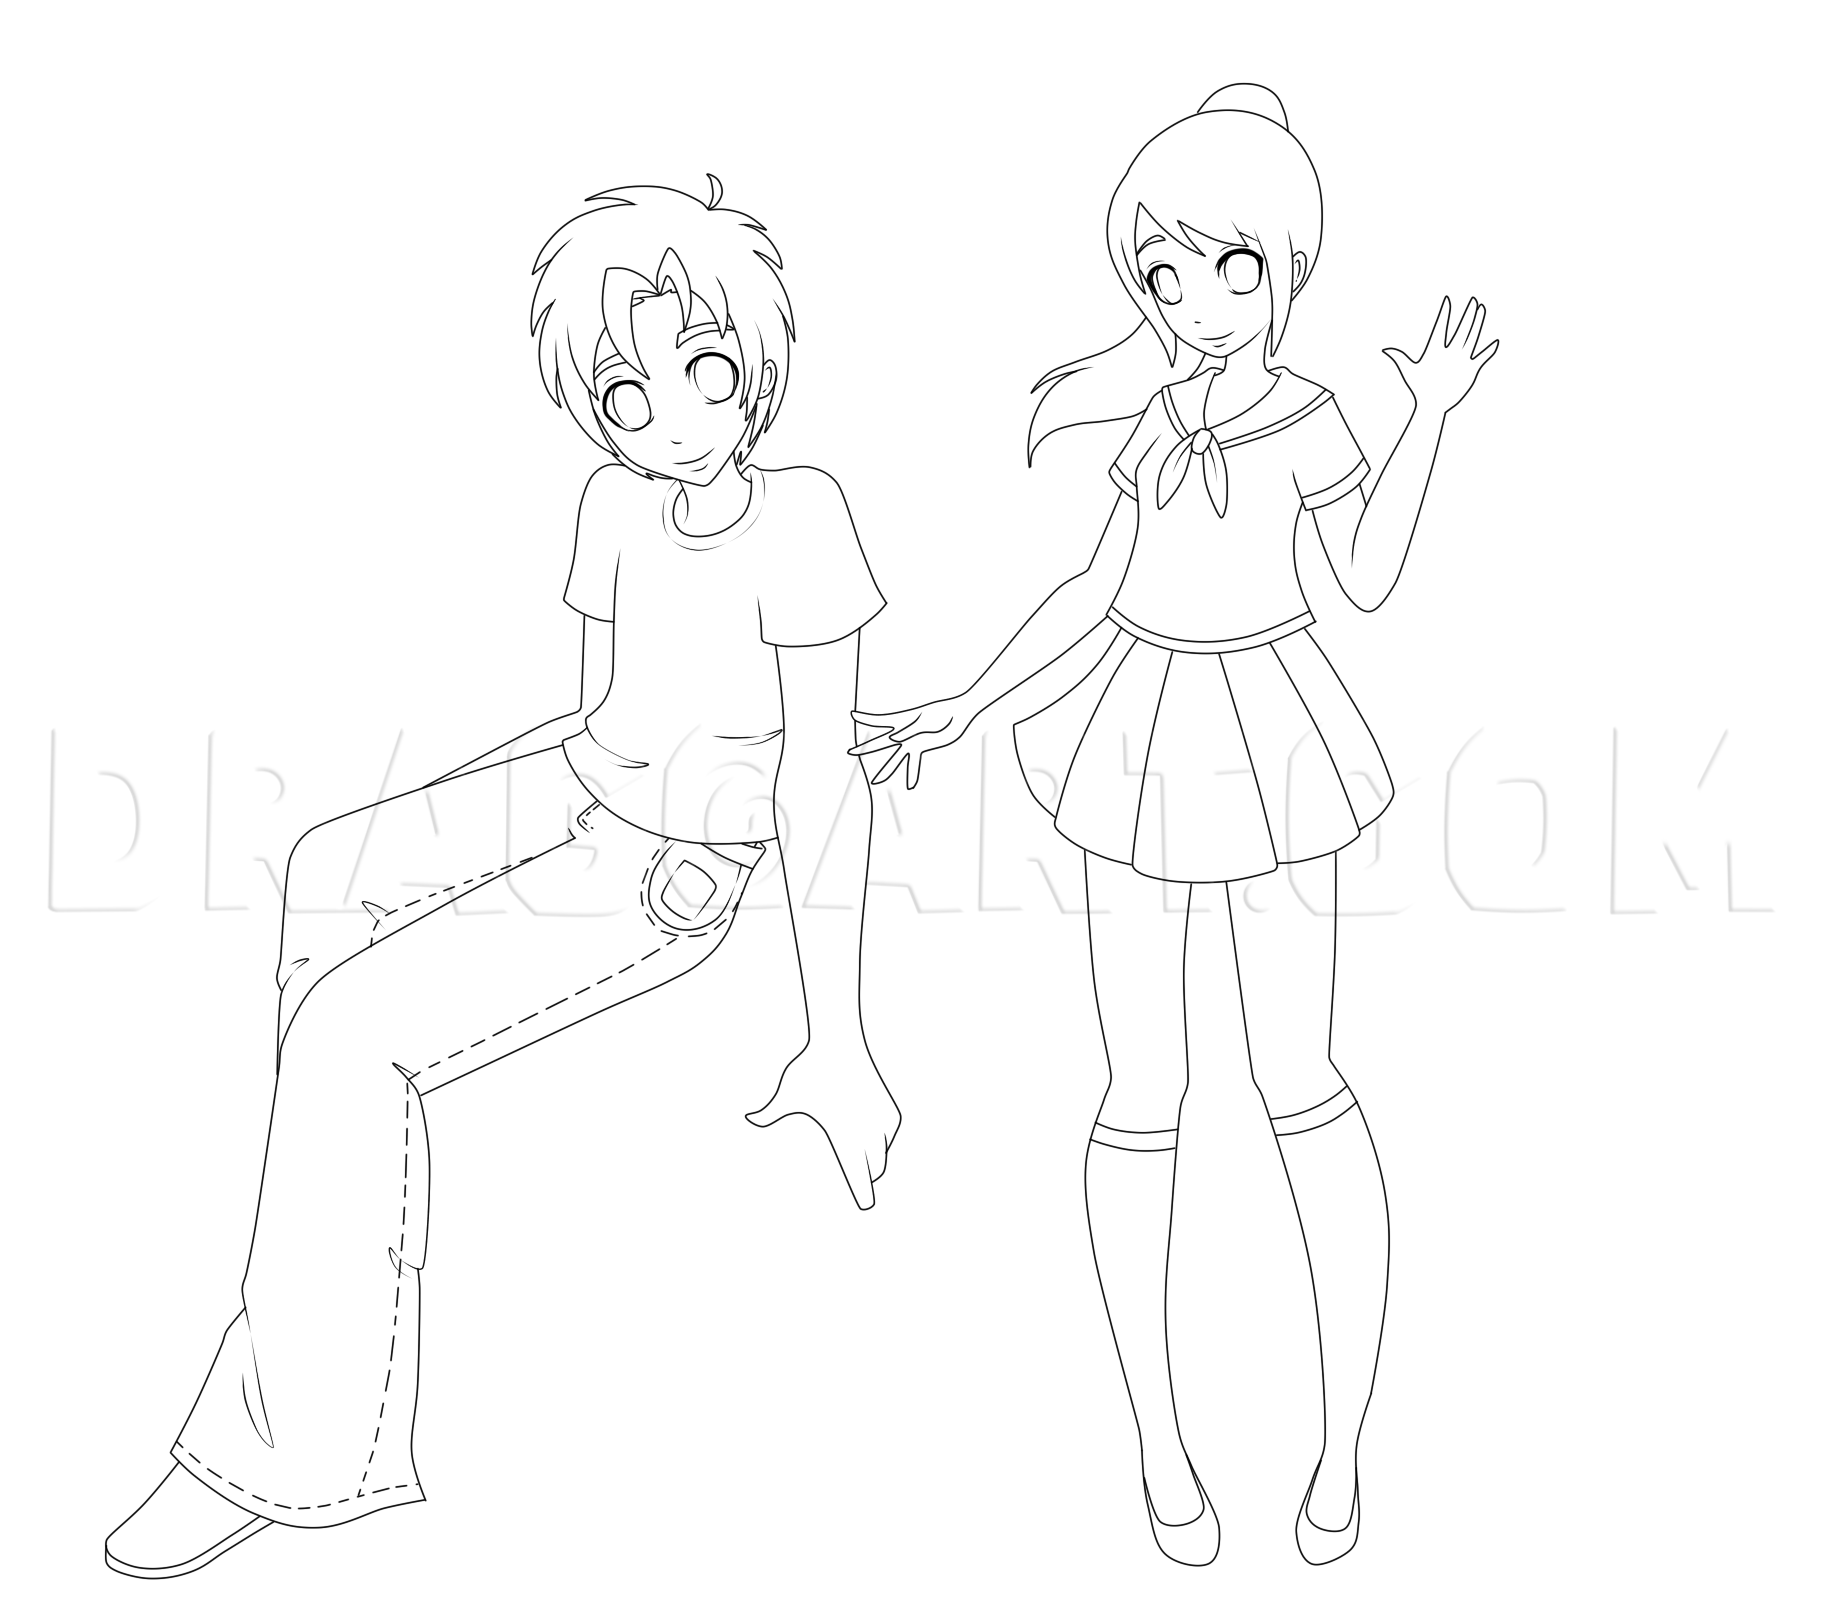
And we're finished! You can either take an individual from this and color them or you can take the both of them and color them together like I have done. I hope you enjoyed the tutorial and happy drawing!
Comments 0
Details
February 2, 2011
Description: Hey ya'll! I love Dawn's new "for kids" tutorials SO MUCH! So I decided to draw up my own "for kids" anime tutorial. Normally my anime characters come out a lot more detailed than this, but since it is a for kids tutorial, I went ahead and left them pretty bare so no one gets overwhelmed. If anyone wants to add more detail to the basics of these guys, I encourage it! I love to see what people do with my tutorials.