


1
Drawing the leaves on trees can vary depending on how much detail you put into it. In this case, I add lots of protruding leaves that detail the overall look of this tree. By adding hints of leaf in certain areas, you'll create a better and realistic

2
These are just two common types of leaves you can use on your trees. Here, there's an Oak, Maple, and a regular leaf. Explore the various types of leaf you can add to your branches.

3
Branches have lots of different sprouts that merge in diverse angles. There are also types of ways to draw the style of the types of branches. Take your time and plan out the directions of the branch.

4
Now, look at the different types of branches you can combo with your tree. There's the 'perky' (which is seen on normal trees); 'blocky' which is seen on large and tall trees (also pretty cool if you mix and match); and lastly, there's 'mixed' which

5
Before you draw the branches of a tree, you have to draw the tree first. Start by making a weird shape for the base of the tree or it's roots. Next, draw the fork like guidelines like you see here.

6
Now you will begin sketching out the first branch of the tree which also includes some smaller branches that we sometimes call twigs when they fall on the ground. There is a total of five fingers on the one big armed branch.

7
Here you will be drawing out the middle branch like so, and this time there is going to be smaller spouts that are scattered on the large limb.

8
Now it's time to draw out the third limb which is mother to a few more branches. Try and draw this limb a bit skinnier then the rest. The next step will take you to another journey.
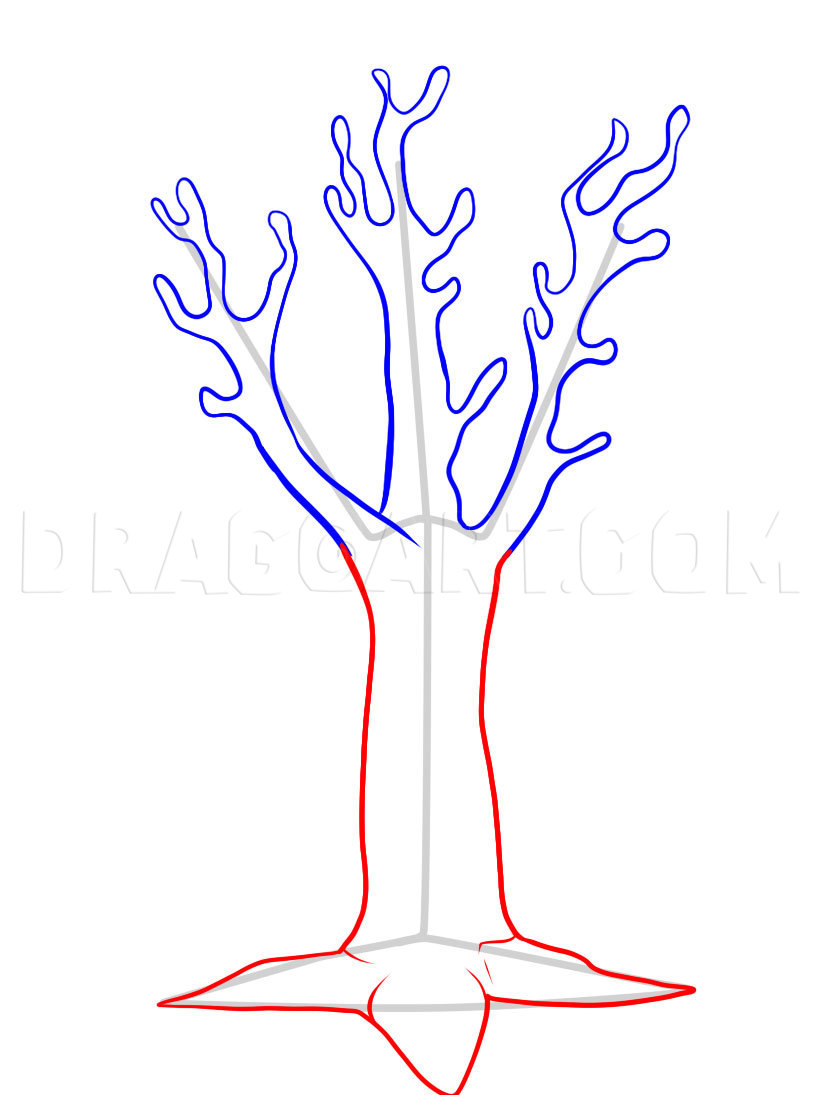
9
Now you are ready to draw out the tree trunk like so. Notice how the root system splits off in three toes. Once that is done you can move to step ten.

10
Now that your limbs branches, and trunk is all drawn out, you only have to sketch in the detailing of the tree which is the bark. Take your time, and you should move along nicely.

11
You are now ready to sketch out the entire tree bush which is just a bunch of leaves scrunched together. Erase your lines and shapes that you drew in step one and move along.

12
Here is what your tree looks like when you are all done. Now you can color it in, and be on your merry way. I hope you use your tree and branches in a drawing that you plan on drawing. Thanks a bunch guys!
Comments 0
Details
January 19, 2011
Description: You guys know that I love uploading lessons that can be very helpful to novice artists or even some intermediate artists too. Today I will be showing you "how to draw branches", step by step. With this lesson, there is going to be some helpful tips and tricks that will enable you to go the distance when learning to draw tree branches. I didn't have a lot of time to sketch out the branches and tree, and that is mainly the reason why the tree looks a bit cartoony. No matter what you should enjoy this lesson even if it is a bit boring from being a tree and all. I have one more lesson coming your way so stay tuned in folks to see what it will be. Maybe I will surprise you all and do a gangster character that was requested by a few members. See you guys later, and don’t forget to use this lesson on how to draw branches. Adios mi amigos!


