1
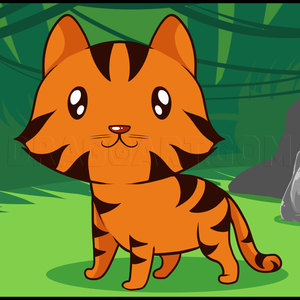
Start by drawing two shapes, one big round circle for the head, and then a small egg like shape for the body. Add in the guidelines for the face.
2
Now that the two body parts are drawn out, you can start sketching out the shape of the tigers head starting at the top, and then draw the ears, fluffy cheeks, and jaw.
3
Using the guidelines you drew in step one for the face, draw out two oblong shapes for the eyes, and color them in. Next, draw out the nose, and mouth or lips.
4
Now you will thicken the lining for the body like so, and then draw out the chest to create a neck line for your tiger.
5
You will now finish drawing out the body by adding the rest of the chest, and drawing out the front and back legs. Don't forget to give this tiger a tail.
6
What you have to do now is draw out the thick tiger stripes on the body like so, and then move to step seven so you can color in those bold stripes.
7
Like I said in step six, color in those thick bold stripes. When that is done you can draw in a few whiskers, and then erase the lines and shapes that you drew in step one to clean up your big cat.
Comments 0
Details
January 26, 2011
Description: Now it’s time I teach you all "how to draw a tiger for kids", step by step. I wanted to make this tiger look a little like the lion for kids I drew a few days ago, but the idea didn’t pan out right for some reason. I’m trying to get all of the popular animals uploaded because that is what I keep getting requests for. When drawing this tiger, I think you will find that you are going to be able to make two or three tigers in a group because the tutorial is that easy. As you learn from this lesson, I want you guys to remember what it was like trying to draw a tiger starting from scratch before. Now all you have to do is follow the steps, and read the instructions. Have fun people, and don’t forget to let me know what else you would like to see.


