1
First thing you need to know are the basic shapes that you use to to create a head. Every head starts off with a circle and depending on what type of character you're drawing, the angles and overall shape changes. Youth heads are very round, the chin
2
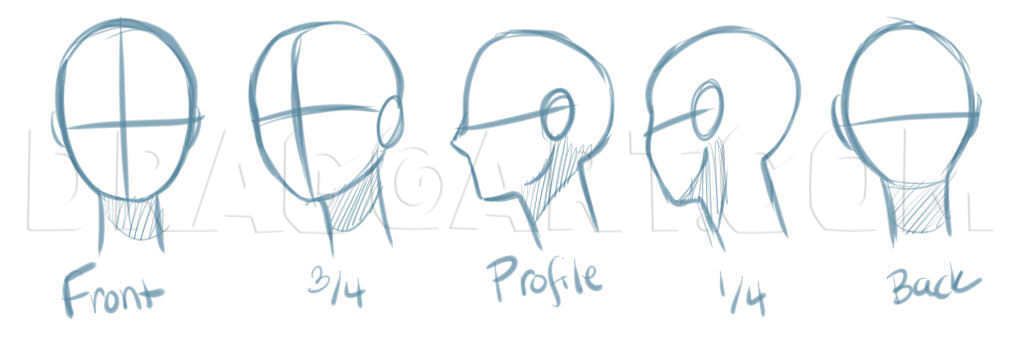
You can draw your head from several different views. From the front or a straight on view. A 3/4 view is when the head is only slightly turned to the side. Profile is when the head is turned completely to the side. 1/4 view is when we're only getting
3
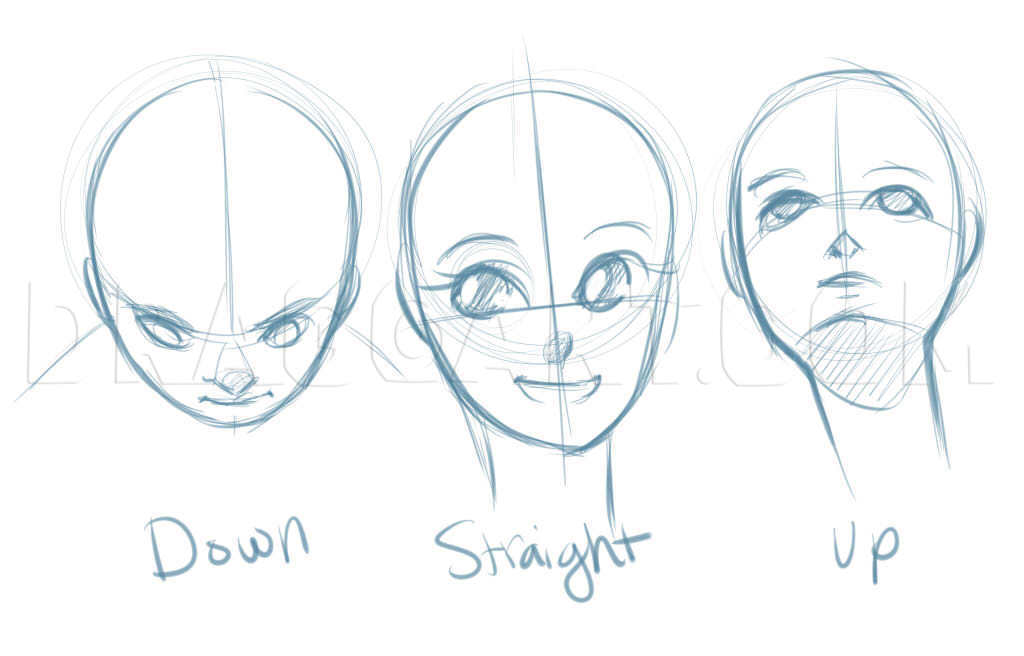
Your head can also be tilted up or down. When looking either down at a head or if the person is looking down, the face will appear shorter. The eyebrows will hood the eyes and come a bit closer to them and you will see the top of the nose and see how
4
Defining the shape of the face is also something you might want to do, though you have the option to have just straight lines for the sides of your face. Usually though you want to show where the cheeks differ from the forehead. You'll want to bring
5
You should also know how to lay hair on your head, unless your character is bald in which case you don't need to know this step so much (this also goes for buzz cuts.) Hair needs to have volume and come up off the head a bit. You can't have your hair
6
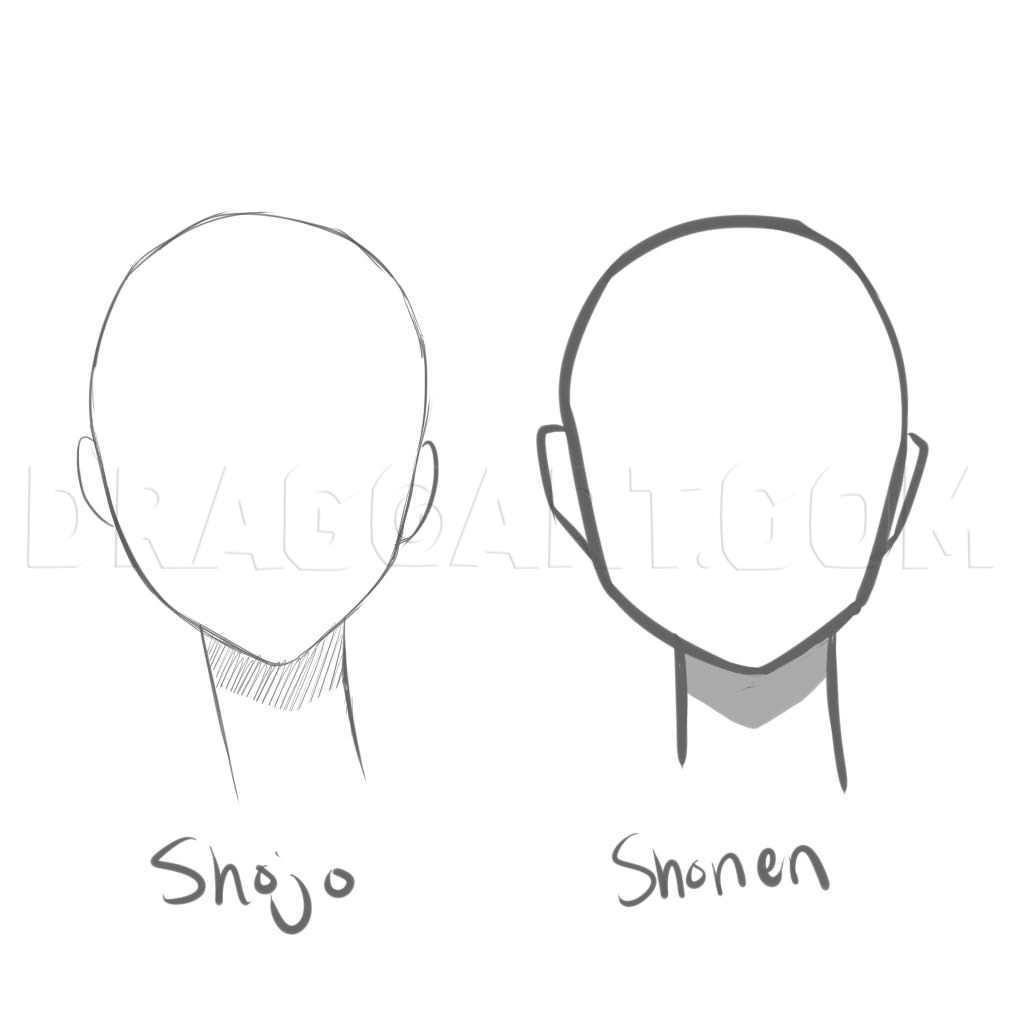
Now just decide on a style. If you want smooth more curving lines and more finer details, you'll probably want to go with more of a shojo style (Shojo is the name for manga normally made for girls). If you want fast and bold lines, go with shonen (Sh
7
Now we can get started. Like I said earlier, all heads start with a circle. We'll also bring down a line for the neck and bring a line across for the shoulders. We'll also draw a line across the face, curving it up as well as bring a line down where
8
Will start with the side of the head on the opposite side of our ear. We'll draw a line coming down and going in around the line going across before bringing back out and down to the chin. We'll bring it in and then then bring it down for the neck. W
9
We'll draw the shape of the ear on the other side and we'll draw where the back of the head connects to the neck, doing the same as we did in the last step, bringing it in and down again, as well as bringing a line out for the shoulders.
10
We'll start the eyes next, drawing the top and the bottom lids. The top lids should be a lot thicker than the bottom and will normally have eyelashes if you're drawing a girl. A little line just above will show the crease between your eyelid and you
11
We'll draw ovals for the pupils and do hatching for shading in the eye, going from thicker to thinner at an angle. You can either erase or use white out or white paint for the eye highlights, and you may opt to save that part for after you've colored
12
Mouth and nose next. Just a little line is all you need to define the nose in a manga face. And the mouth here is open. The lines wont completely connect at the bottom either but the mouth will still be defined when you go to color your image.
13
Now for all the other details of the face. We'll draw a quick curving line over each eye for our eyebrows, some short lines under for the cheek (normally showing a bit of a blush) and we'll draw in the details of the ear.
14
We'll use more hatching for the shadow under the chin and some shading near the eye closest to the side of the face.
17
We'll bring her hair back and up, tying it off and getting ready to draw a ponytail. A few strands near the back of the neck wont be quite long enough and stick out.
18
And then her pony tail, drawing in the curves and some of the strands once again like we did for the bangs.
Comments 0
Details
March 4, 2013
Description: Back again with some manga themed tutorials just for you. And to start us off, we've got how to draw manga heads. I'll go through everything you need to know about drawing a manga head in just a few simple tips and then I'll actually show you how to go about drawing your own.


