1
Ok, let's start by drawing some guide lines. Draw an S-curve for the body with a ball on top for the head. Then draw some long sticks for the bird wings. Each wing has and extra claw coming off the top. Draw a large oval under each wing, close to the
2
Let's start the line art with the head. Draw a pair of circles for Laserbeak's big, googly eyes. Add a beak beneath those. Then draw in the fangs of the lower jaw.
3
Draw a half-circle inside each eye, with a pupil inside that. Draw the inner edge of the lower jaw/beak, and add a tongue just to give the shape some dimension. Add a pair of teeth on both sides of the upper beak.
4
Next draw the long tube of the neck.
5
I've simplified the pattern on Laserbeak's neck a bit. If you turn your head to the side, you'll see I've simply wrapped H-shapes around the neck, with the crossbars in the center.
6
Draw a spiky protrusion at every point where the pattern meets the outer edge of the neck.
7
This chest shape is fairly complex. The most important parts are the diamond shape in the center and the "ribs" on either side. You can fill the space in between with tech patterns.
8
Here we want to repeat the rib shapes down the length of the body. Use curves to split up the sections of the torso.
9
Now we'll fill in the stomach panels with some tech pattern.
10
Draw a blocky shape for the thighs, a triangle shape for the knees, and then draw the blocky calves. Laserbeak's legs are bent, close to his body.
11
Draw a wedge shape for each foot. The feet kind of merge with the tail, here. It's interesting... or maybe just weird. Draw a circle for each kneecap, and sketch in some panel lines before we move on.
12
Here we want to draw a shape that resembles Step 7. From the bottom tip, draw the center line of the tail curving along the guide line.
13
Now draw in the sharp panels of the tail. As the angle changes, one side of the tail disappears and we see the entirety of the other side.
14
Draw a crossbar to cap off the end of the tail. Add two claws on the top and bottom of the bar, and draw small spikes along both sides of the tail.
15
Moving upward, draw the drum-shape of the left turbine.
16
Now for a fun step. Draw a spot in the center of the turbine, and draw thick, triangular marks swirling from the outer rim toward the center.
17
Ok, now we need to draw this chicken wing. Starting from the "shoulder" area, draw pointy shapes outward, along the length of the arm. Each section should correspond to the parts of a normal arm (bicep, forearm, wrist, etc).
18
Now draw in some detail on the arm "bones." Use long, flowing lines here. The outer-most part of the wing splits open at two points, so we'll see between two sections of bone there.
19
For this step we'll draw the four longest feathers at the end of the wing. These are, of course, metal... so we're basically drawing rectangular-ish blades. Have the feathers begin at the "wrist" area by the claw and fan outward from there.
20
The neck section really shows the overlapping of feathers. These feathers are quite a bit shorter and have a different shape than the previous set. Same basic idea, though. Use very straight lines to achieve the mechanical look to these blades/panels
21
Here we can flesh out the wing a bit by adding the tips of feather behind the previous set, and poking out behind the turbine.
22
Repeat steps 15 through 21 to complete the second wing.
23
I nearly forgot to add these quills that project from Laserbeak's hindquarters. Some of these will come from behind his legs, and will overlap the tail. You can either white the shapes out on the inside, erase the areas before drawing, or simply fill
24
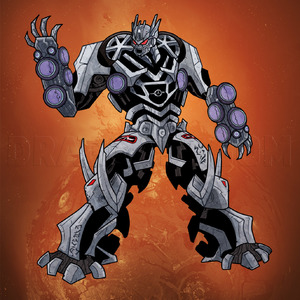
And there we have it. Laserbeak in all his glory. I still can't get used to those goofy-looking eyes, though. Why couldn't he look more like the old Laserbeak who transformed into a giant cassette tape? ;) Anyway, I hope you enjoyed this tutorial. Le
Comments 0
Details
August 9, 2011
Description: Hey guys. Here's the next Bayformers robot tutorial. After finally seeing Dark of the Moon, I was really surprised at how much screen time Laserbeak got. He really stole the show in some respects. Anyway, since I just did Soundwave, it only makes sense to draw up his minion, Laserbeak. "SOUNDWAVE! Play back Laserbeaks findings!"