


1
For this drawing I used a 4H pencil for light shading/line, a B pencil for general shading/lines, and an 8b pencil for rough shading/background shading. The 8B pencil is a personal preference of mine; a 6B or 4B pencil can get the job done as well.

2
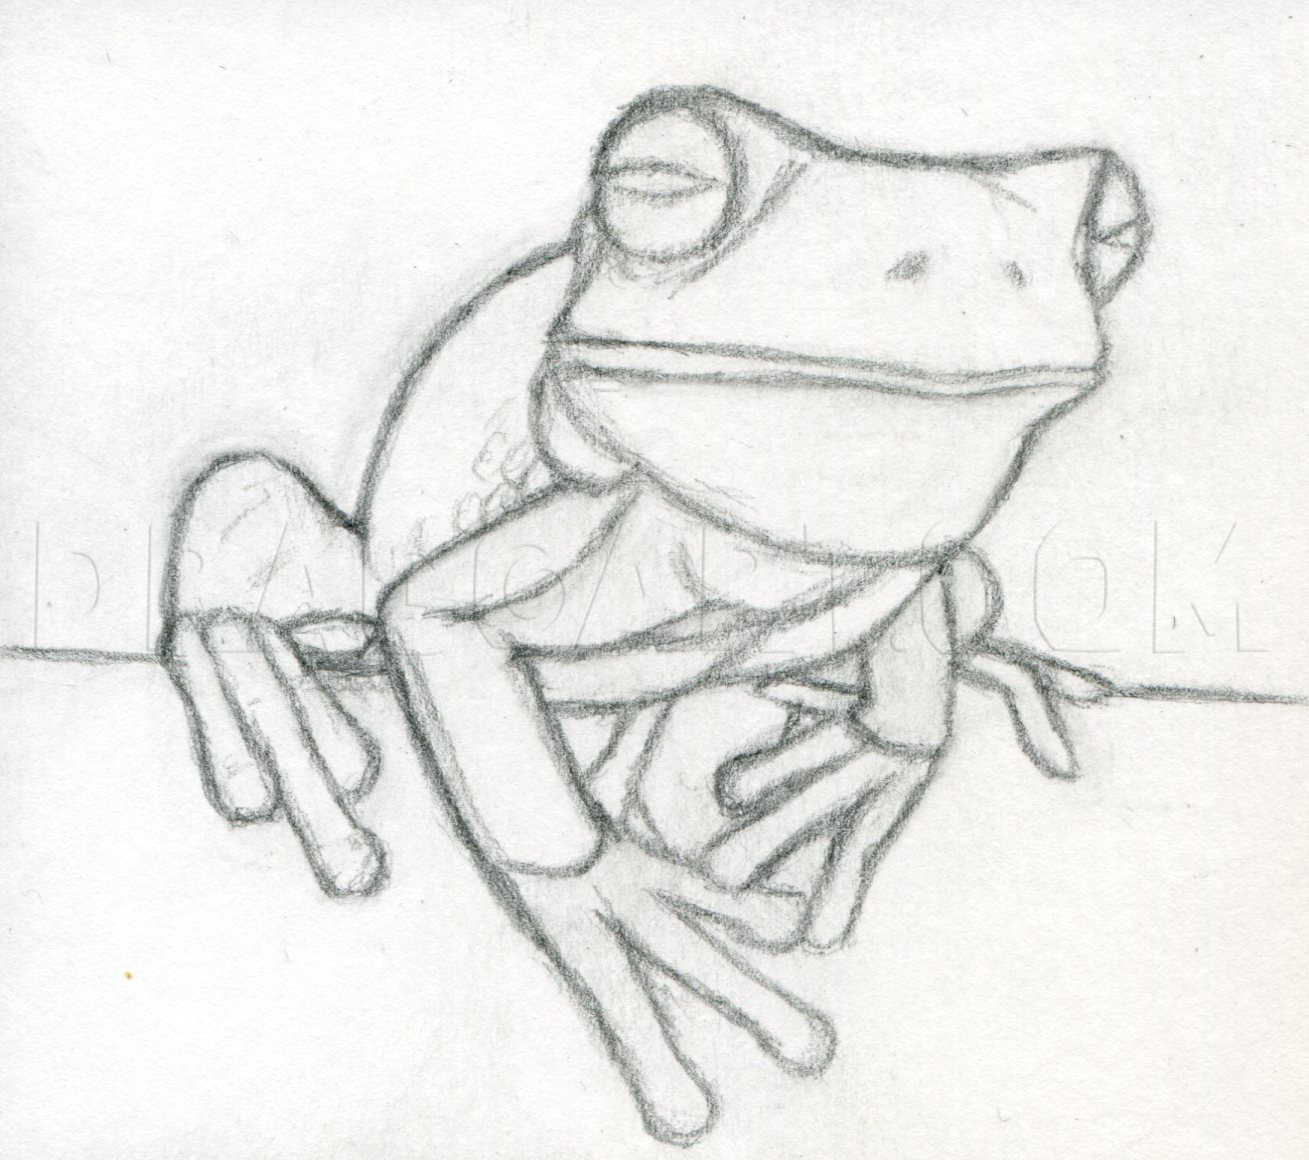
First thing is first, start out with a very basic sketch of the frog. Try to build your sketch with basic shapes: circles, ovals, triangles, rectangles. Since the frog’s form is so rounded I stuck with basic round shapes for my sketch. I always fin

3
Start defining your forms using the same pencil. Make your lines a bit bolder. Start with the head and work your way down. Right now you should only be worried about defining features (eyes, nostrils, lips), don’t add any shading yet.

4
Define the frog’s left legs and pectoral area. Again don’t get caught up in detail just yet.

5
Define the frog’s other front leg. Remember this leg will appear larger than the other due to perspective; objects on the closer side always appear larger.
6
Now define the back and hind leg. I shaved the back down a bit to keep my frog from looking like Quasimodo. If you see anything wonky on your sketch at this point erase it and fix it!

7
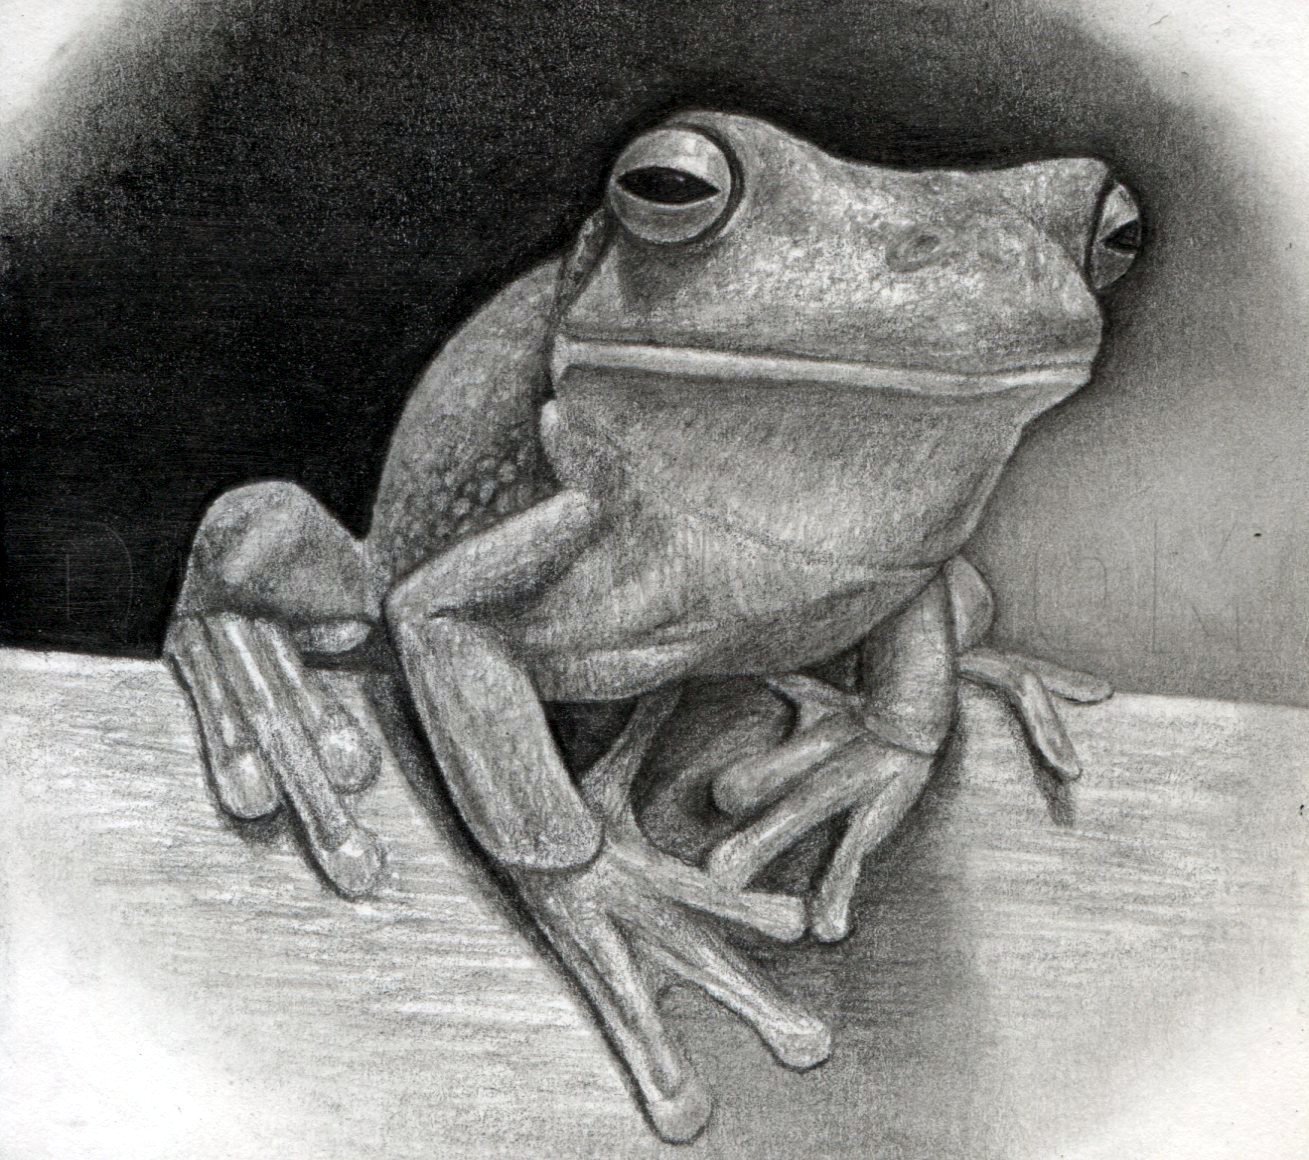
Here I used an 8b pencil to roughly shade in the background and the wood that the frog is chilling on. Play close attention to line direction here. It doesn’t matter so much for the background but make sure that your lines run parallel with the woo

8
Now I used the same 8B pencil to roughly shade in the frog’s head and the surrounding background. You want to make sure that your shading is very light. This layer is meant to be built upon. You should be able to easily shade over, erase, and blend

9
This step looks like a hug jump but it really isn’t. Start out by defining the head’s outline with a B pencil then building up the background with an 8B pencil. I started by detailing the frog’s eyes. Start by using a B pencil on the darkest li

10
Now use an 8B pencil to roughly shade in the bottom right quadrant of the drawing. Build up on the wood, background, frog legs, and pectoral area.

11
Use a 4H pencil to define the legs and pectoral area a bit. Instead of pressing down too hard with the 4H to create dark values, try switching to the B pencil and shading lightly. Don’t forget the shadows! As for the wood, start hinting at the shad

12
Use an 8B pencil to roughly shade in the front leg and rear foot. Build up on the wood as well.

13
Build up your shading a bit using 4H and B pencils again. Pay attention to where your shadows are as well. Don’t go into too much detail with your shading just yet.

14
Build up your background using your softest pencil. This is the main reason why I chose an 8B pencil for this drawing. I wanted to have a very dark value in the background to make the frog pop out a bit more. You can also use the same pencil to rough
15
Hear I build up my shading on the frog’s back and hind leg using B and 4H pencils. Do your best to emulate the bumpy texture on the frog’s side.

16
Now it’s time for finishing touches. Figure out if where you want to start from and work from there. I started by defining the outlines of the frog’s legs and its shadow. I then used a 4H pencil to build up my wood some more. You can use a B penc
Comments 0
Details
June 6, 2012
Description: Hey guys, here’s a tutorial on how to draw a white-lipped tree frog; the largest type of tree frog. This drawing made me realize that I’ve been neglecting amphibians and reptiles. I’ll definitely be drawing more slimy and scaly creatures as the year progresses!


