How to Draw a Realistic Seahorse, Spiny Seahorse
1
Start off by picking your pencils. You could effectively follow along with this tutorial with just about any pencil or combination of pencils. I used a 3H pencil for sketching, light shading, and details and a 3B pencil for dark/textured shading.
2
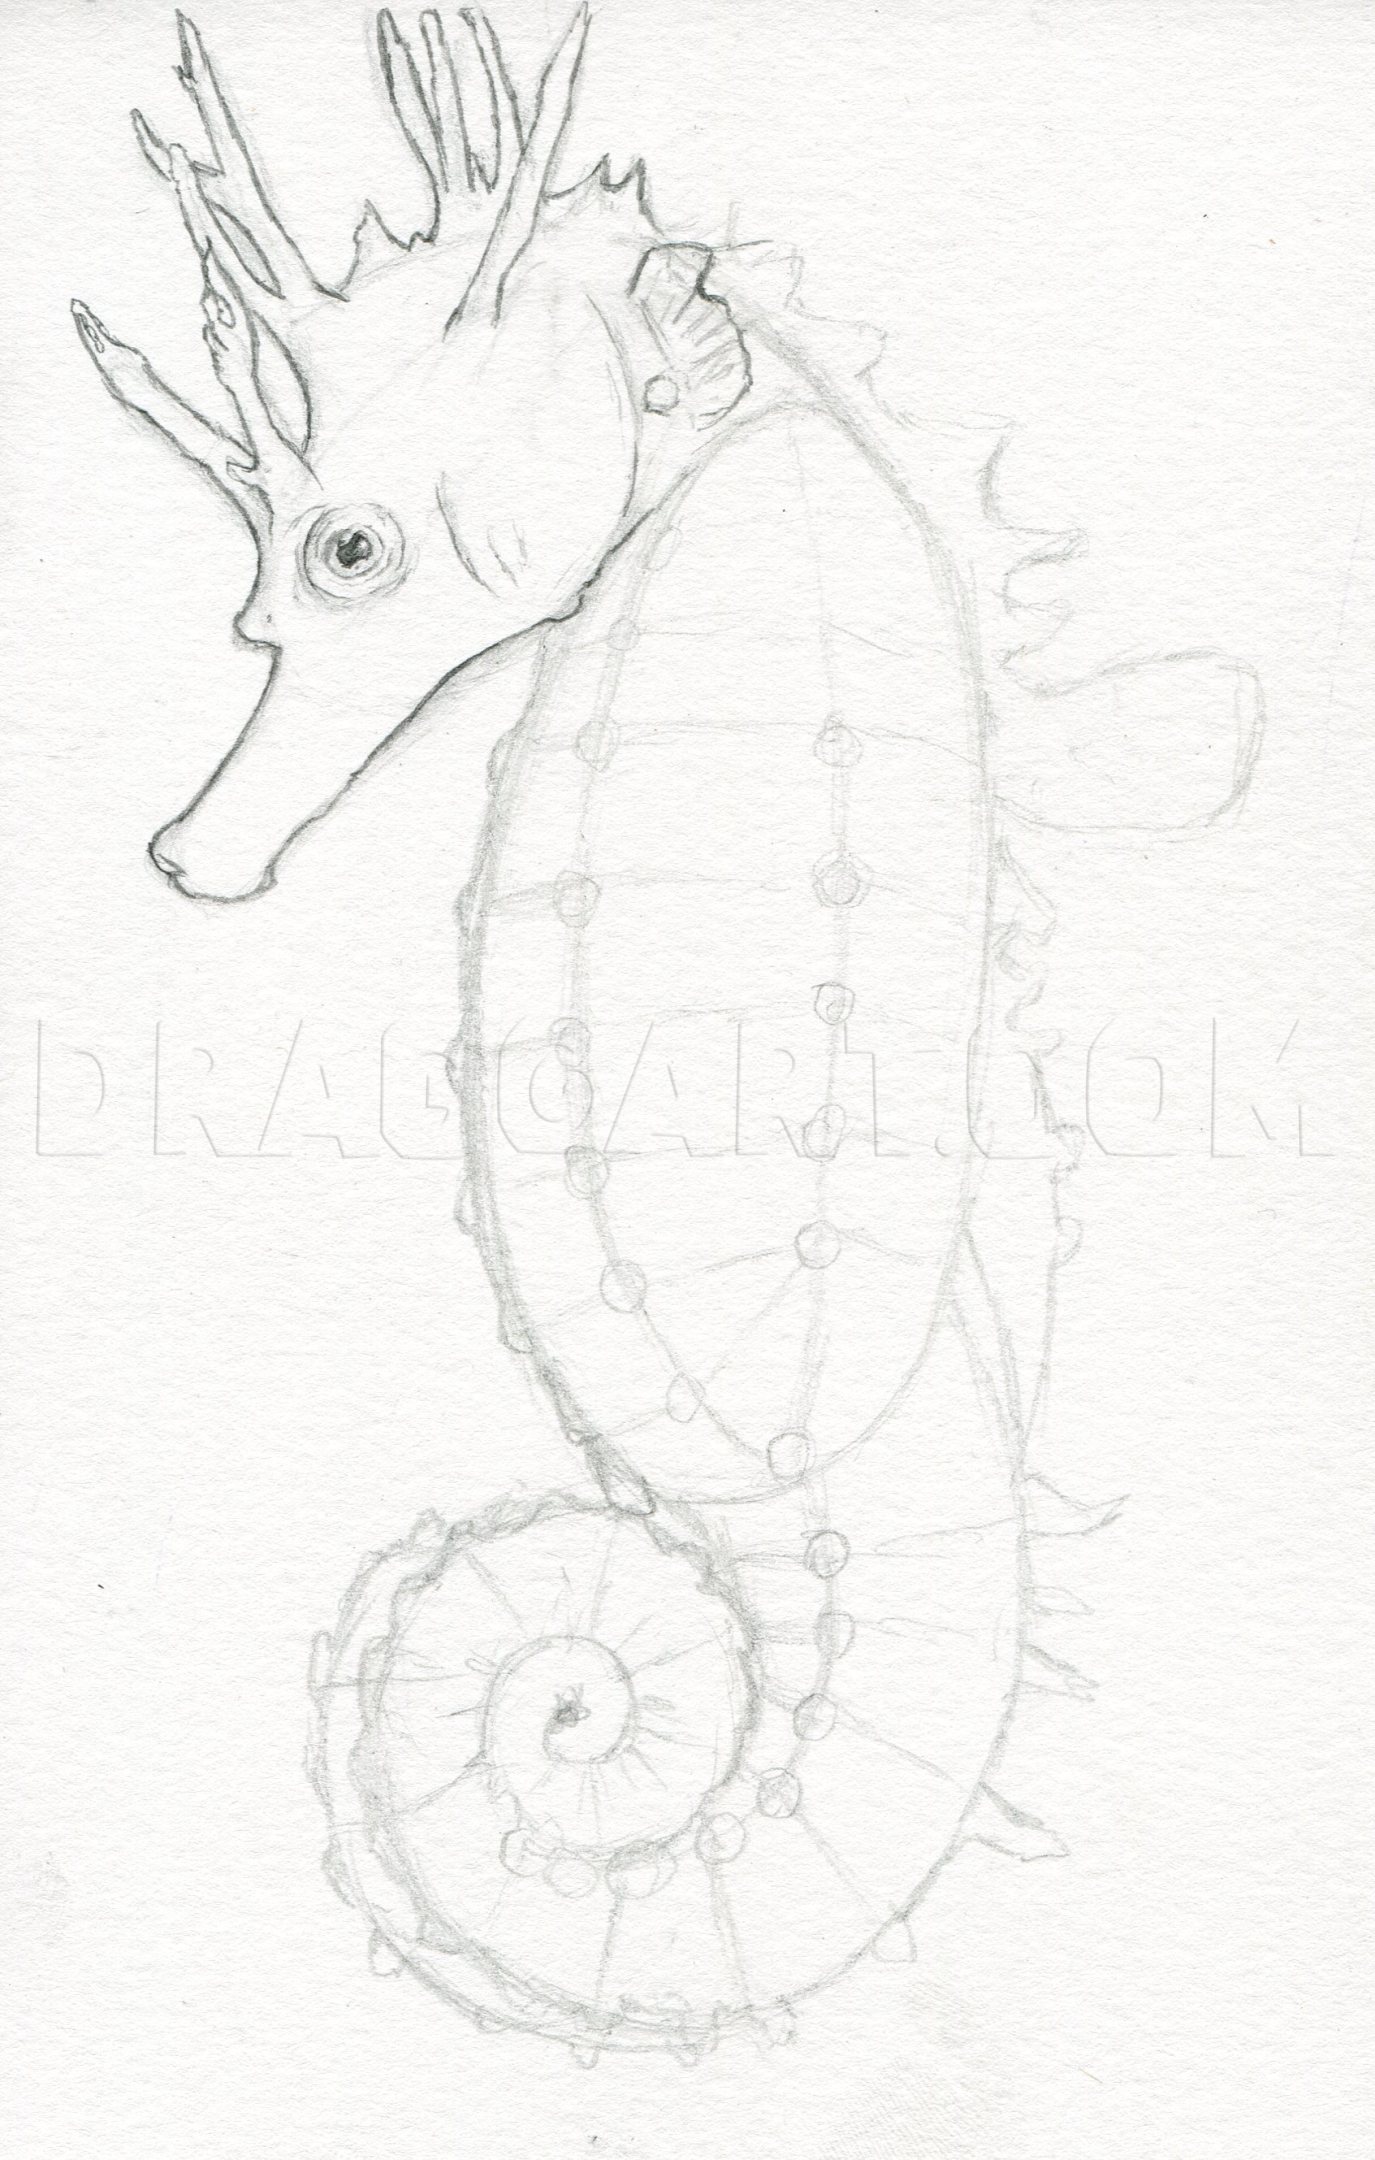
Start off with basic shapes to represent your seahorse's body. Try to use rounded shapes, circles and ovals. Sketch as lightly as you can. I used a 3H pencil for my initial sketch.
3
Start lightly sketching in features, working your way from top to bottom. Don't worry too much about being perfect or copying everything exactly as I have it here. Make your seahorse unique. Draw a basic sort of grid on the seahorse's body. This will
4
Sketch in the torso features down to the dorsal fin. Sketch in some divisions down the spiral of the tail.
6
Start defining your your outlines with bolder lines. Use the same pencil but don't press down too hard. Just make refine your lines. Start with the head and work your way downwards.
7
Refine your torso lines. It may help you later on if you leave you original "grid" instead of erasing it.
8
Finish up your line work. Try to make sure that the seahorse's outline is closed and defined before you move on to the background.
9
I started roughly shading in the background here with a 3B pencil. Any soft pencil will do the trick just be sure to shade with the sides of the pencil lead and not the tip. Make your pencil strokes as broad as you can.
10
Roughly shade in the rest of the background. Try to make your shading even but don't obsess about making it perfectly smooth.
11
Blend in you background using a blending stump, paper towel, cloth, or any other blending tool. The background doesn't have to be perfectly smooth but you should try to make your pencil strokes less noticeable.
12
Here I used a 3B pencil to make the outline around the seahorse's head darker. I then added a rough layer of shading to the head. Don't blend this layer of shading in. It will help you creat more realistic textures.
13
I switched back to a 3H pencil here and started adding details to the seahorse's head starting with its snout. If you are using a hard pencil like a 3H or 2H you'll find that it's a bit easier to shade smoothly especially if you are using smooth pape
14
Finish adding detailed shading to the rest of the seahorse's head. Try and define the outline even more as you add shading.
15
I used a 3B pencil here to add a few layers of shading to the background surrounding the seahorse's head. You can use a blending stump if you need to smooth out your shading even more.
16
Using a 3B pencil I added some rough shading to the top half of the torso. I also used a 3B pencil here to darken the seahorse's outline.
17
I went back to a 3H pencil here to add more detailed shading. Try to make your pencil strokes follow the faint "grid" on the torso. Try not to just scribble in your shading.
18
I switched to a 3B pencil here to shade the top right corner of the background. You can do whatever you want with the background and shade it as you see fit. This is just my way of shading a basic background.
19
Following the same steps as before, I continued by roughly shading the next portion of the torso. Again, try to make your shading follow the original guidelines instead of just scribbling your shading in.
21
I used a 3B pencil again to go over my background. Try to make your sections of shading blend seamlessly into one another. Use a blending stump if you need to.
25
For the rest of the drawing, I used a 3B pencil to add texture and smooth out my background even more.You can lightly go over areas that seem too rough with a blending stump and areas that seem too dark with a kneaded eraser.


